How to install Nextcloud with OnlyOffice in Ubuntu
There are many different ways to install and configure Nextcloud, including manual installation, through the Snap system of Ubuntu and Docker. Here, the article will use the DockOffice configuration provided by OnlyOffice.
Table of Contents
Although there are many cloud storage options available today, most of them put your data in the hands of others. Dropbox, Google Drive and OneDrive all require users to trust how companies own data processing services. Fortunately, thanks to software like Nextcloud, everything seems to have changed.
Nextcloud, derived from the OwnCloud project, performs better tasks than Dropbox, the original inspiration to create it. Although the main task is to store data, it can also act as an Office suite (inspired by Google Docs) when users add OnlyOffice. With a combination of both, users will have the opportunity to enjoy many G Suite features from Google right on their own server.
There are many different ways to install and configure Nextcloud, including manual installation, through the Snap system of Ubuntu and Docker. Here, the article will use the Docker configuration provided by OnlyOffice, as it allows users to install both Nextcloud and OnlyOffice in a few quick steps.
Before start
Nextcloud requires a Unix-like operating system to run, but according to its official website, users can also use Windows Subsystem for Linux . Here the article will focus on Ubuntu, but the steps are similar for other operating systems.
Install Docker and Docker Compose

Install Docker with the following command:
sudo apt install docker
Next, install Docker Compose:
sudo apt install docker-compose
Install and configure Nextcloud
Now, we have installed Docker and Docker Compose and ready to switch to Nextcloud. We will start by duplicating the repository:
git clone https://github.com/ONLYOFFICE/docker-onlyoffice-nextcloud
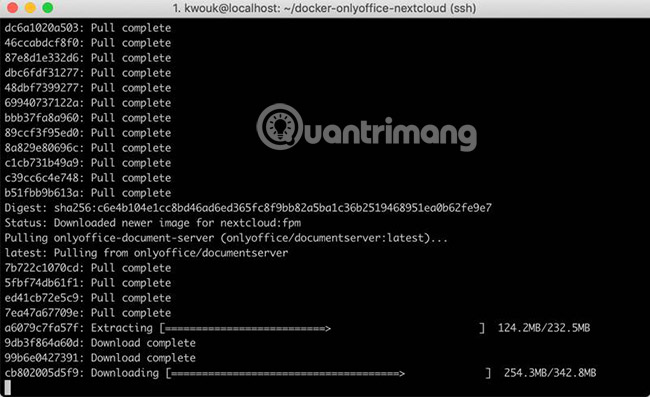
Now, we will move to the newly cloned folder and activate the Docker application with the following commands:
cd docker-onlyoffice-nextcloud/ docker-compose up -d
The second step involves a lot of work to do to run Nextcloud.
When the process ends, launch the browser and navigate to the IP address or host name to complete the Nextcloud configuration. If you're not sure what your IP address is, users can find it with the ifconfig command .
Enter the username and password you want to use for the admin account. Nextcloud server will take a while to start everything.

Install and configure OnlyOffice
Now, almost everything is done. Nextcloud has been installed and configured, and users have a chance to see the control panel. The final step is to activate OnlyOffice.
Back to the terminal, make sure you are in the same directory. Run the following command:
bash set_configuration.sh
Installing OnlyOffice will take a while to complete. When the command is finished, log out and return to the server. Now, OnlyOffice is fully configured.

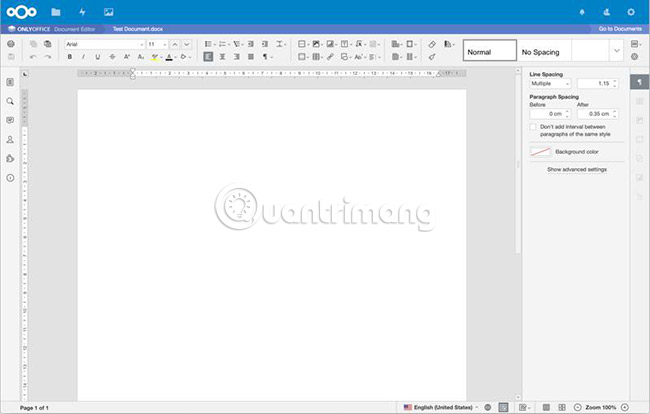
Check the new installation by creating a new file. Although there was previously an option to create a simple text file, users should have new options now. Create a new document, spreadsheet or presentation and you'll see it open in OnlyOffice.
Next step
The main note of setting up Nextcloud in this way is that users cannot connect via HTTPS using SSL encryption. Users can enable end-to-end encryption in Nextcloud settings, but are still susceptible to man-in-the-middle attacks.
The next step is to set up a reverse proxy, and this can be done with Nginx. The ideal configuration will provide proxies, not just for Nextcloud, but for any other Docker application running. This is beyond the scope of this article but should be included in the list of things to be solved when installing Nextcloud server.
Hope you are succesful.
Was this article helpful?
Your feedback helps us improve.
Related Articles
 How to install Nextcloud server on Windows 108 minutes read
 ONLYOFFICE Docs8 minutes read
 Little-Known Nextcloud Features That Will Make You Consider Paying for Google Workspace6 minutes read
 How to create a private cloud using Nextcloud10 minutes read
 How to install Ubuntu 26.04 LTS on a PC or laptop9 minutes read
 How to install Ubuntu in parallel with Windows using USB9 minutes read
Reader Comments 0
Sign in with email or Google to join the discussion.