Table of Contents
Learn how to enable/disable smart app control Windows 11 with clear steps, practical tips, and troubleshooting guidance for a reliable result.
Instructions to activate Smart App Control Windows 11
Step 1
First, press the Windows + I key combination to open Settings on your computer. Then, click Privacy & Security on the left side of the interface.
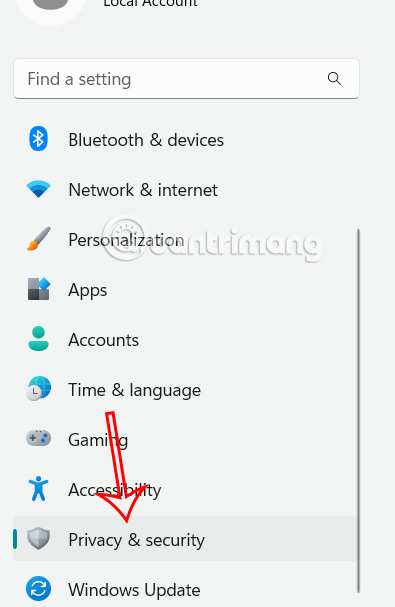
Look at the content next to you and click on Windows Security to adjust again.
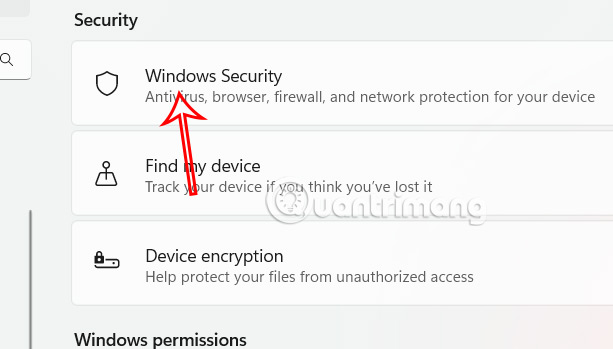
Step 2
In this new interface, we select App & browser control to adjust the settings for applications on Windows 11.
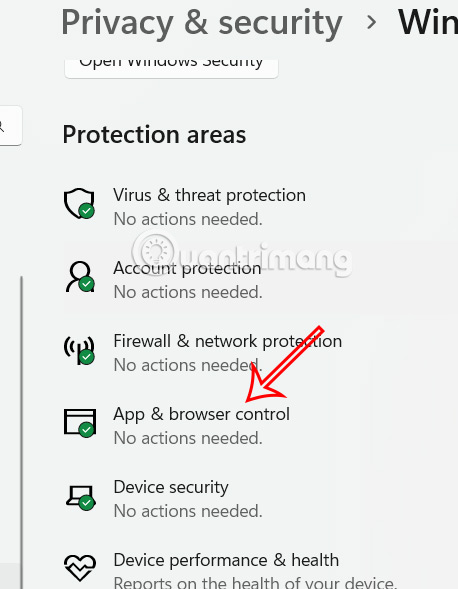
Step 3
In the interface as shown in this image, we see the Smart App Control section , click on Smart App Control settings to proceed with setting up this mode.
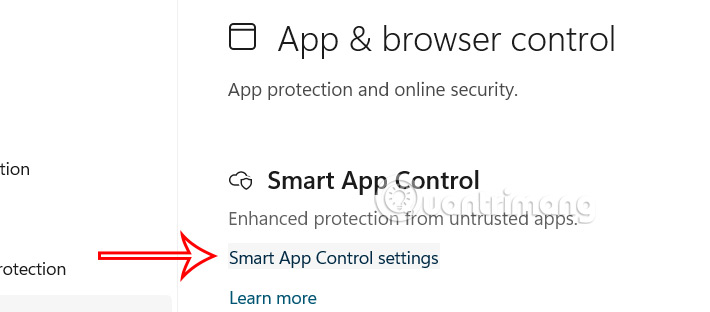
Step 4
The Windows 11 Smart App Control security feature settings section includes different options, we select Evaluation to activate.
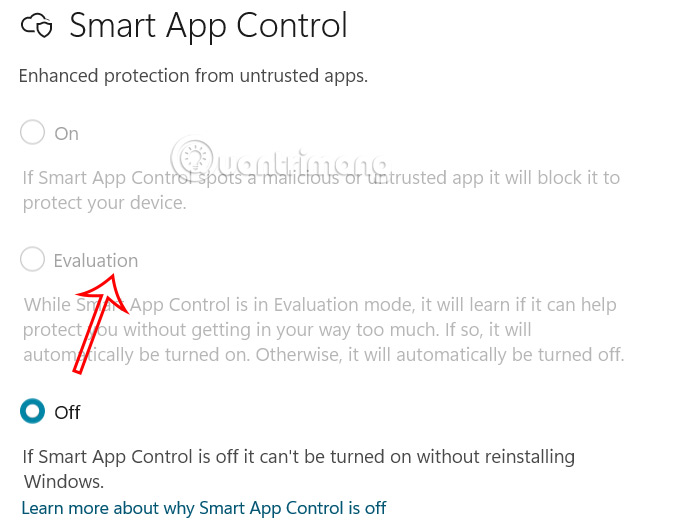
Note, if you cannot click on the enable option and the default is Off, then this feature is not applicable to the version of Windows you are using.
Once you complete the steps, the feature will run in the background but won't block anything. Note that when you turn this feature on, there's a chance that Smart App Control will block one or more trusted apps at some point.
Instructions to turn off Smart App Control Windows 11
Smart App Control in Windows 11 can block applications that are considered untrusted or potentially harmful to your computer. However, sometimes you need to install an application but Smart App Control blocks it. Here are instructions to turn off Smart App Control Windows 11.
Step 1
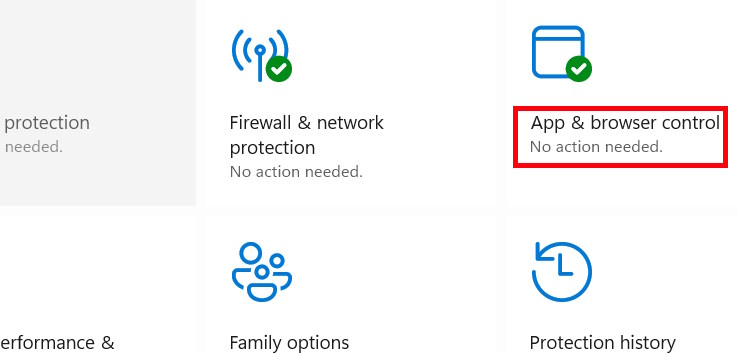
You type Windows Security in the search bar and then click on the result to access. Next, in the new interface, the user clicks on App & browser control .
Step 2
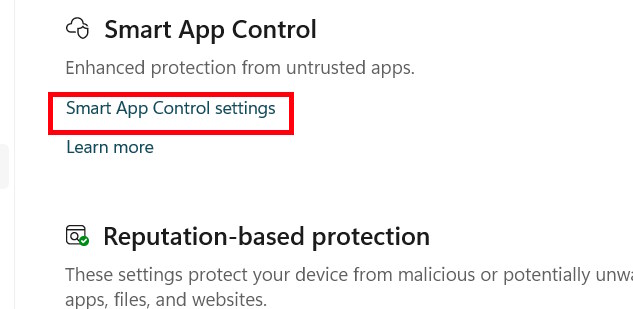
Now the user clicks Smart App Control settings to adjust the Smart App Control tool on the computer.
Then we click Off to disable Smart App Control on the computer.
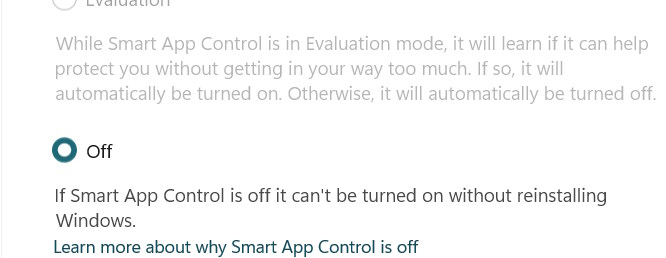
Windows will display a message that you cannot turn Smart App Control back on unless you reset or reinstall Windows. The system will request Admin rights through the User Account Control interface. After confirming, Smart App Control will stop checking or blocking untrusted applications.
Final Thoughts
Use this guide as a practical checklist for how to enable/disable smart app control windows 11. Work through the steps in order, verify each result, and adjust the options to match your needs.
FAQ
What do you need before following this How to Enable/disable Smart App Control Windows 11 guide?
Review the required tools, accounts, settings, or materials mentioned in the article. Learn how to enable/disable smart app control Windows 11 with clear steps, practical tips, and troubleshooting guidance for a reliable result.
What are the main steps for how to enable/disable smart app control windows 11?
Follow the sections in order, especially Instructions to activate Smart App Control Windows 11, Step 1, Step 2. Complete each step before continuing and verify the result as you go.
What should you do if the process does not work as expected?
Recheck the prerequisites, update the relevant app or service, review the settings, and repeat the step that caused the issue. Use any troubleshooting notes included in the guide.
Related Articles
 Alternative Solutions When Losing Smart TV Remote Control8 minutes read
 6 Weird but Useful Things You Can Do with Your Smart TV7 minutes read
 4 Ways AI Is Making Smart TVs Better: Complete Guide6 minutes read
 You Can Control Your Phone with Just a Swipe of Your Nose Thanks to This Smart Eyewear Concept!6 minutes read
 Hackers Can Now Gain Control of a Smart Home Assistant Using a3 minutes read
 Control Applications Controlled by Android Smartphones6 minutes read
Reader Comments 0
Sign in with email or Google to join the discussion.