This article will show you how to do it!
1. Delete OneDrive's Recycle Bin
When you delete a file from your OneDrive account, it sends the file to the Recycle Bin. Because files in the Recycle Bin count toward OneDrive storage, regular cleaning is necessary. While OneDrive keeps deleted files in the Recycle Bin for 30 days, you can delete them manually to free up some space immediately.
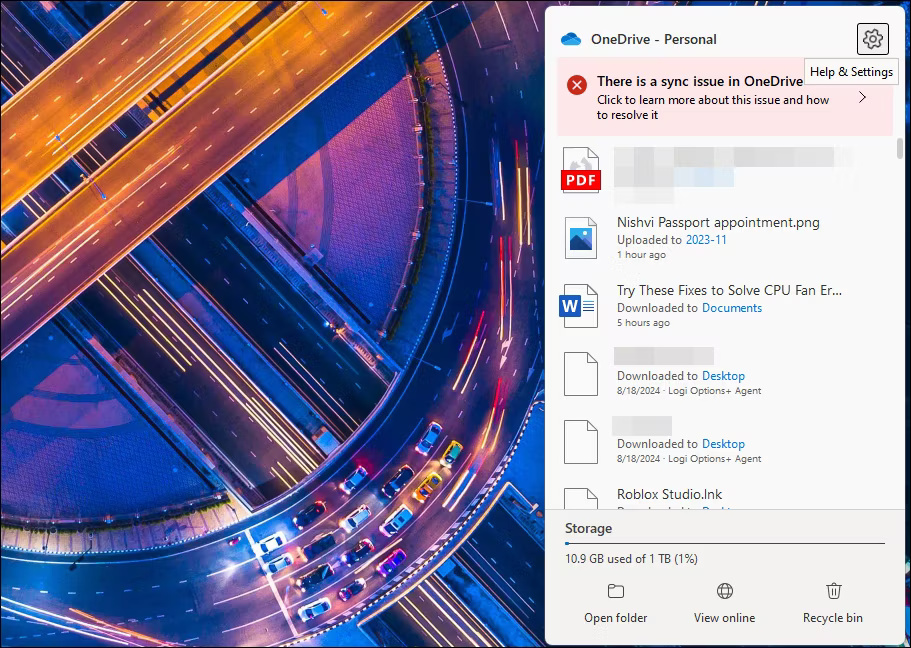
To empty the Recycle Bin, right-click the OneDrive icon on the Windows taskbar (lower right corner), then select Recycle Bin . If you don't have the desktop app, sign in to OneDrive web, then click the Recycle Bin icon in the left navigation pane.
Scroll through the items in the Recycle Bin one at a time to make sure you don't delete any important items. To delete all items, click the Empty recycle bin option below the search bar at the top. Otherwise, you can select each item and click Delete to delete it permanently.

You can also do this using the OneDrive app on your phone. In the Android version of the app, go to the Me tab from the bottom and tap on Recycle Bin . Then, select Delete All to empty the Recycle Bin. On iOS, tap the profile icon in the top left corner, select Recycle Bin , select all the files you want to delete, then tap Delete .

2. Delete Large and Unnecessary Files
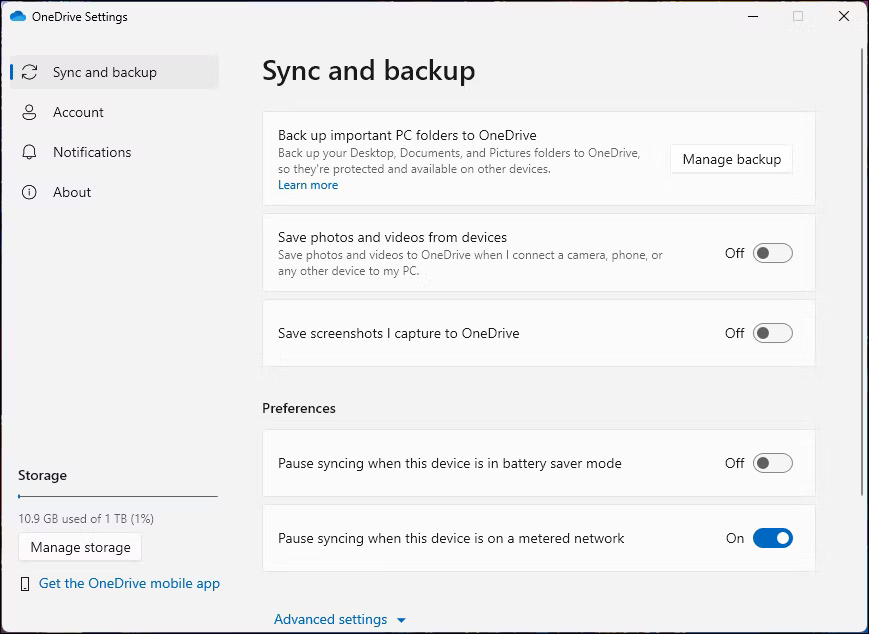
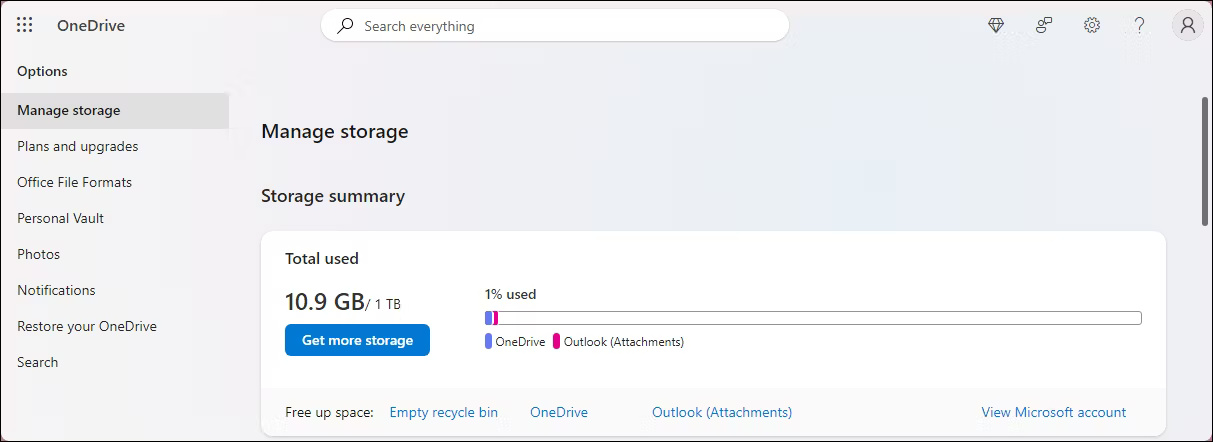
Once the Recycle Bin has been emptied, let's find out which items take up the most space using the Manage storage option in OneDrive. To determine which items are taking up a lot of space, right-click the OneDrive icon on the taskbar and select Settings . In the bottom left corner, click Manage Storage . This will open your OneDrive account on the web.
If you don't have the desktop app, sign in to OneDrive web, click Settings (gear icon) in the upper right corner, and select Options under OneDrive settings .

The Storage summary page shows OneDrive storage used by Outlook files and attachments. Click the OneDrive link and wait for it to populate the screen with your files and folders.
By default, OneDrive sorts the list by the largest files in your account. The idea is to find large but less important files that you can delete or move somewhere else.
Back Up Files to Local Drive
Deleting a file from your OneDrive account on the web will also delete it from the OneDrive folder on your computer or smartphone, and vice versa. So, if you have a file or folder in OneDrive that you no longer want to store in the cloud but still keep a copy on your computer, you'll need to move the file out of the OneDrive folder before deleting.
To create a backup, double-click the OneDrive icon on the taskbar to open the OneDrive folder. Browse through files and folders, select any file you want to back up, press Ctrl + C to copy that file, then move that file to another folder on the drive.
Now, in OneDrive web, select all the files you want to delete and click Delete in the top left corner. Click Delete again to confirm action. After deleting the files, empty the Recycle Bin again to permanently delete them and reclaim storage space. If you can't delete some files, refer to TipsMake's instructions to fix problems deleting files in OneDrive.

Remember that photos can also take up your OneDrive storage space. To clean up your photo library, open the Photos preferences in the left pane, select all the images you don't want to keep, and press Delete .
3. Optimize OneDrive Sync Settings
By default, OneDrive backs up standard folders on your computer, including Documents, Desktop , and Pictures . By optimizing OneDrive sync settings, you can ensure that only important items are stored in the cloud. To enable selective sync, follow these steps:
a. Right-click the OneDrive icon on the taskbar and select Settings .
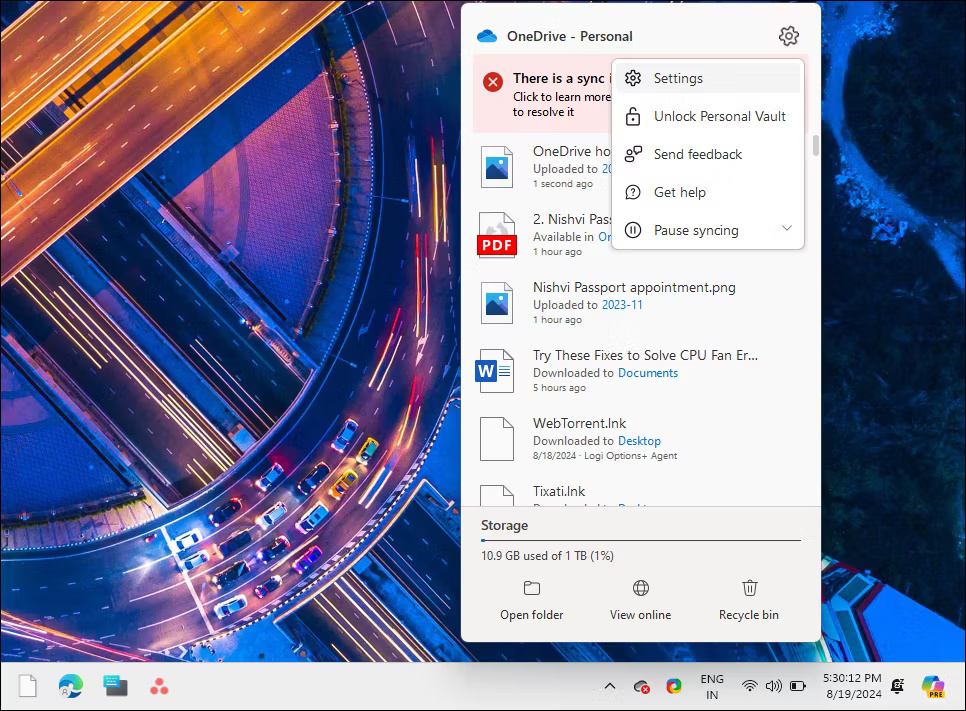
b. Go to the Sync and Backup tab and click Manage Backup on the right.

c. Turn off all switches for folders you no longer want to back up.

d. Click Stop backup when you get the Are you sure you want to stop folder backup dialog box? . Then, click Close .

Avoid saving any unimportant and large files in the Documents folder for easy access. OneDrive will sync all the files in these folders, eventually filling up your cloud storage space in no time. Disciplined file management is key to effectively managing limited cloud storage space.






Reader Comments 0
Sign in with email or Google to join the discussion.