A guide on how to paint your house yourself, following the correct procedure and standards.
To paint a house beautifully and to your satisfaction, besides choosing a quality paint, the process of painting is equally important. If you're looking to give your house a fresh new look, don't miss this article. The standard house painting process we're about to share below will surely be helpful to you..
If you're looking to give your house a fresh new look, don't miss this article! The standard house painting process we're about to share will definitely be helpful. Let's get started!
Things to note before starting the house painting process.
Here are some points to keep in mind before painting your house:
Choosing the right time to paint your house
The best time to give your house a fresh coat of paint is during the autumn season in Northern Vietnam, when the weather is cool and dry. Painting your house around the end of August, September, or October is ideal.
However, finding such ideal weather conditions is difficult in other regions, and it's also impossible to meet year-round construction needs. Therefore, you can still paint your house in spring, summer, or winter, but you should avoid periods of prolonged rain and high humidity. This is because the paint will take longer to dry and may cause unwanted problems such as peeling paint and moisture seepage.
Additionally, you should avoid painting during periods of intense heat because paint needs time to adhere firmly to the wall surface. Excessively hot weather will reduce adhesion, causing the paint film to peel, crack, and wrinkle easily.
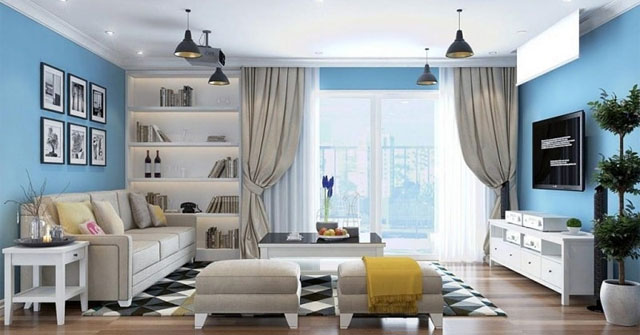
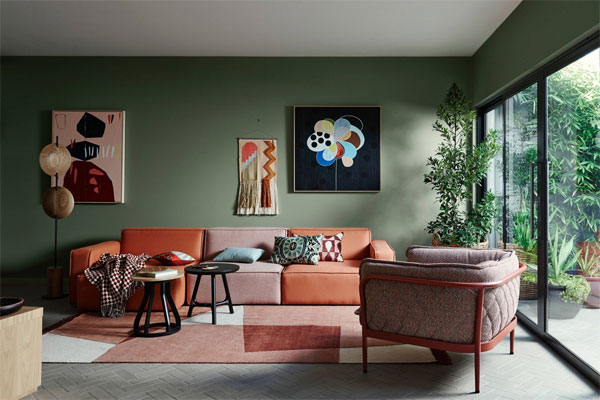
Choose the right paint color.
Almost all paint manufacturers offer a wide range of colors for customers to choose from. In theory, the colors from different manufacturers are quite similar; however, the actual color can vary depending on the paint quality, the paint system, and the skill of the painter. Additionally, lighting is a crucial factor in determining paint color; for example, the same paint color will appear different under natural light than under artificial light.
Our advice is to determine your favorite color scheme and budget to choose the right paint colors. In addition, don't forget to consult with experts to create unique and beautiful color combinations.
Calculate the amount of paint needed.
Calculating the amount of paint needed is a crucial step in the house painting process. To accurately calculate the required amount, you need to know the coverage rate of each type of paint. Coverage rate refers to the number of square meters that one liter of paint can cover. Coverage also depends on the surface's smoothness; a smooth surface will require less paint than a rough one.
So how can you calculate the exact amount of paint you need to buy? Please refer to the table below for the answer:
Primer:
| Capacity | Original paint | Add 5-10% water. |
| 18 liters (20 kg) | 100m² | 120m² |
| 5 liters (4 kg) | 25m² | 35m² |
Economic paint:
| Capacity | Original paint | Add 5-10% water. |
| 18 liters (20 kg) | 65m² / 2 layers | 90m² / 2 layers |
| 5 liters (4 kg) | 20m² / 2 layers | 30m² / 2 layers |
Smooth paint:
| Capacity | Original paint | Add 5-10% water. |
| 18 liters (20 kg) | 80m² / 2 layers | 110m² / 2 layers |
| 5 liters (4 kg) | 25m² / 2 layers | 35m² / 2 layers |
High gloss, gloss, matte paint:
| Capacity | Original paint | Add 5-10% water. |
| 18 liters (20 kg) | 120m² / 2 layers | 140m² / 2 layers |
| 5 liters (4 kg) | 30m² / 2 layers | 40m² / 2 layers |
Refer to the standard house painting process.
The proper house painting process is carried out in the following steps:
- Step 1: Clean the surface to be painted.
- Step 2: Apply the waterproofing paint.
- Step 3: Apply mastic.
- Step 4: Apply alkali-resistant primer.
- Step 5: Apply the first coat of paint.
- Step 6: Apply the second coat of paint.
The rule for painting a house is to paint from the outside in, from top to bottom, and from the most difficult areas to the easiest.
Specifically, the tasks to be performed in each step are as follows:
Clean the surface to be painted.
For a smooth and well-adhering paint finish, thorough surface preparation is essential.
For newly constructed buildings, the wall surface must be sufficiently dry before painting can begin. The wall moisture content should not exceed 15%, as excessive moisture will cause the paint film to degrade quickly, leading to peeling, blistering, or uneven color. Under ideal, dry weather conditions, you can begin painting after about 3 weeks. In reality, depending on the weather, the drying time can range from 2 to 3 months. Although this is quite time-consuming, it is considered a curing phase, allowing contaminants in the bricks, mortar, and plaster to decompose, ensuring a stable surface for painting. Afterward, you can clean the wall surface with fine sandpaper to remove any remaining sand particles, then clean off any dust or other elements that might reduce paint adhesion.
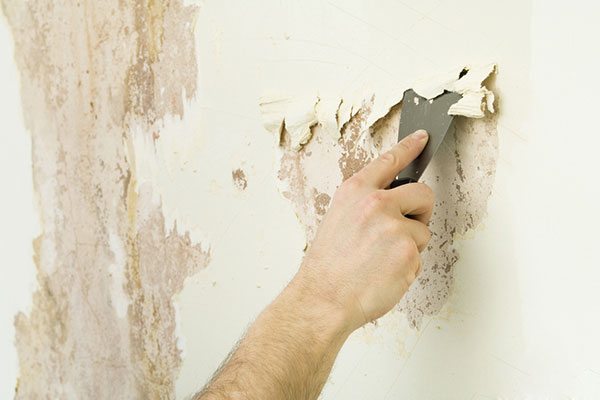
For old walls, before repainting, you need to remove all moss, dirt, and peeling old paint. If the wall surface is still new, you only need to use sandpaper or a grinding stone to sand the entire surface once to create a base for the new paint. You should also note that after cleaning, you must rinse thoroughly with clean water, then wait for the surface to dry before applying the paint.
Notes on preparing wall surfaces:
- If the wall surface contains sand, powder, or dirt, you should use a high-pressure water hose to clean it. Additionally, you can combine it with a mild detergent to increase cleaning effectiveness. In cases where the wall surface has a lot of powder, after cleaning, you should apply two coats of alkali-resistant primer.
- If the wall surface contains putty, cement mortar, or old paint film, you need to chisel, sand, and scrape off the paint film, then reapply it with a suitable type of putty.
- If the wall surface contains mold or algae, you can use a high-pressure water hose to clean it. You should also combine this with scraping tools, chisels, or antifungal chemicals to increase effectiveness. Finally, rinse the wall surface and wait for it to dry completely.
- If the wall surface is greasy, you can use a mild detergent and a little solvent, then rinse thoroughly with clean water.
Waterproofing construction
This is a very important step in the house painting process. Waterproofing protects the building from the effects of rain, humidity, etc. Our advice is that you should proactively waterproof from the side where the water source is located to achieve the best results.
Applying putty
Wall putty is a material used to create a smooth surface on walls, cover cracks before applying primer or paint, and also increase adhesion.
Here's how to apply the putty:
- You mix the putty powder with water in a 3:1 ratio, then use a paint mixer to stir until the mixture reaches a thick, homogeneous consistency.
- Next, apply 1-2 coats, with an interval of about 2-4 hours between each coat.
- After 6 hours, you can proceed with sanding.
- After sanding, you should wait 1-2 days for the putty surface to harden before cleaning and applying the primer.
Note:
- The putty powder should be used within 1-2 hours after mixing because if left longer, it will dry out, harden, and become unusable.
- Depending on the requirements and intended use, you can apply 1-2 layers of putty or omit it altogether.
- If applying putty, ensure that the putty layer is no thicker than 3mm to avoid peeling, cracking, or deformation of the paint film.
Apply alkali-resistant primer.
Primer paint serves to prevent alkalinity (found in lime and cement), block moisture, prevent penetration, and increase the waterproofing ability of the wall surface. You can choose to apply one or two coats of primer as desired. Many people often skip this primer application step because they think that not applying a primer coat doesn't affect the house painting process. However, in the long run, not applying a primer will reduce the quality and aesthetics of the topcoat, making the topcoat more susceptible to alkalization, unevenness, and discoloration. Furthermore, not using a primer will result in higher consumption of topcoat paint because the putty will absorb more paint. Meanwhile, primer is much cheaper than topcoat paint, so using a primer is always the right choice in the house painting process.
Note: Regular white paint cannot replace primer because it lacks alkali resistance, moisture barrier properties, the ability to create a smooth surface, and high adhesion.
Finish coat
This is the final step in the house painting process. This topcoat is like a protective layer for the wall, not only protecting it but also enhancing the house's aesthetic appeal. Typically, two coats are applied instead of just one to ensure a more even and smooth finish.
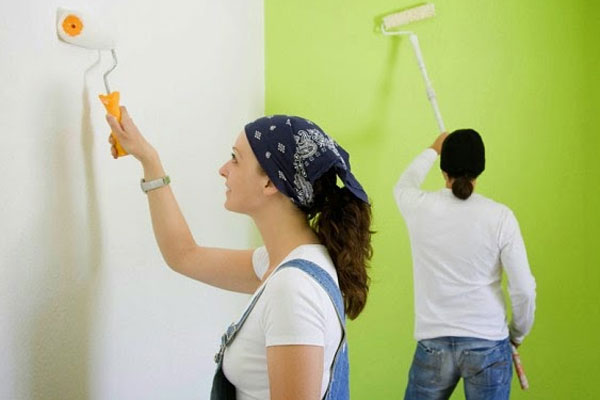
Applying the first coat of paint:
- After applying the alkali-resistant primer, you should wait at least 2 hours for it to dry before applying the first coat of paint.
- Before application, you should dilute the paint with 5-10% clean water by volume to achieve maximum coverage and make application easier.
- After applying the first coat of paint, you need to carefully observe the surface to identify any imperfections from previous painting steps and take timely corrective action.
Applying the second coat of paint:
- After about two hours of applying the first coat, you can proceed with the second coat. Since this is the final step, you need to apply it very carefully. After painting, use a flashlight to check the wall for even coverage and to see if there are any brush strokes.
Note: Depending on the wall surface, you can choose a brush, roller, or spray gun when applying the paint .
Things to note when painting your house.
When painting your house, you should keep the following points in mind:
- Always wear a mask and use protective clothing and gloves to ensure your own safety.
- Paint cans should be stored in a safe location, and transportation requires extreme caution. If paint is accidentally spilled, you should use soil or sand to clean it up.
- Ensure adequate ventilation during construction, or if ventilation is insufficient, use electric fans to improve airflow.
- If you have leftover paint and need to dispose of it, you must comply with environmental protection regulations and absolutely not pour leftover or expired paint into the environment.
- If paint gets in your eyes, rinse with clean water and seek immediate medical attention at the nearest healthcare facility.
Hopefully, after reviewing our guide on the proper house painting process above, you can confidently give your home a beautiful and more elegant "new look." Good luck!
If you need paint mixers, construction equipment , or paint sprayers, please visit META.vn to place your order or contact us at the phone number below for the fastest advice and support:
Hanoi: 56 Duy Tan Street, Dich Vong Hau Ward, Cau Giay District
Phone : 024.3568.6969
Ho Chi Minh City: 716-718 Dien Bien Phu Street, Ward 10, District 10
Phone: 028.3833.6666
See more:
- The most beautiful interior paint colors
- Review of the Haupon TM71 multi-purpose paint sprayer.
- How to clean your house to kill germs and prevent disease.