Table of Contents
This updated guide compares ways to enable telnet in Windows 10 & 11 and highlights the details that matter most. Despite its vulnerability issues, Telnet is still used by Windows users as a client-server protocol. It is primarily used for initial network hardware configuration, remote access, port testing and forwarding, and other tasks that do not involve transmitting sensitive information.
You can enable Telnet on Windows 10 and 11 computers through the Command Prompt tool or the graphical user interface (GUI). Here, the article will show you several ways to enable Telnet on Windows computers.
1. Enable Telnet on Windows Using Control Panel
You can enable Telnet Client using the classic Control Panel. Since this is an optional feature, you can enable it using the Windows Optional Features dialog box. You can use this feature to add or remove other user-optional features on Windows.
To enable Telnet Client using Control Panel:
- Press Win + R to open Run.
- Type control and choose OK to open Control Panel.
- In Control Panel, choose Uninstall a Program under Programs and Features .

- In the left pane, choose Turn Windows feature on or off .

- In the Windows Features dialog box, scroll down and select Telnet Client .
- Click OK and wait for the feature to install. Once installed, restart your PC to apply the changes and enable the feature.
If you need to disable Telnet:
- Open the Windows Features dialog box and uncheck Telnet Client .
- Click OK and wait for the feature to uninstall.
- Click Restart now to restart your PC and apply the changes.
2. Enable Telnet Client Using Windows PowerShell
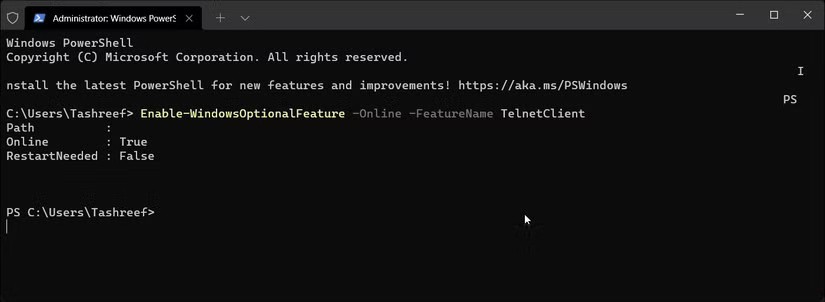
You can use the Enable-WindowsOptionalFeature cmdlet to enable Telnet Client using Windows PowerShell. This is useful if you cannot enable the feature using the Windows Features dialog, and it is also faster than the GUI method.
To enable Telnet using Windows PowerShell:
- Press Win + X to open the WinX menu.
- Click Windows Terminal (Admin) and choose Yes to open the Terminal app with admin rights. If you are using Windows 10, type PowerShell into Windows Search and open Windows PowerShell with admin rights.
- In the PowerShell window, type these command and press Enter to enable Telnet:
Enable-WindowsOptionalFeature -Online -FeatureName TelnetClient- This process may take a few minutes, so wait for it to complete and return a status report. If successful, you will see Online:True as the result.
- to disable Telnet Client, use these command instead:
Disable-WindowsOptionalFeature -Online -FeatureName TelnetClient- Close PowerShell and restart your PC.
3. Install Telnet Client Using Command Prompt
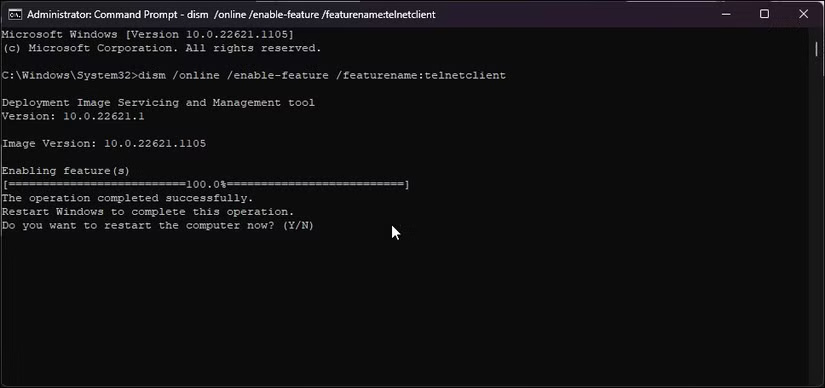
If you prefer Command Prompt over PowerShell, you can use the DISM /Online command to enable optional features on your Windows 11 computer.
Follow these steps to install Telnet using Command Prompt:
- Press the Win key and type cmd.
- Right-select Command Prompt and select Run as administrator .
- In the Command Prompt window, type these command and press Enter :
dism /online /Enable-Feature /FeatureName:TelnetClient- Command Prompt will start enabling the feature and display a message that the operation completed successfully.
- If you need to disable Telnet, type these command and press Enter :
dism /Online /Disable-Feature /FeatureName:TelnetClient- Wait for success notification.
- Type exit and press Enter to close Command Prompt.
How to Check Telnet Client Status on PC
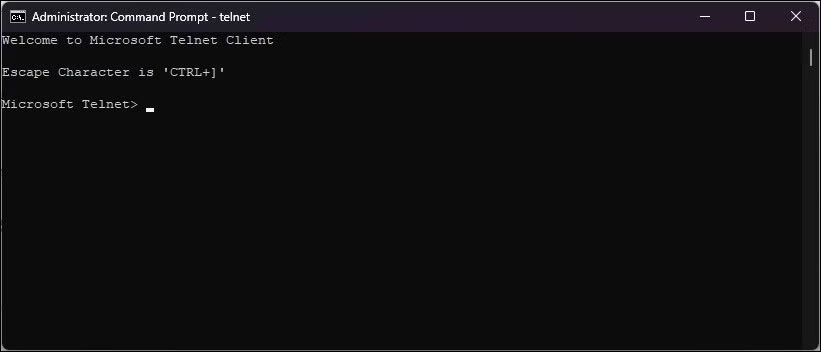
You can check if Telnet client is enabled on your PC using Command Prompt command. When enabled, Telnet command will open a new CMD to connect to remote server and perform other tasks.
- Launch Command Prompt with admin rights.
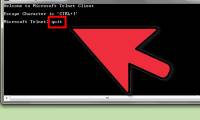
- In the Command Prompt window, type Telnet and press Enter.
- A new CMD with Microsoft Telnet will open.
All Ways to Enable Telnet on Windows 11 Computer
Telnet is a built-in remote access utility that you can use to troubleshoot firewalls and networks. Although it is still part of Windows, system administrators now prefer the more secure SSH protocol for accessing computers over unsecured networks.
The main disadvantage of Telnet is that it is insecure and vulnerable to Man-in-the-Middle attacks. If not in specific situations, switch to more secure network protocols like SSH and Mosh with better passwords and public key authentication.
FAQ
How were the ways to enable telnet in windows 10 & 11 options evaluated?
The comparison focuses on practical features, ease of use, limitations, compatibility, and the type of user each option is most likely to help.
Which option is best for beginners?
Beginners should prioritize a clear interface, useful documentation, reliable support, and the core features needed for their first project.
Should I choose a free or paid option?
Start with a free option when it covers your needs. A paid plan may be worthwhile when you need advanced tools, commercial rights, collaboration, or professional support.
Related Articles
 How to Enable Telnet on Windows 7: Complete Guide4 minutes read
 Learn About Telnet Protocol: What You Need to Know6 minutes read
 How to Activate Telnet in Windows 74 minutes read
 Instructions for Activating TFTP and Telnet Client on Windows 103 minutes read
 Job Batch: Automate Telnet Commands Using Vb Script4 minutes read
 Connection: How to Use Telnet on Mac Os X2 minutes read
Reader Comments 0
Sign in with email or Google to join the discussion.