In this article I will tell you everything you need to know about Chroma Key's great filmmaking technique and green background to create a movie like Hollywood.
1. Chroma Key overview and green background
Chroma Key is first and foremost a post-production technique - a cinematic technique used to isolate and remove a color or a certain brightness value from an image or a digital Video that renders color or luminance value becomes transparent.
This technique is commonly used in broadcasting, especially in news programs, in the field of film production from television series to movie theaters, and also movies from youtuber with category typically green background replacement target with a still image or a Video.
Why should the background be green?
In fact, you can use any color as a background in Chroma Key technique, the only thing is that the color chosen as the background must not match any of the above colors. props, on the actor's body because otherwise the matching software will disappear and create jokes like below :))
Incidentally green ( Green ) and blue ( Blue ) are two of the most perfect colors in Chroma Key, as they do not coincide with any skin tone or color. Natural hair does, and very rarely coincides with the actor's outfit.
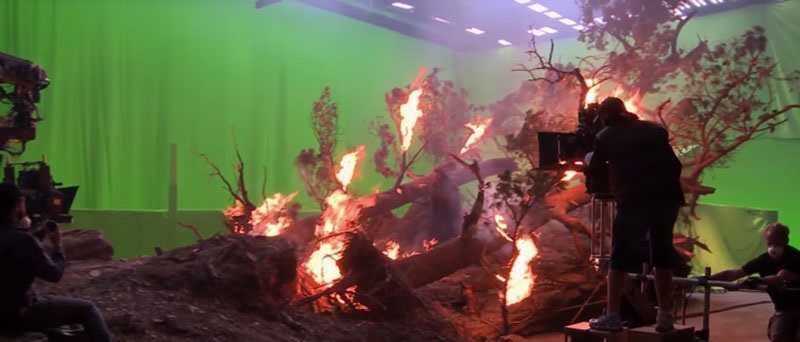
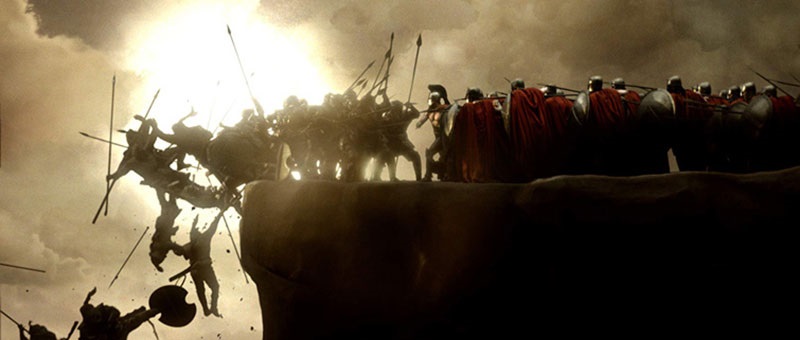
By my estimates, almost every major movie made in 2019 uses a blue screen effect for at least one scene. It is a completely scientific and simple, simple assessment when arriving in theaters in Vietnam today like CGV, we will definitely flock to a blockbuster movie using Chroma Key.
There is no doubt about the accessibility and sophistication of today's green screen technology. From Marvel movies, DC movies to local news stations, all filmmakers, big and small, use this technology. In addition, many people who read this article also know Zach King, an extremely successful YouTuber by making magic videos. There are loads of tricks he uses to make a great Video, but Chroma Key is definitely a must among them.
One of the best ways to learn the Chroma Key technique is to study how it's done in real-life movies. You can watch behind the scenes clips on Youtube, on social networks This video also has a lot of free Tutorials, finally buy courses using professional filmmaking software . You will see that the screen Green (and blue) are really good for background removal, simply because these two colors hardly match any of the characters on set, costumes or the skin color of the characters. This subtly helps to create small movie scenes to scale as large as 'Star War'.
The use of Chroma Key has come a long way over the past few decades. This technology was previously reserved for Hollywood blockbusters but is now used by many of your favorite YouTubers. In this article, freetuts will guide the whole process of using Chroma Key from start to finish, we will learn lighting, cinematic techniques, keying, editing, and common mistakes when using. green background.
2. What is Green Wallpaper and Chroma Key?
In the overview I have introduced briefly about how it works, let's learn in more detail and go through a few key terms in section 2.
Green background ( Green Screen ): Technically, this term refers to the background color behind the scenes background / character that you would use during physical separation / person from the background.
This is usually a single color backdrop, can be any color but usually a bright green as it is the most different color than human skin tones. (Blue screen is often used in the early days of movies and can still be used under certain circumstances.) Sometimes the term is used as a word that is suitable for the entire making process. Video by VFX.
Chroma Key: This common term goes hand in hand with a green screen. That is the actual layering technique, the whole filming process -> background removal -> background smoothing fixes the overflow . -> new background stitching -> all that process called the Chroma Key technique .
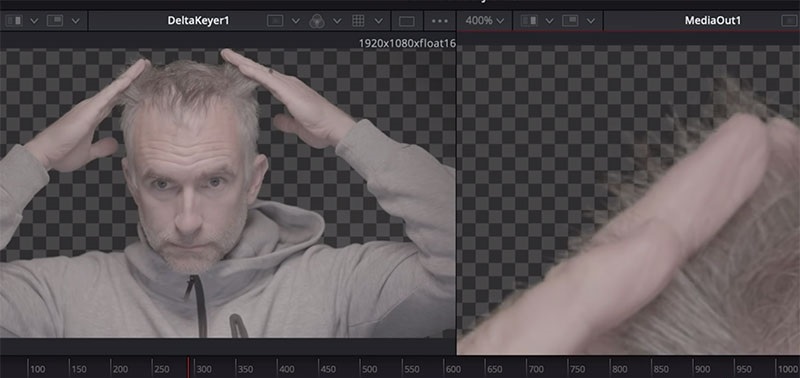
Keying: This term is used to describe the process of removing a blue screen background in post-production using video editing software. When the blue screen background is locked, it will be completely transparent. You can then fill that transparent area with another image or video. The goal is to make this transparent area as transparent as possible, which means that all the blue (background colors) will cleanly erase them.
Spill: Actually, this term is not commonly used in Vietnam, so I temporarily call it 'Overflow': This term refers to the problem that the background color is too bright and the subject is reflecting that color. -> results in the subject being overflowed, making Chroma Key technique very difficult during background separation. There are a few steps you can take to prevent spills, which we will explore below.
3. Six essential rules in the Chroma Key technique
I know everyone is very busy so I will summarize 6 essential rules for creating a great project.
1. Start with green (or blue)
Use a background of green (Green) and blue (Blue) as non-reflective materials. These colors are ideal for use when removing fonts, especially greens.
2. Separate your subject from the background
Keep your subject at least six feet away from the green screen. This helps to minimize spills and unwanted shadows appearing on the background.
3. RAW is king
Currently, professional as well as semi-professional camcorders have many formats, but you should customize the movie format with high bit-rate quality / codec compression as little as possible. 10-bit colors will outperform 8-bit, ProRes 442 and 444 are always great choices, and RAW trick the choice even better if you have that ability.
4. Light is properly exposed to the background
Ambient light and background should be separate, which means you should use the space in the room and a fixed light source, don't let other light into the room interfere with the brightness and cause the background removal process. become difficult.
5. Eliminate motion blur
Shooting movies with a fast shutter speed reduces motion blur and provides a more standard keying. You can always add secondary motion blur back in post-production.
6. Let the software work
Using specific software that supports the Chroma Key feature, you can consult free video editing software for the best and fast Keying process.
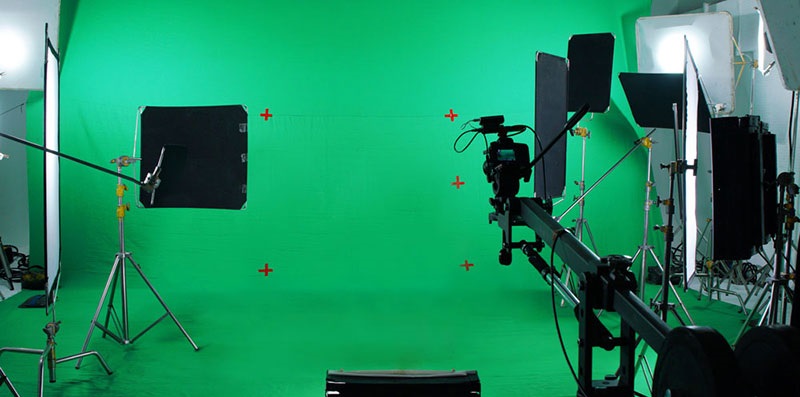
4. Green screen material - What you need
Unless you have a big budget to spend on green covered studio space. Your budget and plan are the main elements for determining which tool to prepare, I will break down the basics for you below.
DIY blue screen
Just slap some fluorescent green paint on the wall and you're done, right?
Not necessarily finished, it's not too far off with your "DIY" options for making your own painted green backdrop. When you're doing the hand-crafting method, it's all about getting the right background material. Includes paint, muslin, nylon, poster boards and more. Think about factors like:
-
Portability - Are you planning on creating a stationary studio , or someone who is constantly on the go -> if so lightweight fabrics will be the best choice if for moving filmmakers.
-
Patience - Do you have the patience (or time) to spend ironing or steaming wrinkles from the fabric? If so, you can choose a heavier fabric that avoids wrinkles but provides a backdrop with great coverage.
-
Thoughtful calculation - You are filming an entire large scene or a small up close subject in the studio, if you just want to cover a small space, a poster might fit the bill.
You can refer to the article How to DIY a green backdrop to have a green backdrop that suits your budget.
Green background kits
Kit is a quick, easy option for those who want to skip customization and get right into the filming process.
There are many varieties to choose from such as small, portable displays to full large-size setup but the installation takes longer. Many of these kits are used for small idea production like YouTube content. Perfect for use in the early stages when actors / hosts introduce video content.
The small backdrops have just enough coverage to achieve a transparent background around the back of the subject's face, especially the compact kit is also extremely useful if you plan on shooting on the go.
With easy assembly and reasonable storage, these kits are perfect for travel filmmakers.
You can refer to freetuts' blue background Chroma Key tooling kit purchase article to choose the best kit for you, including the mentioned pros and cons for each kit.
5. How to shoot green background footage
It's important to plan ahead, visualizing the final scene after post -> what your footage will look like when you remove the green background and fill it with other spaces. Artistic elements and storyboards can help you with this process.
Your main goal is to determine what is real and what is not in your scene. This means you have to know what will be in the scene and what will be added later in post.
If your scene is particularly complex, with multiple blue screen layers, it's a good idea to set up a clear guide for everything.
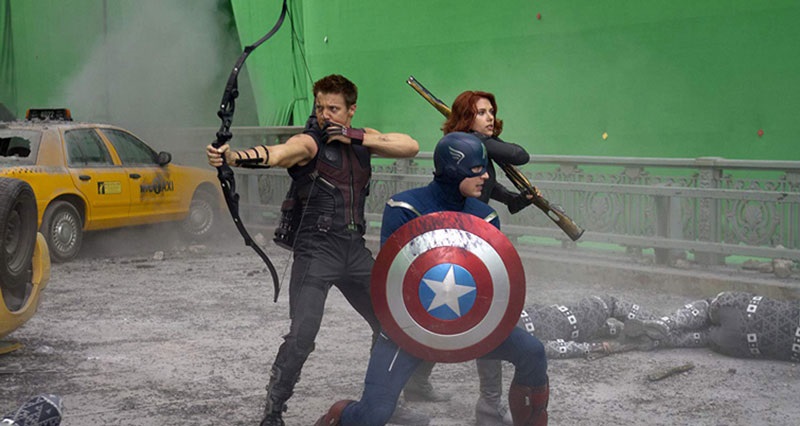
In certain cases, you may need real props on set that your actor can refer to. In the behind-the-scenes photos you'll see tennis balls hanging against a green background. They provide actors with visual reference points, making them easier to interact with and look more realistic.
Lighting is another important factor to consider. Think about lighting your character to match the lighting of the environment they will live in. This will create a strong final synchronization when putting things together.
In this section, I will cover all the steps and considerations to complete a shot on a green background with Chroma Key technique.
Here's what we'll dive into:
- Planning
- Prepare the light
- Chroma Key optimization
Step 1: Make a plan for filming with a green background.
Scaling
It's time to calculate the ratio of your final shot and choose the best lens to shoot with. If you're planning on creating a wide-angle shot, it makes sense to shoot your subjects at the correct ratio. This process mainly relies on knowing the field of view of the lens used to rotate the background element, commonly referred to as the panel. In a nutshell you have to shoot both foreground and background with the same focal lens, or at least be predictable without knowing the lens used to shoot the panel.

It is worth noting that the wider the background image, the larger the background will be to fully capture your actors. Luckily, Mark Vargo has helped us to solve this difficult problem, by using the field of view of the lens to calculate the final blue screen size required for any given shot.
The more notes you have from the original background image (like lenses, time of day, etc.) the easier the process will be.
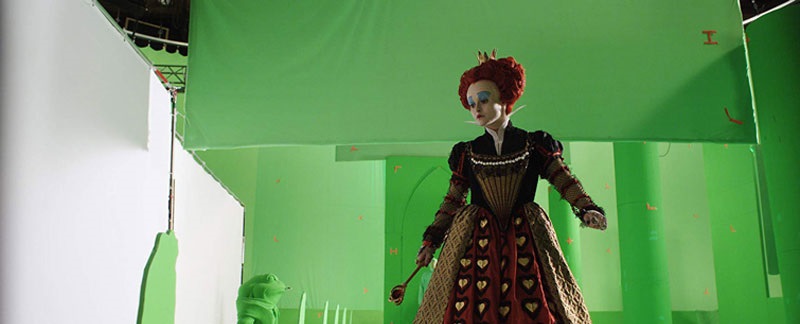
As a rule of thumb, expansive shots featuring the full body and action scenes of a high-motion actor will require a green backdrop that covers the entire ground and possibly even one side of a wall. If this is the case, make sure the background is not angled so you can remove them easily. You should use a curved and drop backdrop that doesn't have hard edges on the floor or the side wall.
Actors, objects and props prepared
Clear costumes, skin color, hair color of actors must avoid green! Actors shouldn't wear green because they disappear after post-production, removing the fonts. You should also avoid shiny objects as these can reflect green and cause transparent spots. If reflective objects or props are required in the shot, you may have to manually mask them around them in post. This can be very time consuming, so plan ahead if that's required.
Step 2: Backlight the background
There are three mandatory rules when lighting a green background:
- The light should be even
- Light should be soft and diffuse
- The blue screen should be illuminated separately from the subject
When lighting a backdrop, the goal is to make the light as uniform as possible. This helps to ensure that uniform green color, with no hot spots or shadows, helps keying in post-production smooth. You will also need to illuminate your actors and separate blue screens, preferably the actors, and blue screen backgrounds at least six feet apart. Remember to combine the lighting on your actors with the scene they will appear in post-production.
In this article on basic principles for lighting a green background, you will find that you should use large soft light sources. Hard light without diffusion creates hot spots in the background.
To diffuse the light, you can use diffuser boxes or set up large silk frames. If you are on a tight budget, try using a white bed sheet mounted on the c-stand a few feet behind your light source.
The position of the lamp is also very important. If you only use two lights to illuminate the background, place one on each side of the background, back up an angle over 45 degrees. You can fine-tune / adjust the angle of each light to make sure they don't overlap too much in the center. Make sure the 2 lights have equivalent light sources for uniformity.
On large products you can use overhead lighting, additional lights or more diffusers, but the basic principles outlined here will be the same.
Step 3: Optimize Chrome Key
As mentioned, the Chroma Key process will merge 2 images or video clips together after you've successfully split the background. And as I showed above we will use the green background to replace what's behind the cast. You will often hear the term ' clean chroma keying ' which means optimizing a green background, the ultimate goal of having a shot that wipes the background clean.
Prevent spills
A shot with perfect chroma keying will leave only actors or subjects with little defined edges looking natural enough.
But more often than not when shooting digitally, messy / jagged edges and overflowing from the green screen often appear. Spill is a phenomenon that occurs when a blue screen reflects back on your subject, creating a difficult green halo during background splitting.
The Chroma Key tips for the perfect Chroma Key have some great tips and tricks that will help improve your Chroma Key usage results, including ways to prevent spills with thoughtful planning. .
One of the first things is to decide whether you should use a green or blue background. On today's digital cameras, green will probably give you the perfect chroma key. However, if your actor has blond hair or green clothes, you will likely get better results with a blue screen, as green can spill over blond hair and clothes.
Use Motion Blur
It is best to record green screen movies with a fast shutter speed to eliminate motion blur. Alternatively you can use CC Force Motion Blur in After Effects or try a third party plugin called Reel Smart Motion Blur to improve this situation.
Movies with low ISO
I recommend the lowest ISO setting that the camcorder can achieve. This is because the higher ISO levels cause noise and they will appear against a blue screen background. This can lead to a lot of off-color points on a blue screen, making it difficult to keying.
6. How does the font deletion process work?
If you've followed the above blue background workflow recommendations, it's much easier to perform background splitting of your footage. It really is a workflow that requires a tightly coordinated workflow.
Keying process with your Video editing software
Today you have a lot of software that supports Chroma Key processing, there is a lot of software. This skill has long disappeared from TV stations or Hollywood, now almost every video editing software integrates Chromakey, some even free this feature like HitFilm Express and DaVinci. Resolve.
Keying in DaVinci Resolve
DaVinci Resolve is a free video editor considered to be one of the best color grading apps out there. It also has a number of tools for precise hue selection. Resolve's effects are applied using a button-based workflow, which can take some getting used to if you've never used it before. However, this button-based system will eventually give you the most options when it comes to customizing your footage with different key effects.
Keying in After Effects
Adobe After Effects is another popular option. Because After Effects is a dedicated synthesizer, you can imagine there are a lot of effects you can use to refine your Chroma Key. The free built-in keyer effect called Keylight is quite powerful and was developed by The Foundry, the same company that created Nuke, a powerful professional synthesis application.
Keying in Premiere Pro
While Premiere Pro is the first non-linear multi-tool composite video editor, it also has most of the powerful Keying effects from After Effects built into it. Please refer to the article in the Premiere Pro tutorial
The keying effects in Premiere Pro are great if you need to split fonts quickly in a project. You won't spend too much time learning and getting used to like After Effects, which will save you time rendering / managing files. The only drawback in Premiere Pro would be if you had to do a lot of manual masking. For that kind of work, you'll be much better in After Effects.
Keying with Final Cut Pro X
Final Cut Pro X has a more causal workflow when dealing with green screen footage. This can be useful for amateur video users or YouTubers who just need a quick solution. Add your green screen footage to your timeline, then apply a Keyer effect to the footage. It will automatically remove the green background with varied results. You can continue to tweak the interface with some simple controls in the Video preferences once your clip is selected.
7. How to fix bad wallpaper errors
If you are working with a blue-background setting that isn't ideal, there are remedies available that improve keying results. While there are plenty of tricks up your sleeve to improve your keying, it's best to create a green backdrop right on set.
Let's take a look at some background problems.
The background is less than ideal
Example: If the blue screen has wrinkles on it - you can record movies with a shallow depth of field to help blur the background. This will help fade wrinkles and potential hotspots / hotspots, making it easier to remove the background when the background is not smooth.
The phenomenon of color is too heavy
Use masking as much as possible. As mentioned before, if your subject wears green clothes or ornaments or props that reflect the background color, you should use masking on them. Then place that overlay on top of your video, this will mask the overflowing color so the character / object won't be erased accidentally like before.
Green screen spill is sometimes difficult to get rid of, it requires you to find the perfect light balance for both your background and your subject.
8. Conclusion
My article " What is Chroma Key Technique - The most classic cinematic action of all time " is here, hopefully with the above revelations and explanations, you will understand more about Chroma. Key is also easy to start using on your movies. If asked what is the best software to make a green screen effect movie, I will answer that Adobe's filmmaking software, although the price is a bit expensive in Vietnam, but with what this tool offers. Help you create great movies. Good luck !


Reader Comments 0
Sign in with email or Google to join the discussion.