How to make a house model out of cardboard
Paper room mockups are a great way to create a design prototype for a room. Here are detailed instructions on how to create a basic paper room mockup.
Table of Contents
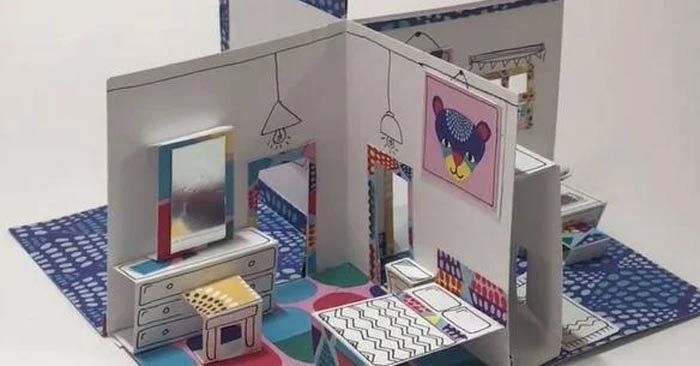
Paper or cardboard models of houses and rooms are a great way to prototype a room design, or even create fun creative room decor elements. Here are detailed instructions on how to make a basic paper model of a room .
Materials to prepare
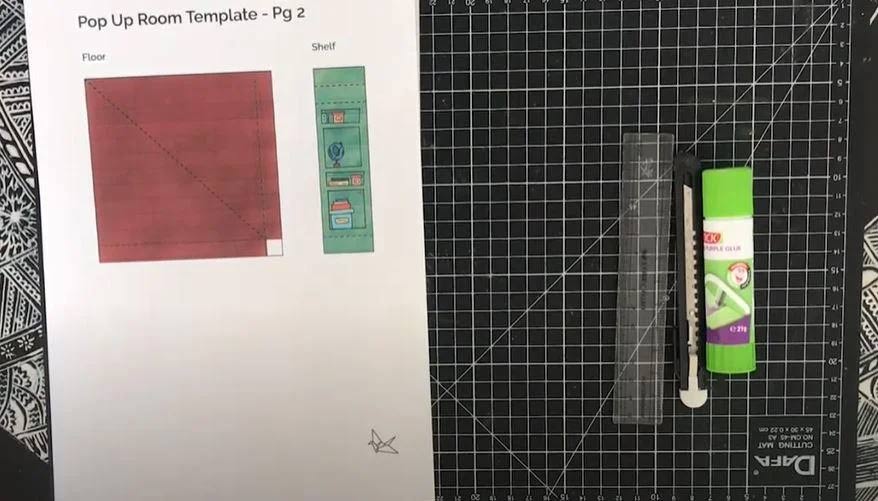
- The template (or sheet of paper, if you want to design your own) you can find an example of in this article here: https://drive.google.com/drive/folders/1PgM5Amwsf.
- Paper cutter/blade or scissors
- Ruler/Dimensional ruler
- Regular stationery for decoration (pencils, pens, colors, etc.)
Steps to follow
Step 1: Prepare materials
Step 2: Basic components of a house model
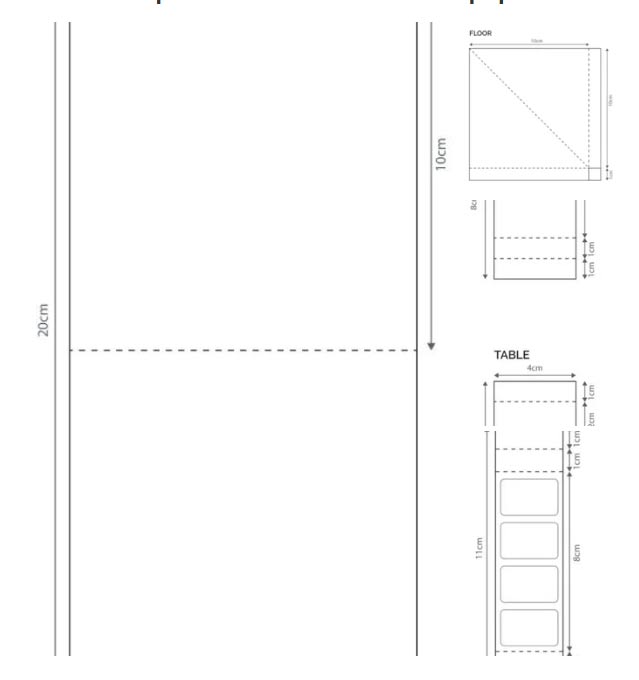
For example, there are two basic structural components for a room model: the floor and the walls. You can use the available templates or create your own using the measurements we have provided in this folder.
In the pattern, the dark lines (outlines) will be cut out with a paper cutter/scissors, and the dotted lines will be marked with a ruler and folded.
IMPORTANT: If you create your own templates, be sure to customize and decorate the components before gluing them to the room.
Step 3: Cut the floor and wall
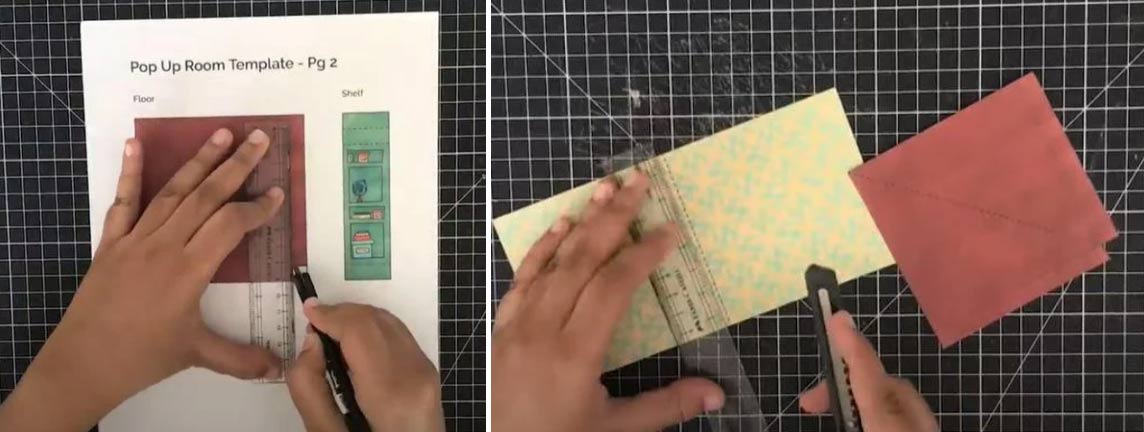
Cut out the floor and wall pieces from the template using scissors or a paper cutter. A paper cutter may be more convenient.
Step 4: Fold along the dotted lines
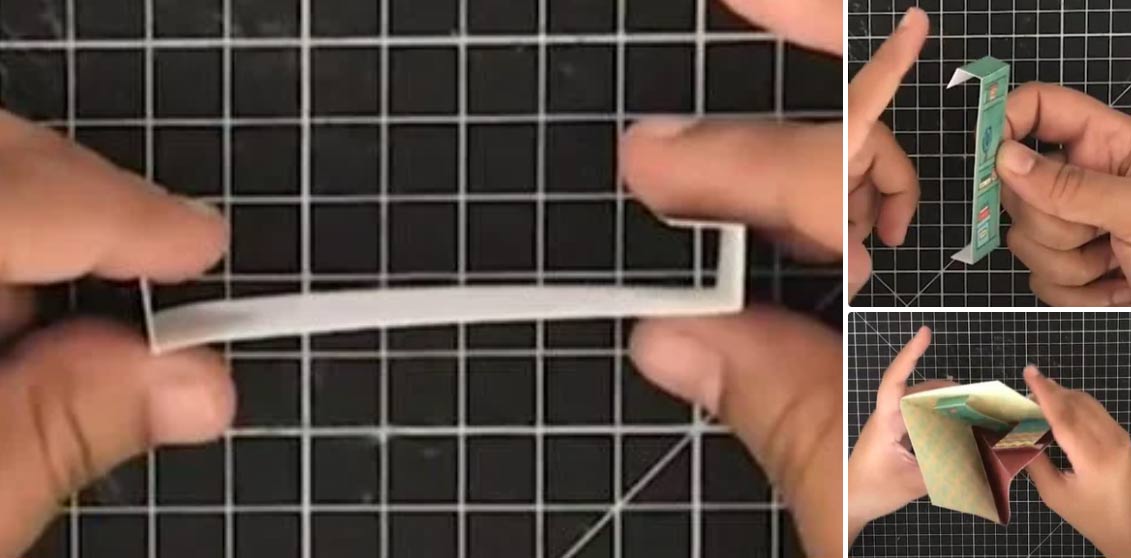
Using a paper cutter or the edge of a ruler/level, mark the dotted lines and fold to create a sharp, precise crease as shown. You will see that the floor has 3 folds, 2 small flaps and a diagonal fold. The flaps will be used to attach the floor to the wall.
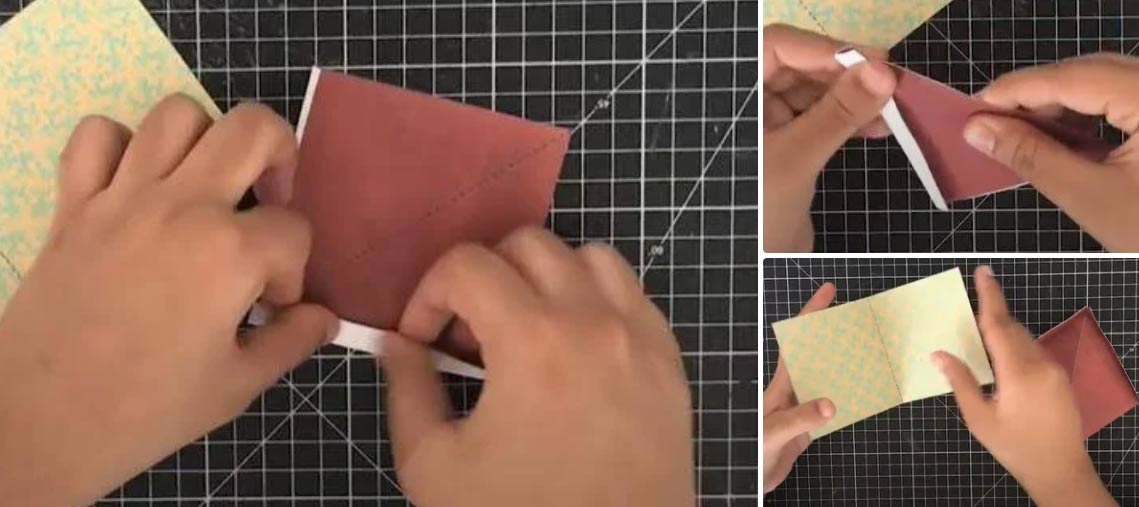
Step 5: Assemble the floor and walls
You can glue the wall and floor pieces together by placing the panels on the inside of the wall or the outside, as shown in the illustration. This example chooses to glue the panels to the inside of the wall as shown.
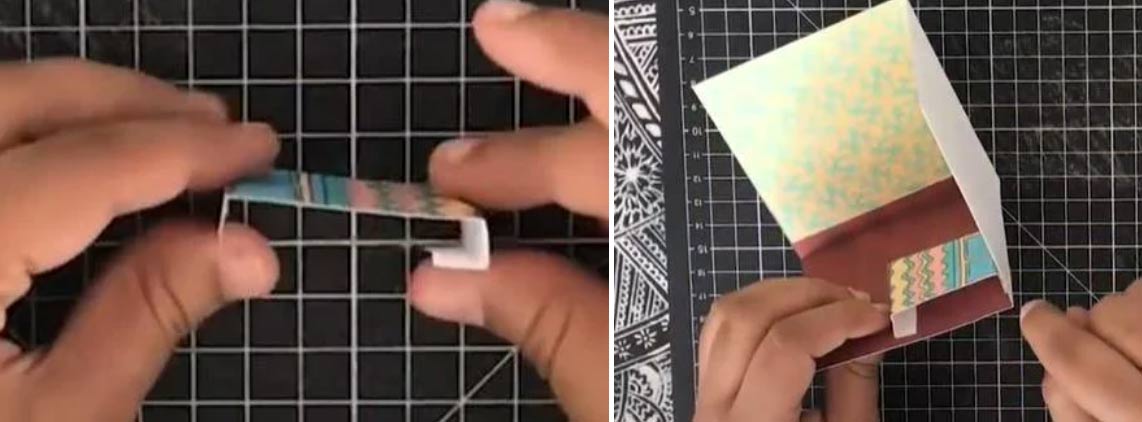
Step 6: Glue the floor panels to the wall
Tape the first piece of fabric to the wall as shown. Then, carefully fold diagonally and tape the second piece of fabric. Fold diagonally and press to create a crease. You may want to place heavy objects on the crease to help with this.
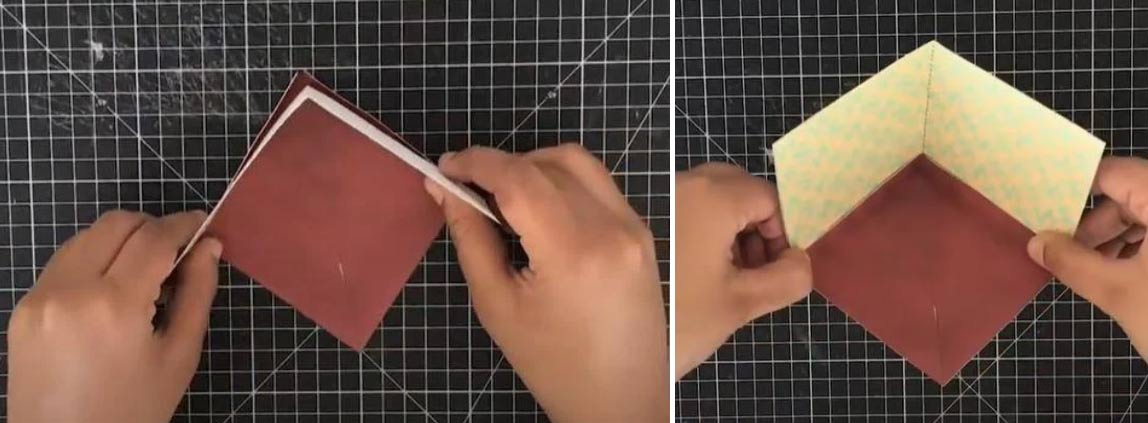
Step 7: Fold the Room Diagonally
The basic apartment mockup is ready! Just fold diagonally and unfold to reveal the floor plan as shown.
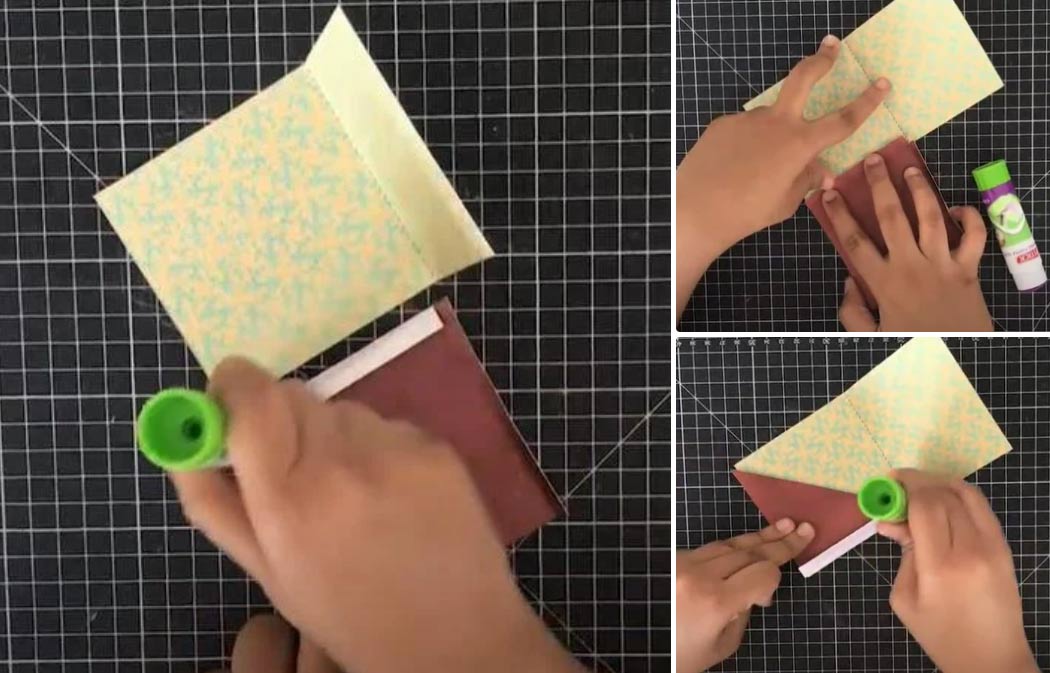
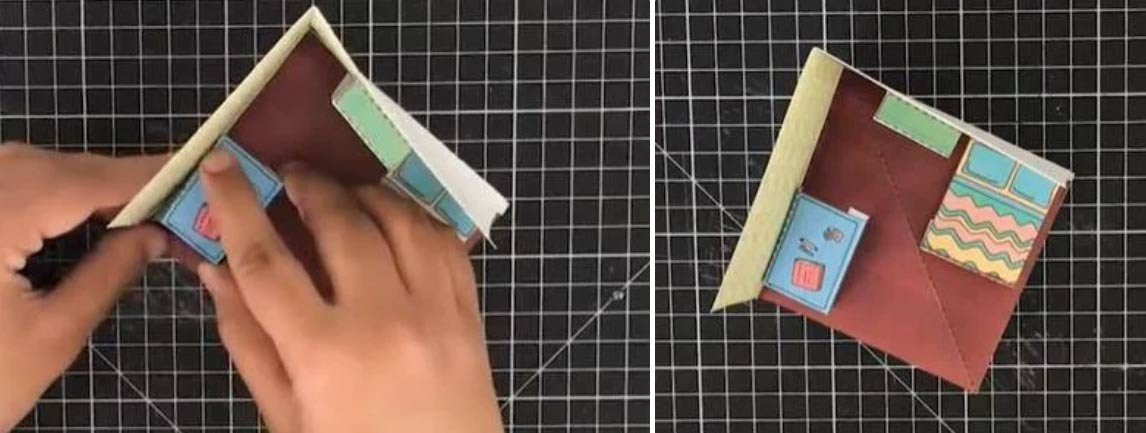
Step 8: Fill the room!
Now we will fill the room. Each component must be glued so that one part sticks to the wall and one part sticks to the floor.
Cut out the bed section from the template and fold along the dotted lines. Fold so that the side with the two panels is glued to the floor and the other side is glued to the wall as shown.
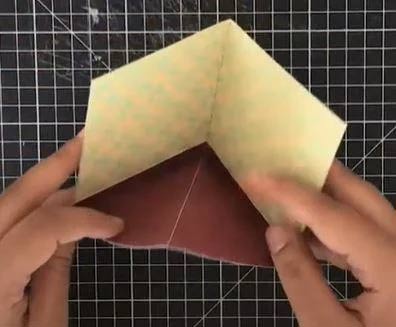
Step 9: Component location in the room

Make sure the components are glued so that no part is on the diagonal. This is to ensure the pop-up room can fold and collapse smoothly when closed.
Step 10: Fold and Hold

For each component, it is important that after the glue dries, we fold the pop-up room structure along the folds and press firmly. This is to ensure that all the folds are in the right direction and look neat.
Step 11: Now let's add the shelves
Now let's repeat this with the shelf component. Fold the wings so that this time, the end with two wings is glued to the wall and the other end is glued to the floor. Glue carefully to the room so that it does not overlap the diagonal line on the floor.
Fold the pop up again and press firmly to create creases.
Step 12: Add table same as above
Using the same methods, add a table to the room. You can experiment with the placement of different elements and add things like picture frames, chairs, or even rugs! You can cut out windows and add curtains. Whatever you do, just make sure the elements don't overlap the diagonal folds.
Step 13: Customize, Design and Innovate
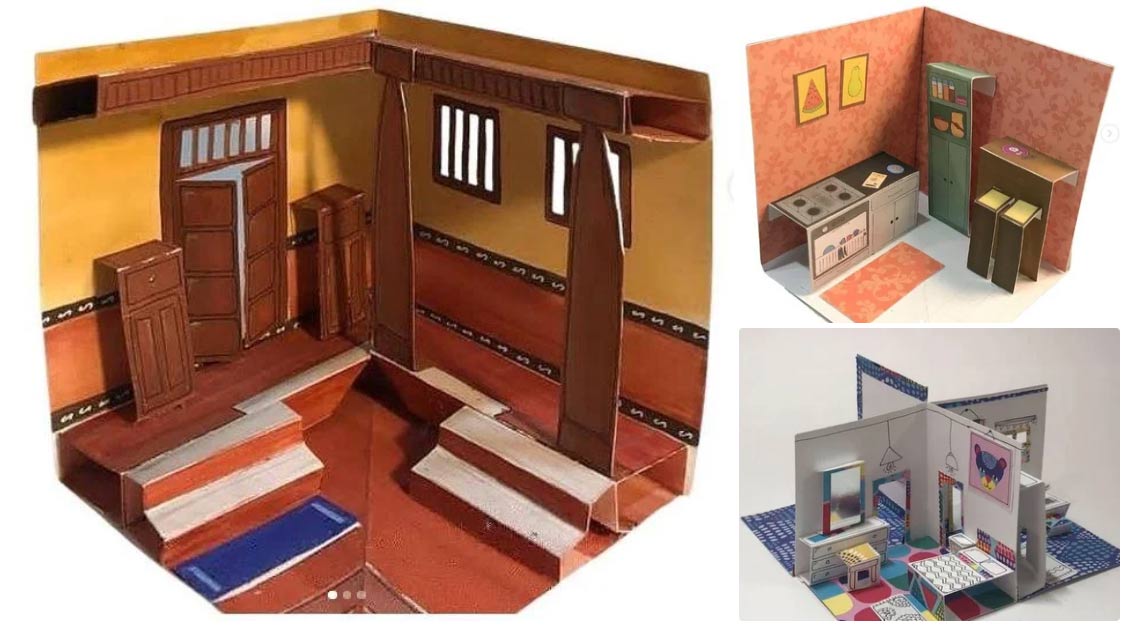
Feel free to experiment with this technique to design your bedroom or any other room in your home. You can add them all together to design a living home model.
Step by step video tutorial on how to make a paper house model
Was this article helpful?
Your feedback helps us improve.
Related Articles
 4 level 4 house drawings, including 3 bedrooms, with the most scientific layout3 minutes read
 3-model house with beautiful modern space2 minutes read
 Startled with houses built on unbelievable terrain5 minutes read
 5 drawings of level 4 houses with 2 modern bedrooms3 minutes read
 Beautiful 35m2 house model, 3 floors 1 tum2 minutes read
 9 best VR apps for Google Cardboard on iPhone8 minutes read
Reader Comments 0
Sign in with email or Google to join the discussion.