Table of Contents
Microsoft Edge lets most users hide the Copilot button from the toolbar. You can also stop Copilot from using browsing context for responses. These are different controls: hiding an icon cleans up the interface, while changing Context Clues affects what browser information Copilot may use.
Older instructions that change the Windows Copilot policy or the WindowsCopilot registry key do not disable Copilot inside Edge. Edge has its own settings and enterprise policies.
Hide the Copilot toolbar button
- Open Edge and select Settings and more (the three-dot menu), then Settings.
- Open Copilot and AI. Depending on the Edge version, the same controls may appear under Appearance > Copilot and sidebar.
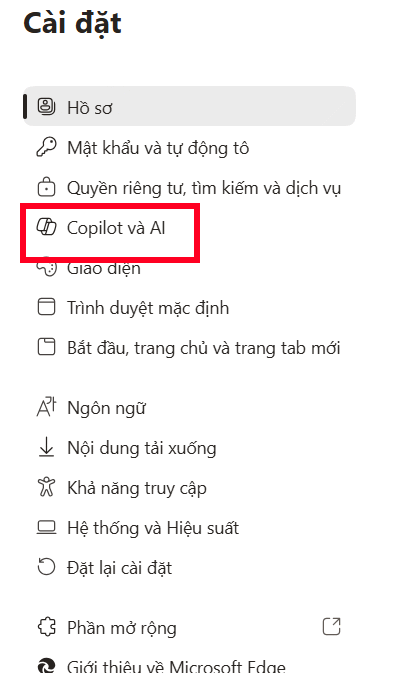
- Open the Copilot settings and turn off Show Copilot or Show Copilot button in toolbar.
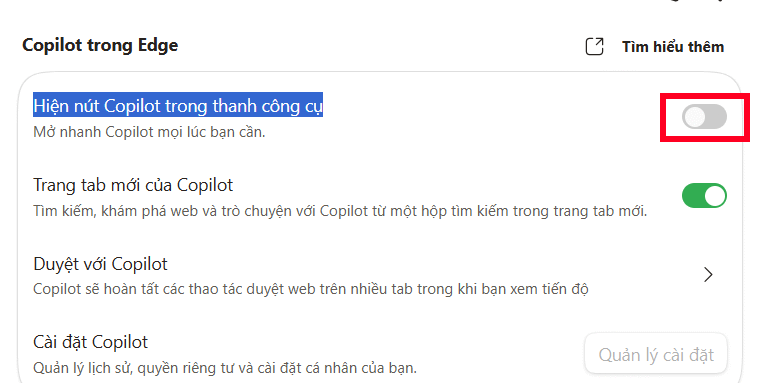
The Copilot icon should disappear from the toolbar. If it remains, restart Edge and check edge://policy to see whether an organization manages the setting.
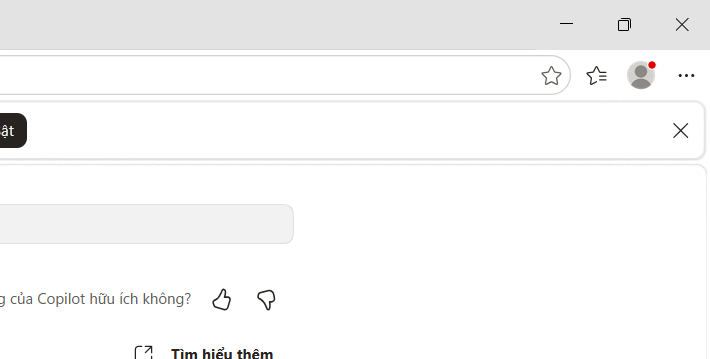
This does not uninstall Copilot, block the Copilot website, or change Copilot in Windows and Microsoft 365 apps.
Stop Copilot from using browsing context
If your goal is privacy rather than toolbar appearance:
- Open Copilot in the Edge sidebar.
- Select the More menu, then Settings > Privacy.
- Turn off Context Clues.
Microsoft says this setting prevents Copilot in Edge from using the current webpage, page title, open tabs, and browser history to tailor responses. You can still send text or other information intentionally in a prompt.
Managed work profiles: use the Edge policy
For an Entra ID profile in Microsoft Edge for Business, administrators can control the toolbar icon with the Edge policy Microsoft365CopilotChatIconEnabled. Microsoft documents this policy for Edge 139 and later:
- Policy path: Administrative Templates > Microsoft Edge > Control whether Microsoft 365 Copilot Chat shows in the Microsoft Edge for Business toolbar
- Policy name:
Microsoft365CopilotChatIconEnabled - Set to Disabled: the toolbar icon is hidden for the managed profile.
The corresponding mandatory registry location used by management tools is SOFTWAREPoliciesMicrosoftEdge, with the Microsoft365CopilotChatIconEnabled DWORD set to 0. Deploy it through Group Policy or device management rather than editing individual PCs by hand.
Install the current Microsoft Edge policy templates before looking for this setting. An old MSEdge.admx file will not contain newer policy names.
Why the old Windows Copilot policy is not the right method
The following screenshots show the older approach commonly copied into guides: opening the Windows Copilot policy and creating a TurnOffWindowsCopilot registry value.
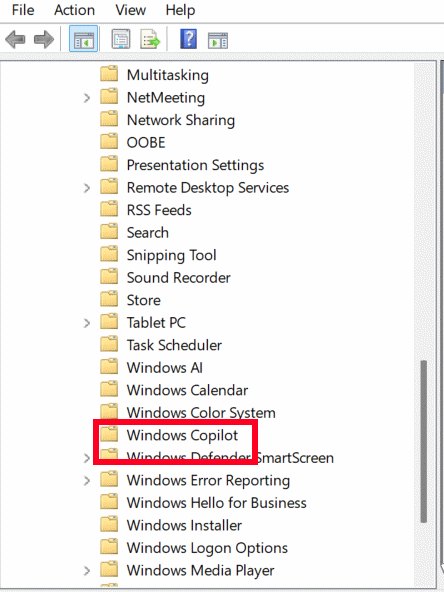
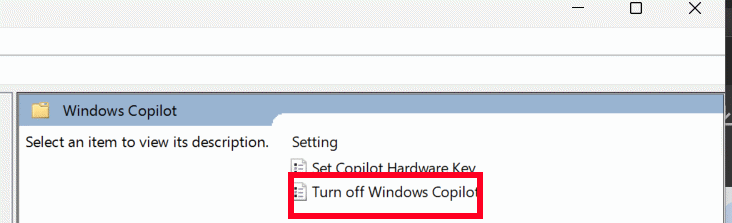
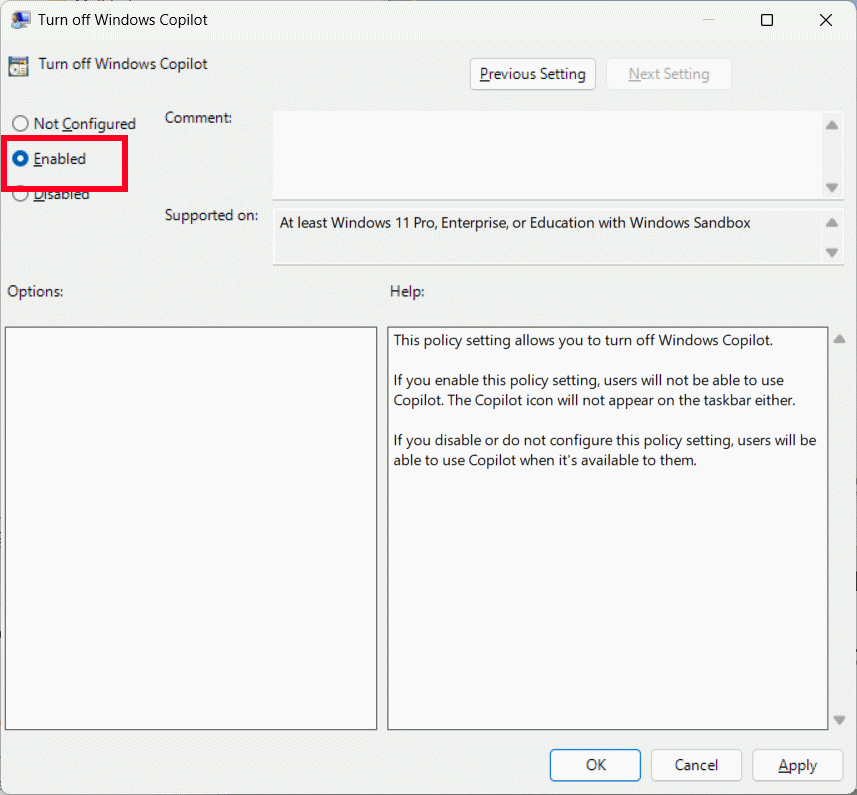
That policy targeted the Windows Copilot experience, not the Copilot feature provided by the Edge browser. Applying it can leave the Edge button unchanged.
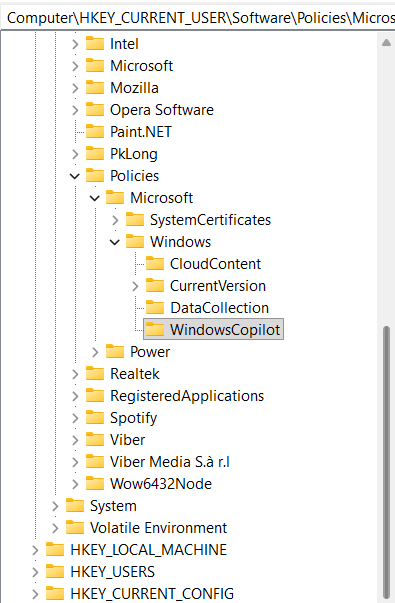
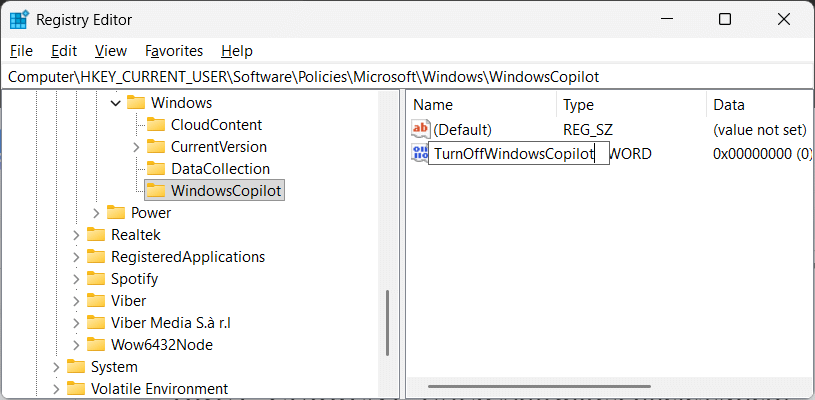
Do not create these WindowsCopilot keys to solve an Edge-specific problem. Use the in-browser toggle for a personal profile or the Edge policy for a managed Entra ID profile.
What about the entire Edge sidebar?
Organizations can disable the Edge sidebar with the HubsSidebarEnabled policy. That also removes other sidebar apps, so it is broader than hiding Copilot. Microsoft notes that, as of Edge 141, Microsoft365CopilotChatIconEnabled is the policy specifically responsible for the Copilot toolbar display.
Verify the result
- Open
edge://settings/helpand update Edge. - Check
edge://policyfor active management policies and policy errors. - Restart Edge after changing a policy.
- If the setting says “Managed by your organization,” contact the administrator rather than trying to override it locally.
Microsoft's current references are the Copilot toolbar policy and the Copilot in Edge privacy guide.
Related Articles
 How to Disable Copilot in Microsoft Edge5 minutes read
 Instructions on Disabling New Tab Copilot on Microsoft Edge3 minutes read
 How to Delete Copilot History in Edge Windows5 minutes read
 How to Turn Off Copilot in Windows 11: Step-by-Step Guide4 minutes read
 Microsoft Continues to Be Criticized for Trying to Promote Copilot on Social4 minutes read
 minutes read
Reader Comments 0
Sign in with email or Google to join the discussion.