Table of Contents
Stable Diffusion Web UI is a community-developed browser interface for running compatible diffusion models on your own computer. The project commonly called AUTOMATIC1111 Web UI provides text-to-image generation, image-to-image editing, inpainting, upscaling, metadata tools, and an extension system.
The interface runs locally, but installation still requires compatible software, a model file, sufficient storage and memory, and appropriate hardware drivers. Model and extension licenses vary, so check each component before using its output commercially.
Before you install
- Use the official repository. Obtain the application and release instructions from the verified AUTOMATIC1111 project rather than a repackaged download.
- Check current requirements. Supported Python, PyTorch, drivers, and launch options change. Follow the README for the exact release you install.
- Plan model storage. Checkpoints and related files can use many gigabytes.
- Update the GPU driver. Do this through NVIDIA's official installer or supported operating-system process.
- Do not expose the UI publicly. Keep it bound to the local machine unless you understand and secure remote access.
Do you need to install CUDA separately?
Many Windows installations use the runtime components installed by the project's Python packages and require a compatible NVIDIA driver rather than a manually assembled CUDA Toolkit and cuDNN folder. Do not copy DLL files into a Toolkit directory or force an old CUDA version unless the current project documentation specifically requires it for your setup.
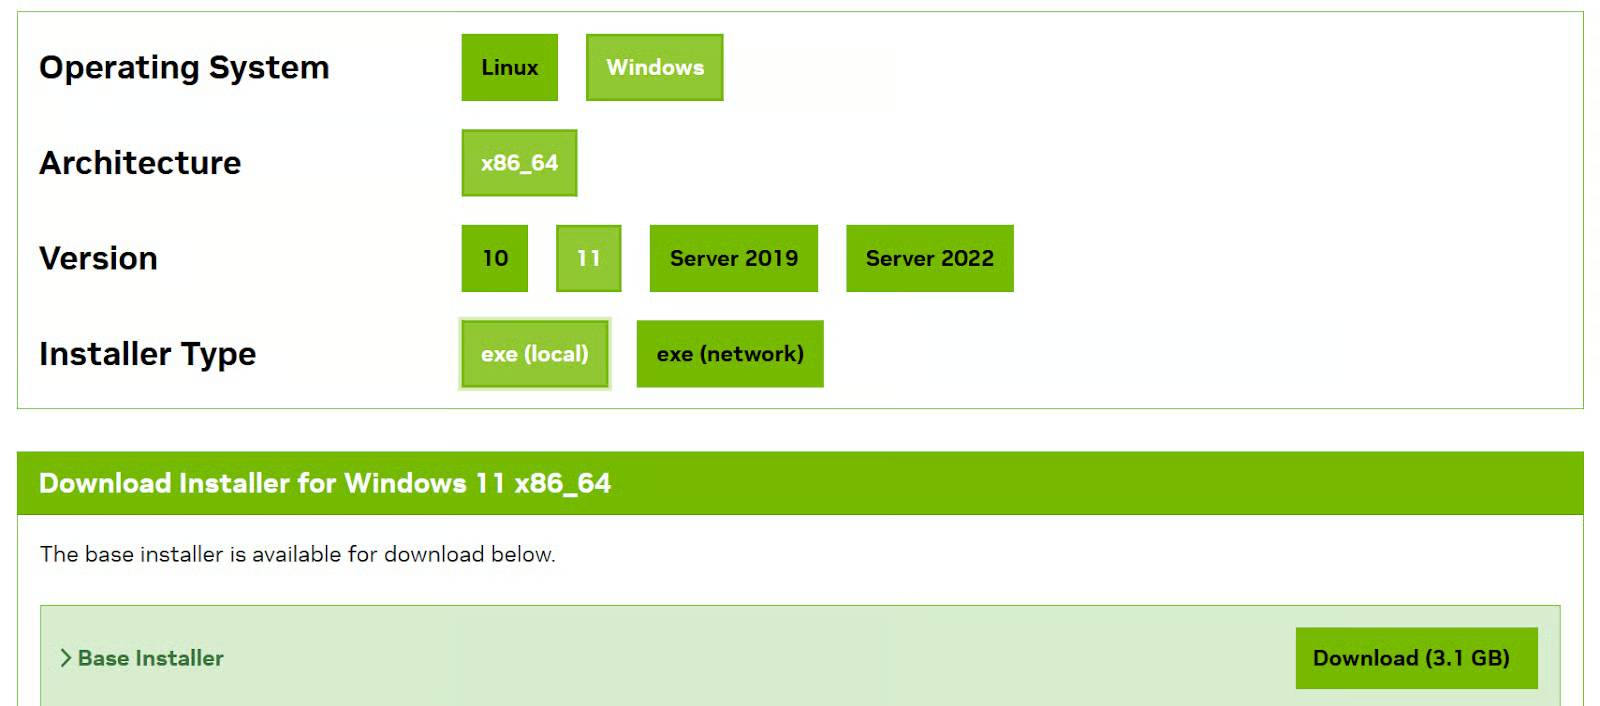

CPU-only operation may be possible in some configurations, but image generation can be impractically slow. GPU support and memory requirements depend on the operating system, hardware, model, resolution, and selected optimizations.
Install on Windows
Use an official release package
- Open the official AUTOMATIC1111 repository and read its current Windows instructions.
- Download the release asset named by the project, if a maintained package is offered.
- Extract it to a user-writable folder with a simple path and adequate free space.
- Run the supplied update script if the release instructions require it.
- Start the supplied launcher as a normal user, not as administrator.
Clone the repository
Install the Python and Git versions required by the current project documentation. Then open a terminal in the parent folder and run:
git clone https://github.com/AUTOMATIC1111/stable-diffusion-webui.git
cd stable-diffusion-webui
On Windows, launch:
webui-user.batThe first start creates an environment and downloads dependencies, so it takes longer than later launches. Read the terminal if the browser does not open; the first meaningful error is usually more useful than the final stack trace.
Install on Linux
Install Git, Python, a virtual-environment package, and the graphics libraries listed for your distribution in the current repository documentation. Do not paste a combined package command written for a different distribution.
git clone https://github.com/AUTOMATIC1111/stable-diffusion-webui.git
cd stable-diffusion-webui
./webui.sh
If a specific Python executable is required, configure it in webui-user.sh using the project's supported option. Avoid changing the system-wide Python merely to satisfy one application.
Add a model checkpoint
The Web UI does not create useful images without a compatible model. Download a checkpoint from a source you trust, read its model card and license, and place it in the checkpoint folder used by your installation—commonly:
stable-diffusion-webui/models/Stable-diffusion/Restart the UI or refresh the checkpoint list, then select the model in the interface. A model may require a particular base architecture, configuration, VAE, or workflow; do not assume every checkpoint is interchangeable.
Create an image with txt2img
Open the local address printed in the terminal and select txt2img. Enter a prompt that describes the subject, composition, environment, lighting, and medium. Use a negative prompt only for characteristics you specifically want to discourage; long generic negative lists can make results less predictable.
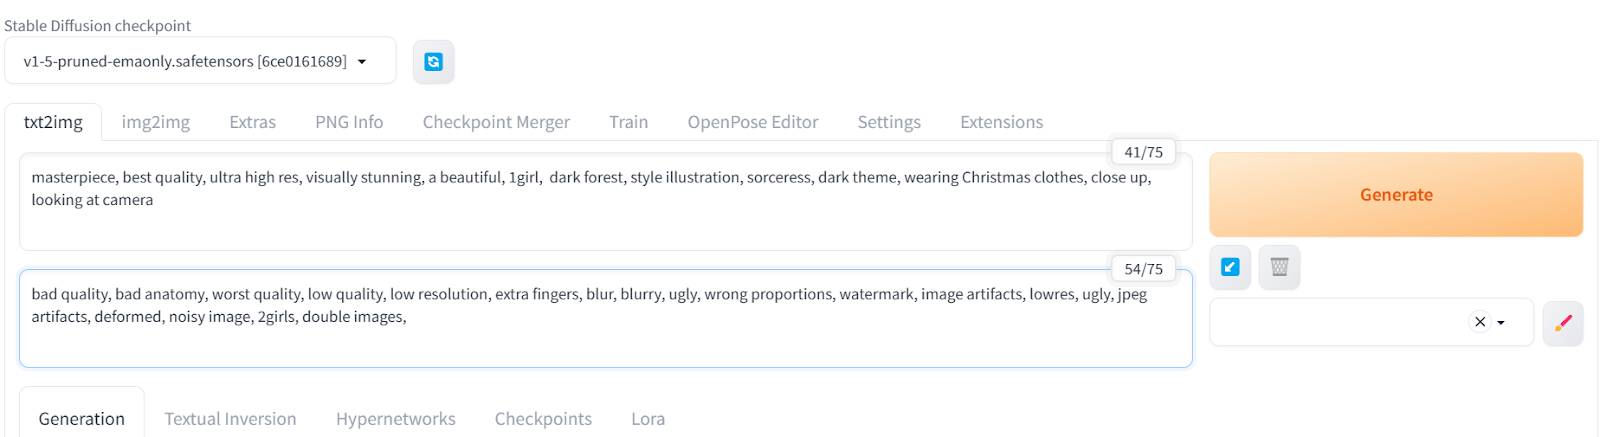
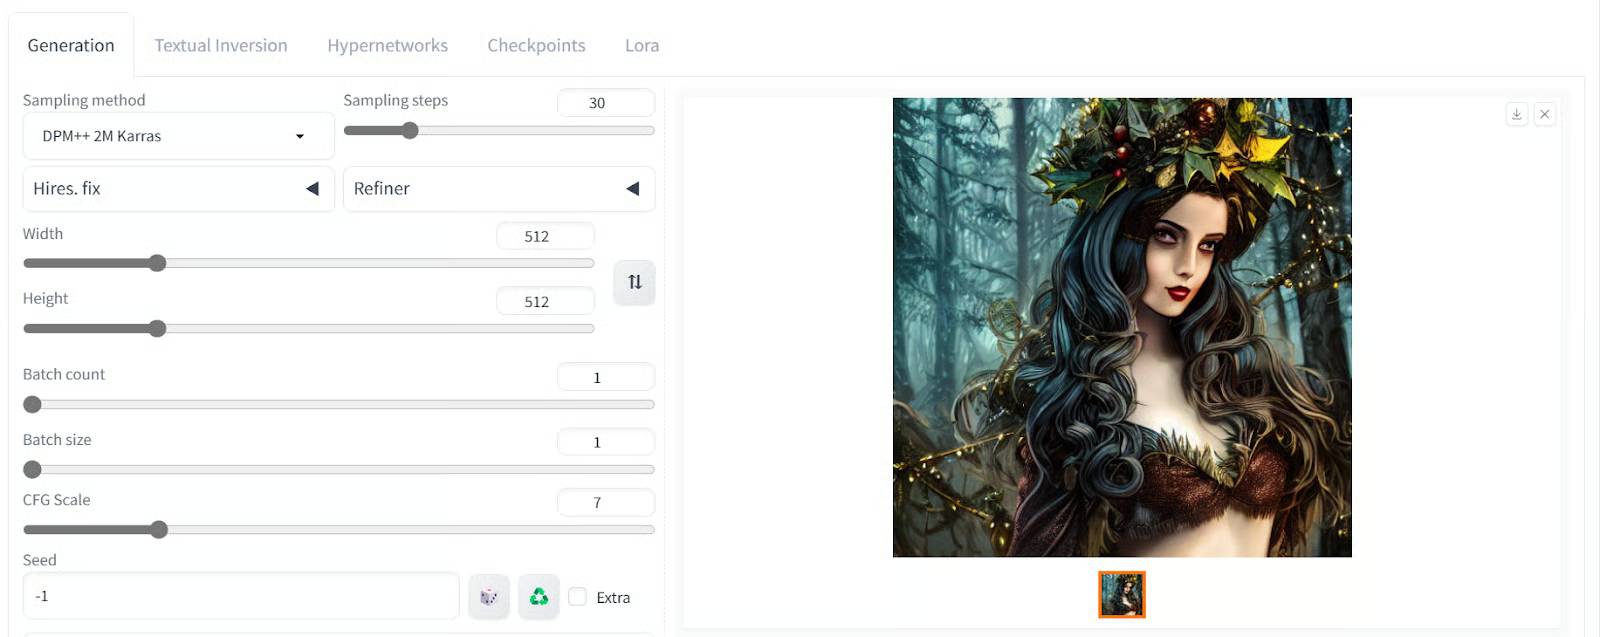
Start near the model's expected resolution and with moderate sampling settings. More steps do not always add useful detail; after a point they mainly increase generation time. Keep the seed when you want to compare one setting at a time.
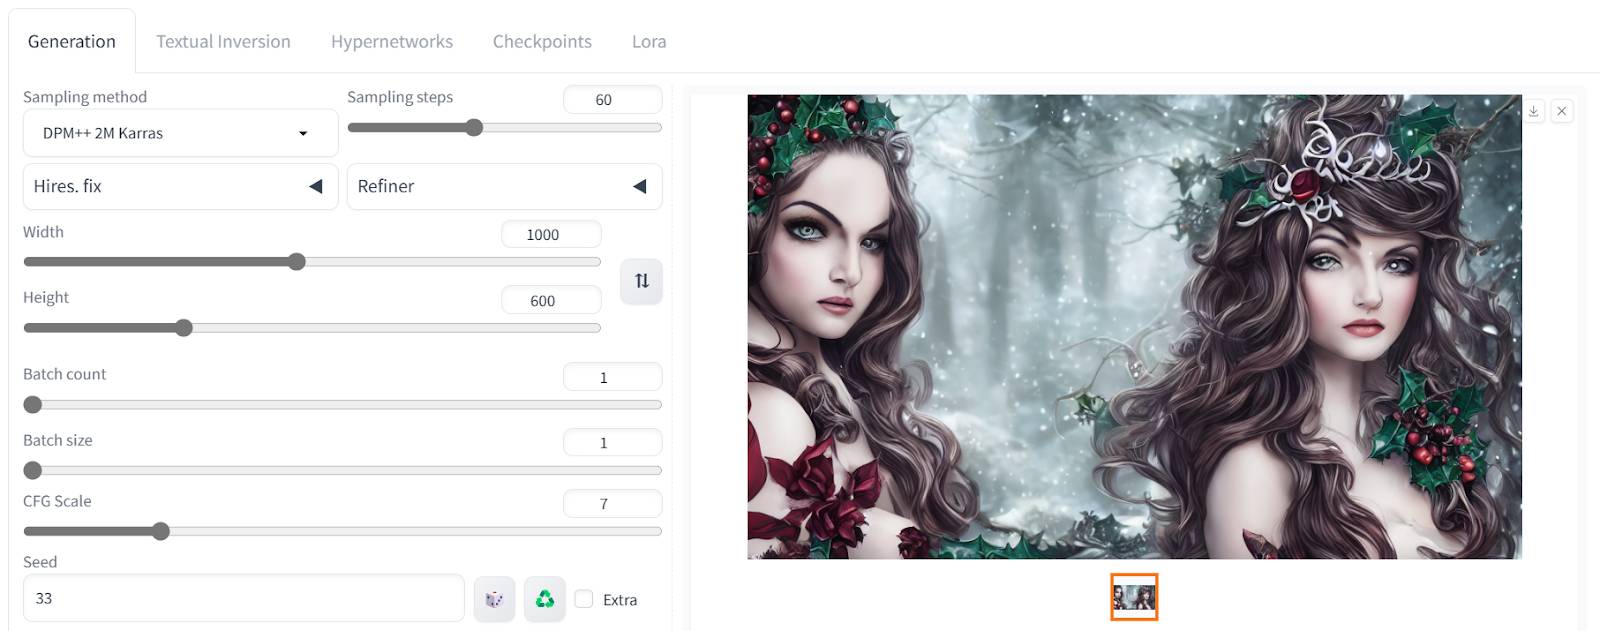

Settings that matter
- Checkpoint: the base model used to generate the image.
- Sampler and scheduler: the denoising method; compare using the same seed.
- Steps: how many denoising iterations are used.
- CFG scale: how strongly the result follows the text; higher is not automatically better.
- Width and height: resolution and aspect ratio, both of which affect memory use.
- Seed: a value that helps reproduce or systematically vary a generation.
- Batch settings: number of images and how they are grouped; larger batches need more memory.
Modify an image with img2img
The img2img tab starts from an input image and a prompt. Denoising strength controls how far the result may depart from the source: a low value preserves more structure, while a high value gives the model greater freedom.


Change one parameter at a time and reuse a seed when comparing settings. If the result loses important composition or identity, reduce denoising strength or prepare a clearer source.
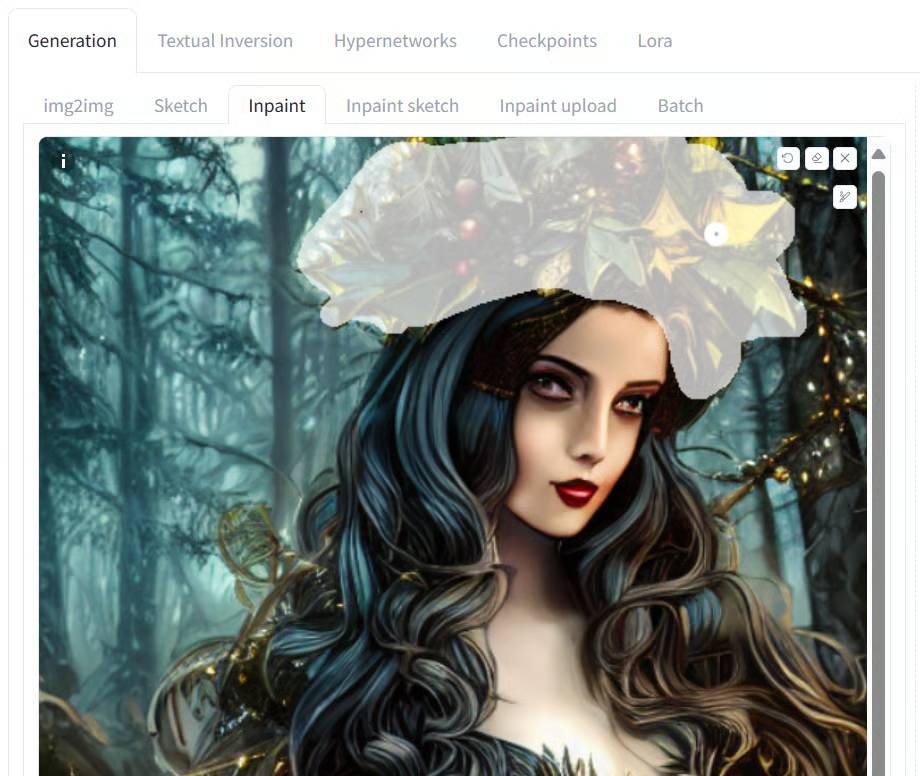
Edit part of an image with inpainting
Inpainting regenerates a masked region while preserving the rest of the image. Paint the mask over the area to change, describe the desired replacement, and leave enough surrounding context for the model to blend edges.

If the boundary is obvious, expand or blur the mask slightly and lower denoising strength. For a small object, use an inpaint-area option that gives the masked region adequate working resolution.
Upscale an image in Extras
The Extras workflow can enlarge an image with a selected upscaler.
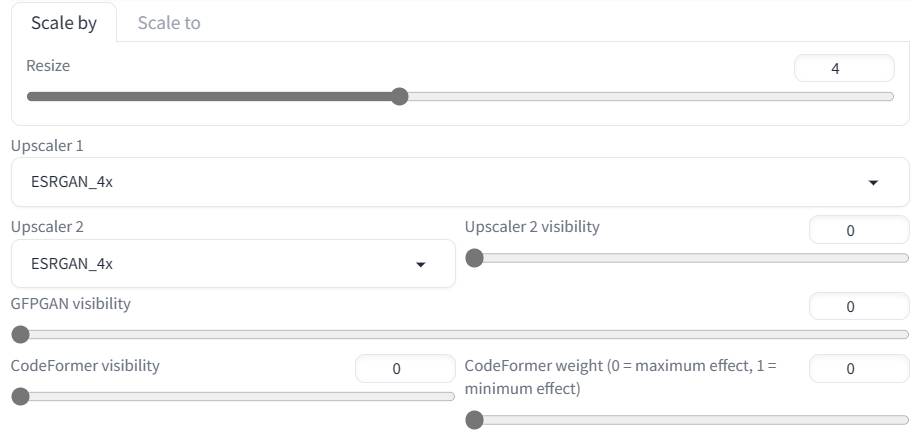
Choose an output scale and upscaler, then generate the larger file.
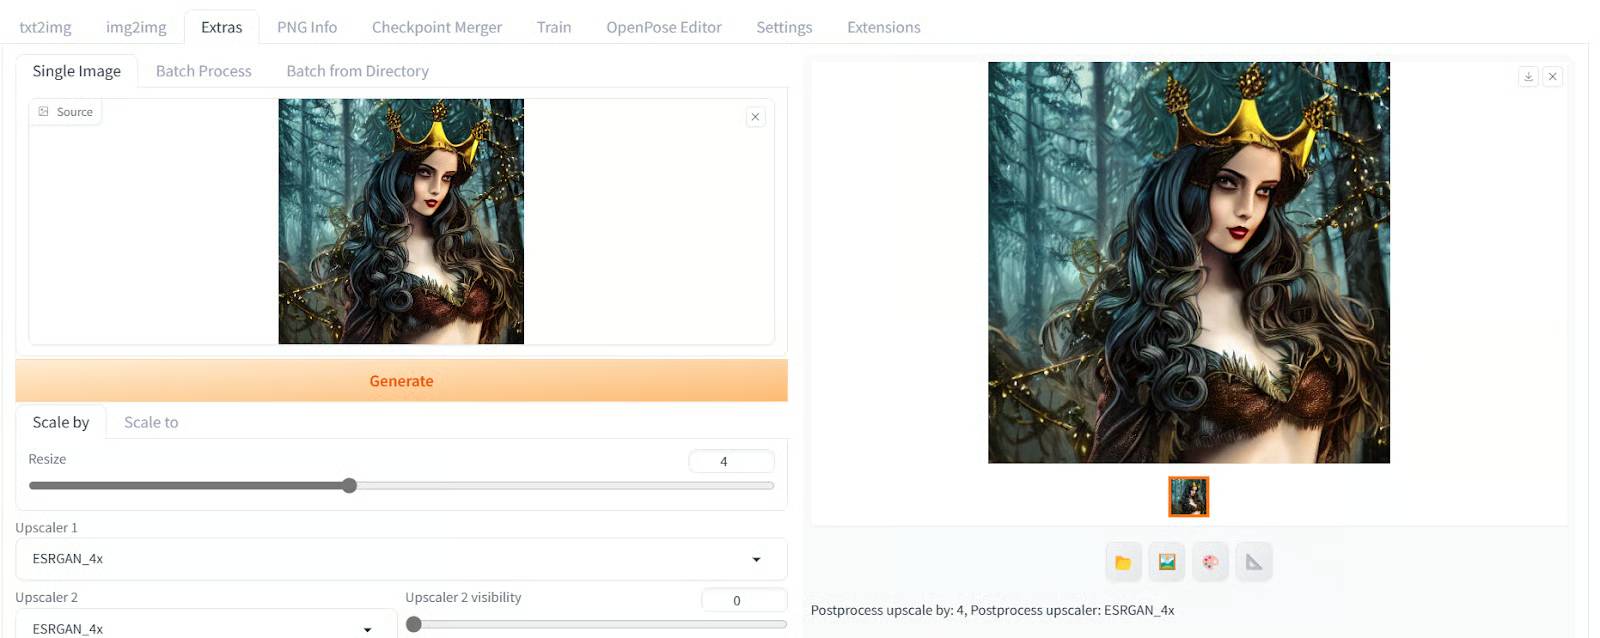
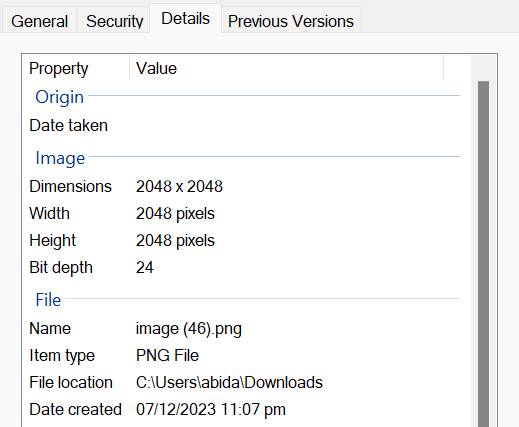
Upscaling increases pixel dimensions and may infer texture, but it cannot guarantee recovery of real detail absent from the source. Inspect faces, text, edges, and repeated patterns at full size.
Reuse settings with PNG Info
When generation metadata is embedded in a compatible PNG, the PNG Info tab can display the prompt, seed, sampler, dimensions, and related settings. Buttons may transfer those settings back to generation tabs.
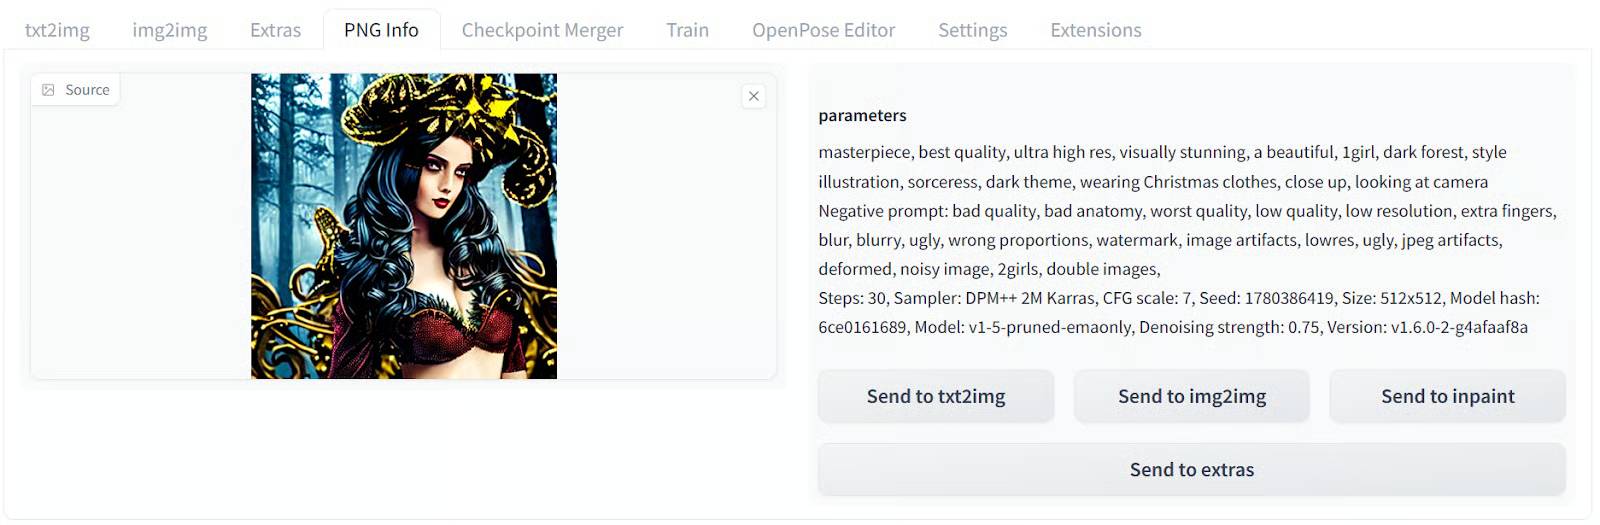
Metadata may be removed by social platforms, image optimization, screenshots, or conversion to another format. Save a separate workflow record for important work.
Security and responsible use
- Extensions and launch arguments can execute code; install only reviewed components from trusted sources.
- Scan unfamiliar model files and prefer safer formats when available, while remembering that file format alone does not establish trust.
- Keep the local server private and never enable sharing or network listening without authentication and access controls.
- Use only source images and models permitted for the intended purpose.
- Review outputs for personal data, deceptive content, trademarks, and harmful or misleading errors before publication.
Stable Diffusion Web UI offers extensive local control, but that flexibility comes with maintenance and security responsibility. Begin with a verified installation and one compatible model, learn the core tabs, and add extensions only when a specific workflow justifies them.
Related Articles
 How to Record on Computer Using Adobe Audition5 minutes read
 Steps to Use Tab Audio Control to Manage Audio on Edge3 minutes read
 How to Record on Windows 10 Using Tape Deck5 minutes read
 How to Fix PowerPoint Screen and Audio Recording Errors4 minutes read
 TOP 5 Best Audio Recording Applications for Computers4 minutes read
 How to Add Google Search Options on Microsoft Edge: Edge Trick5 minutes read
Reader Comments 0
Sign in with email or Google to join the discussion.