OpenAI Codex User Guide with 3 Real-World Examples
OpenAI has just released Codex inside the ChatGPT app. Codex is a tool that helps developers and teams reduce the daily programming workload.
- What is OpenAI Codex?
- Setting Up OpenAI's Codex
- 3 Real-World Examples from OpenAI's Codex
- Step 1: Locate the Codex tool
- Step 2: Get Started with Codex
- Step 3: Multi-factor authentication
- Step 4: Connect to GitHub
- Step 5: AGENTS.md file (optional)
- Example 1: Basic fixes and typos
- Example 2: Explaining the codebase
- Example 3: Find and fix errors
OpenAI has just released Codex inside the ChatGPT app . Codex is a tool that helps developers and teams offload their daily programming work.
This tutorial will show you how to use the Codex inside ChatGPT to perform real-world tasks on GitHub repositories, even if you are not a professional programmer. We will use the Codex to:
- Apply code fixes and create pull request.
- Explain a complex function within the code base.
- Identify and resolve errors based on Q&A style prompts.
You'll see how Codex works in a secure sandbox, creating verifiable code changes and helping you deliver faster without leaving ChatGPT.
What is OpenAI Codex?
OpenAI Codex is a cloud-based software engineering agent that can write and edit code, run tests, fix bugs, and even submit pull requests. Each task is performed in its own sandbox environment.
Codex is powered by codex-1, a version of the o3 model tuned to real-world development workflows. This agent is built for safety, testability, and developer productivity. You can navigate Codex using AGENTS.md files or interact with it directly in the ChatGPT sidebar.
With the Codex CLI, you can also bring these capabilities directly into your terminal.
Setting Up OpenAI's Codex
Setting up Codex only takes a few minutes. Here's a simple step-by-step guide to get you started.
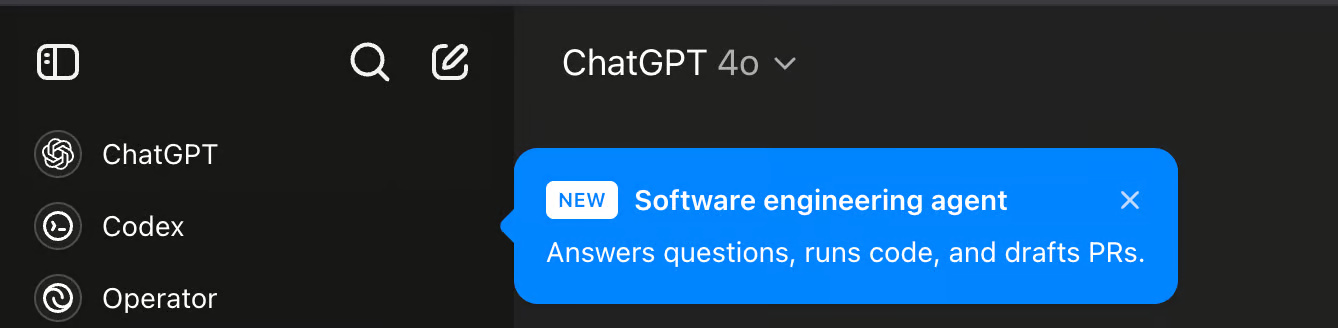
Step 1: Locate the Codex tool
Start by logging into ChatGPT. On the left toolbar, look for Codex. Note that Codex is currently only rolled out to Pro, Team, and Enterprise users.
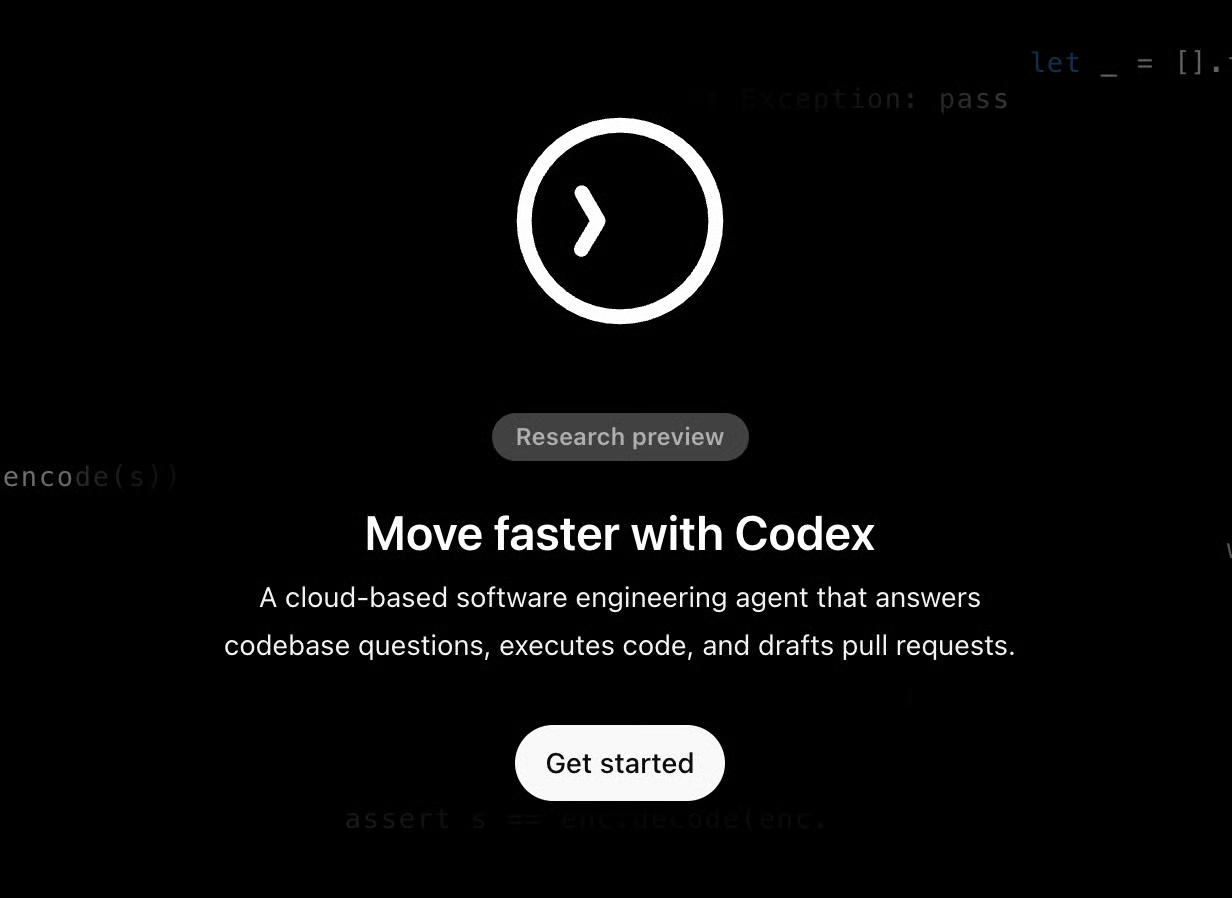
Step 2: Get Started with Codex
Click on Codex and you will be taken to another tab for initial setup. Click on Get Started and follow the authentication process as shown in the next step.
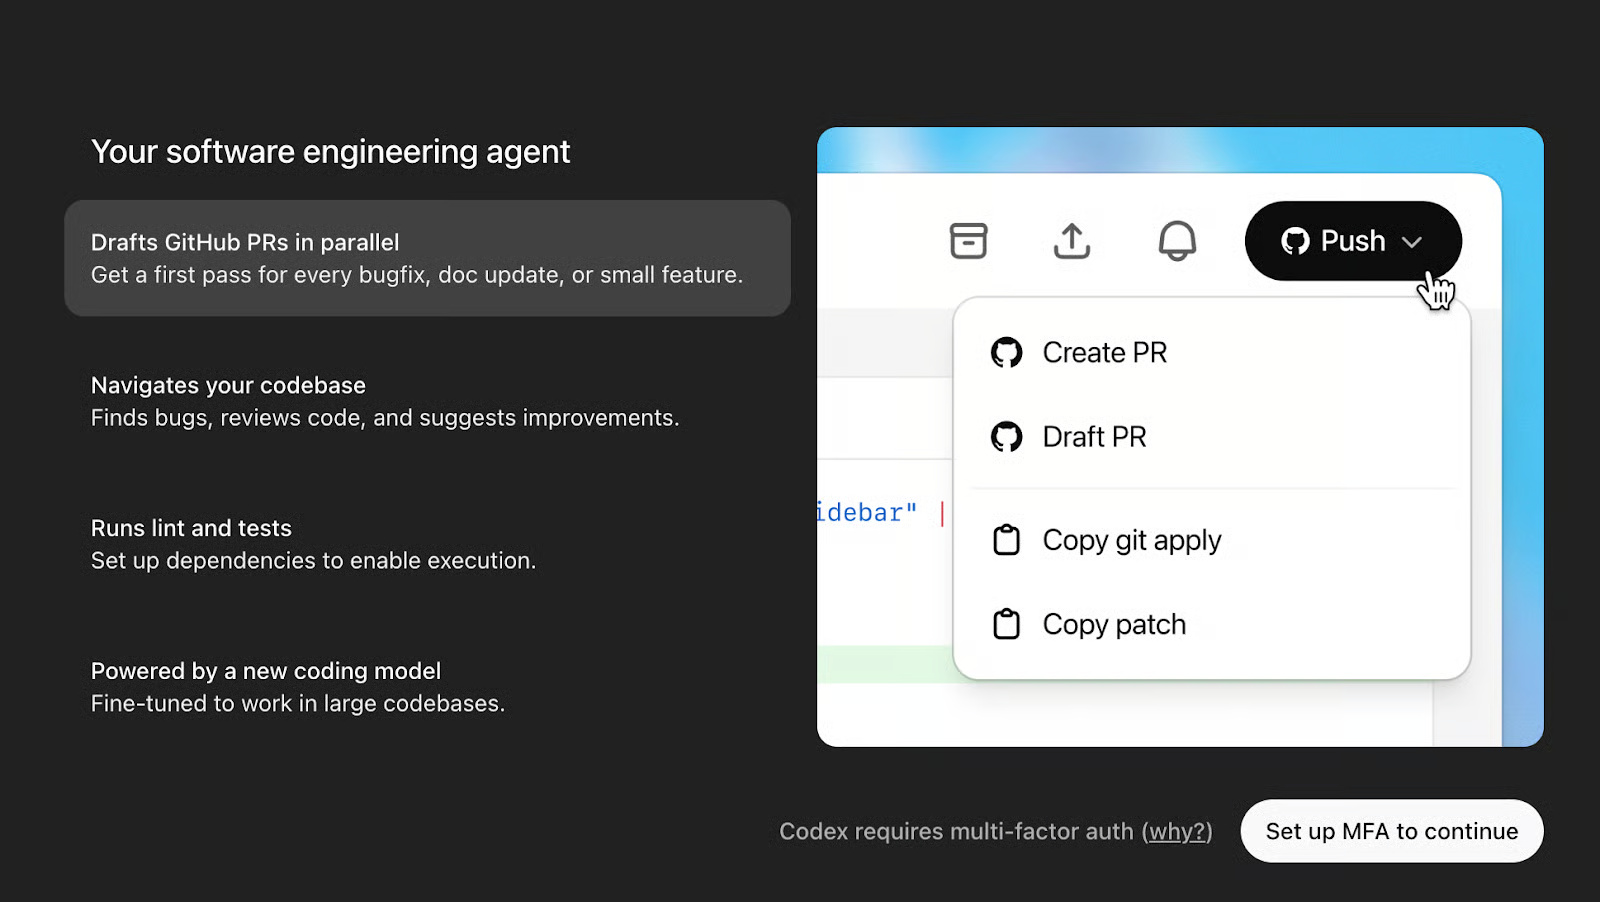
Step 3: Multi-factor authentication
Click Set up MFA to continue and scan the QR code using your favorite authenticator app (like Google Authenticator or Authy ). Enter the code to verify and you're done!
Step 4: Connect to GitHub
Once multi-factor authentication is complete, we'll connect Codex to GitHub.
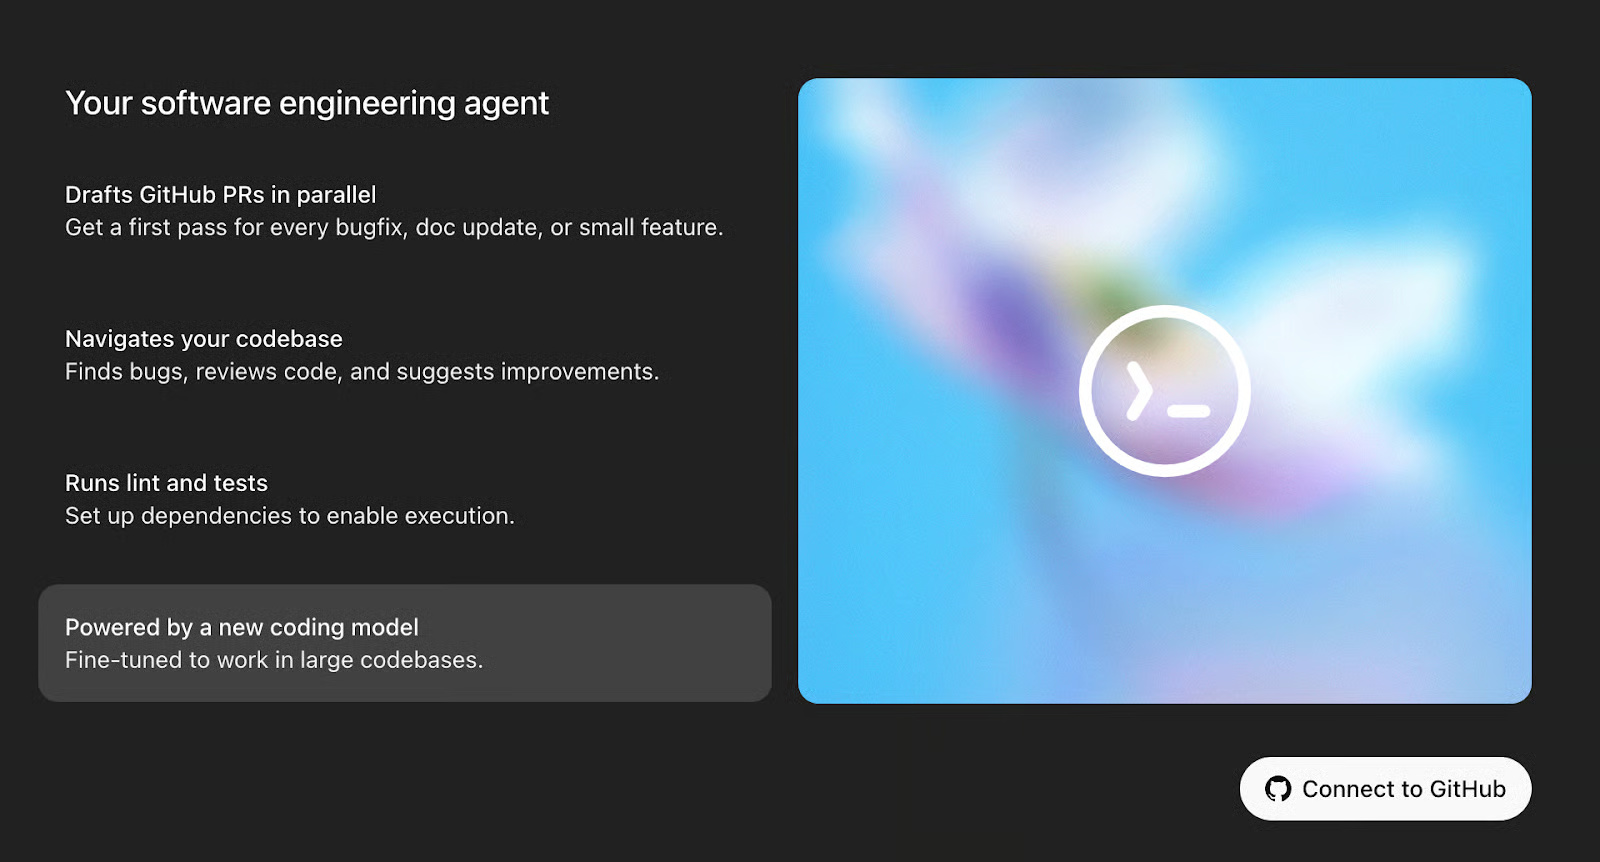
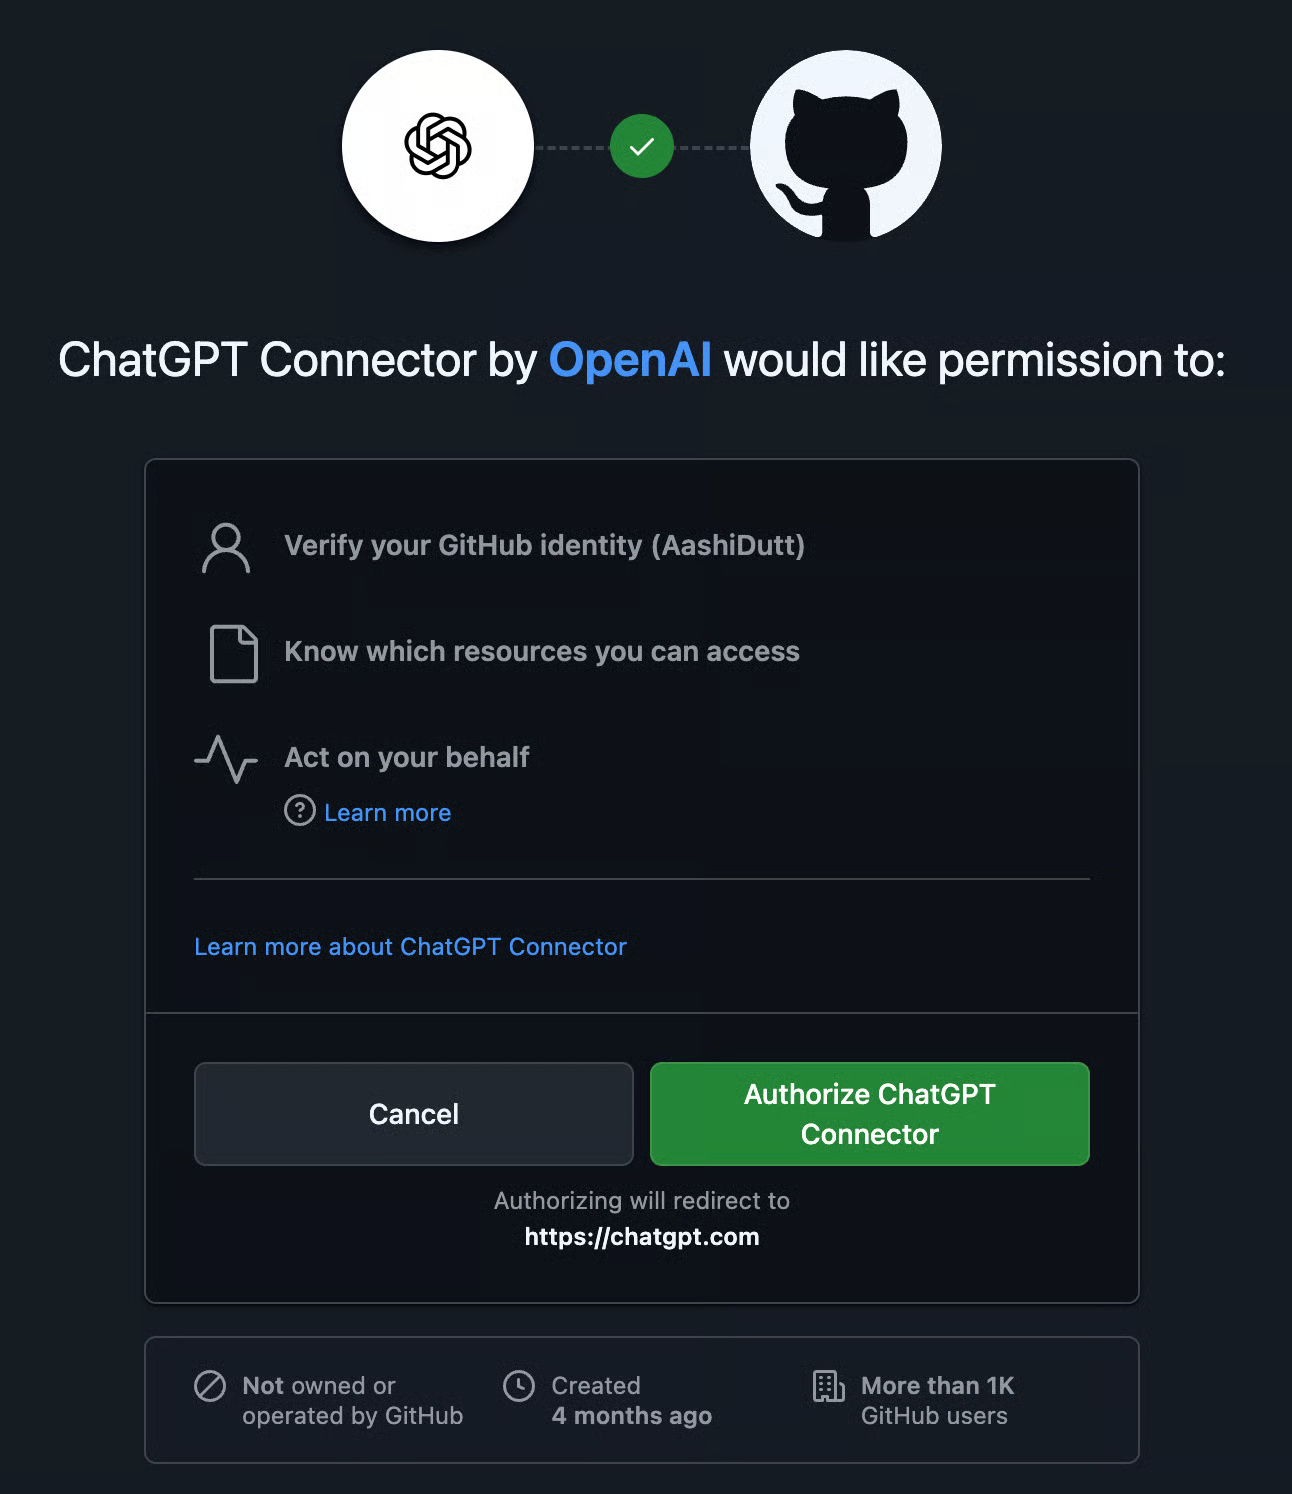
Step 4.1: Authorize GitHub Connector
'Connect to GitHub' will take you to a pop-up window to authorize GitHub Connector. Read through the pop-up window and click Authorize ChatGPT Connector.
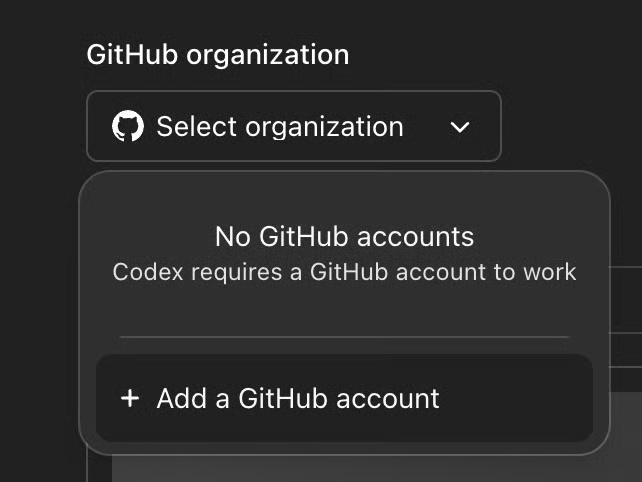
Step 4.2: Add a GitHub account
Once GitHub is connected, you'll need to add your account. Under the GitHub organization tab, select Add a GitHub account .
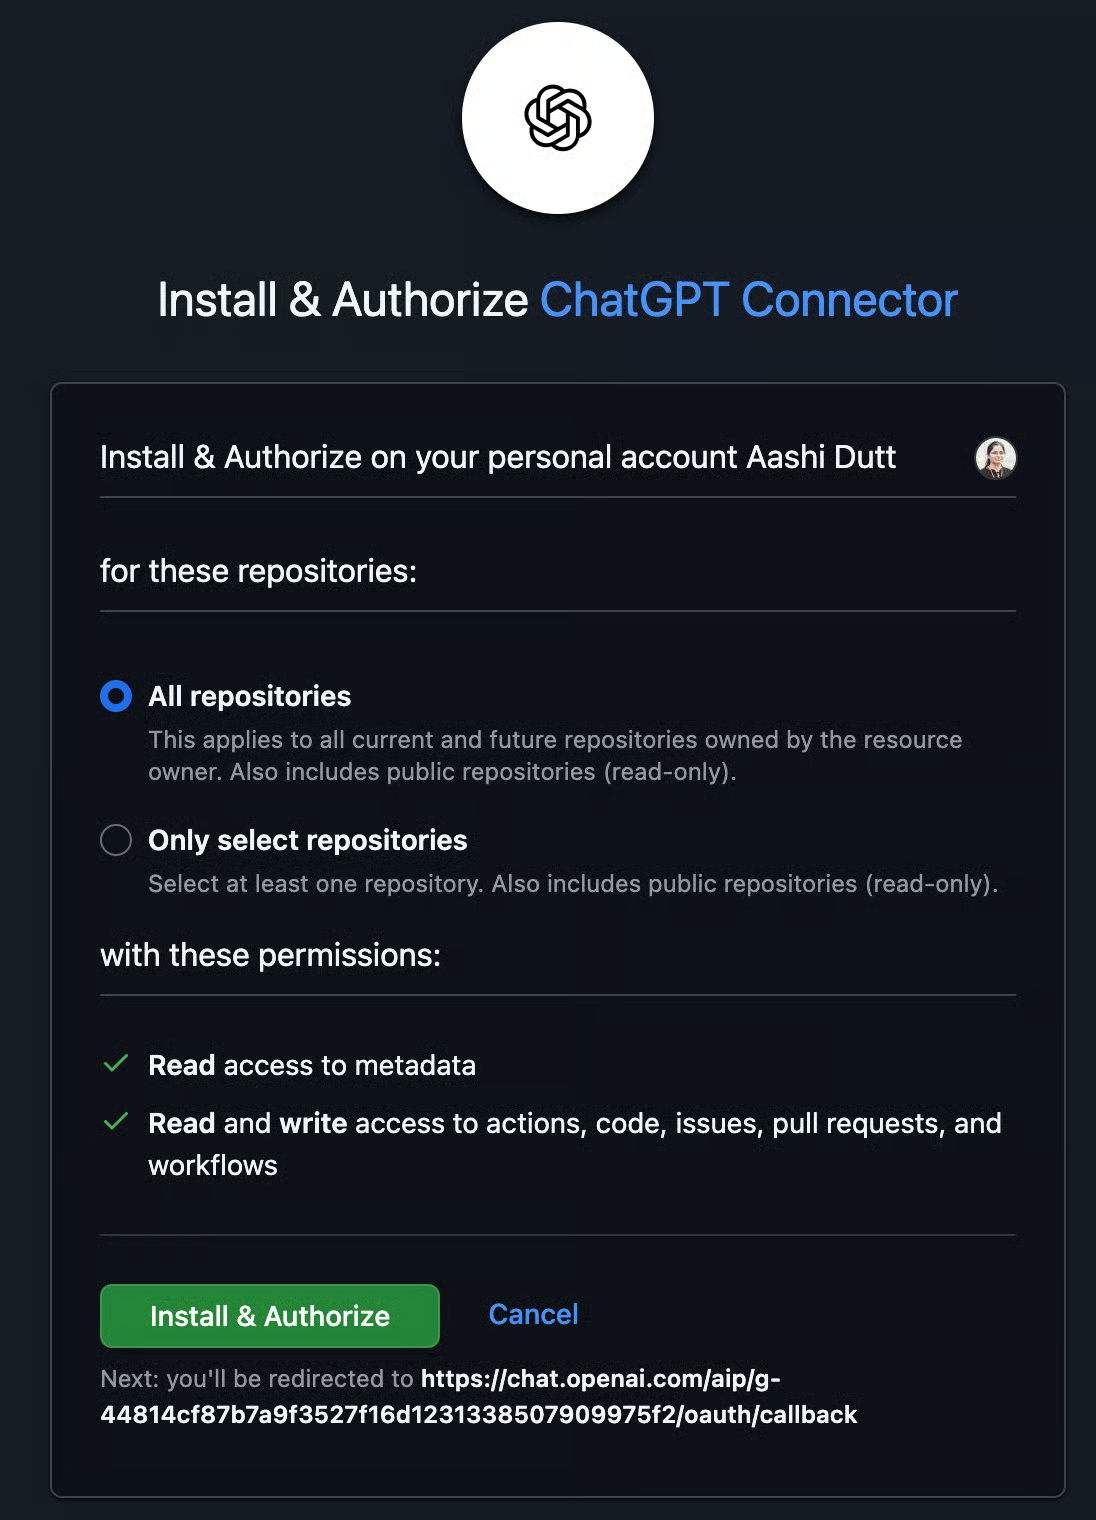
This will take you to another pop-up to select Install and Authorize . Click to authorize and all your repositories will appear on the ChatGPT interface. You can also authorize only selected repositories.
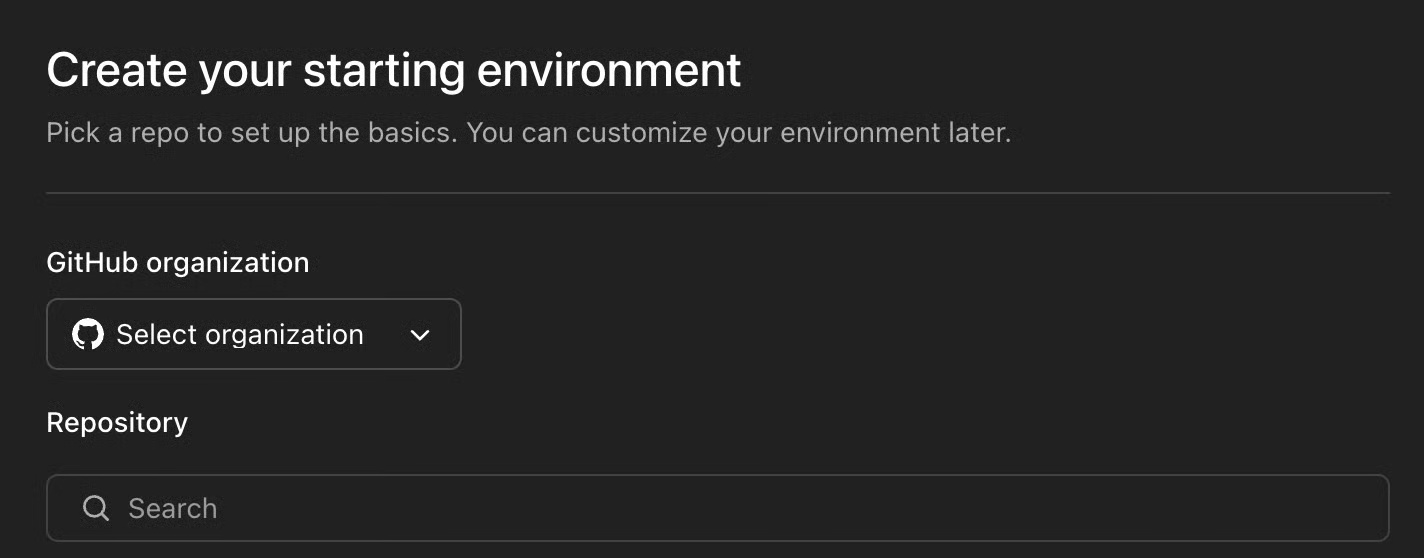
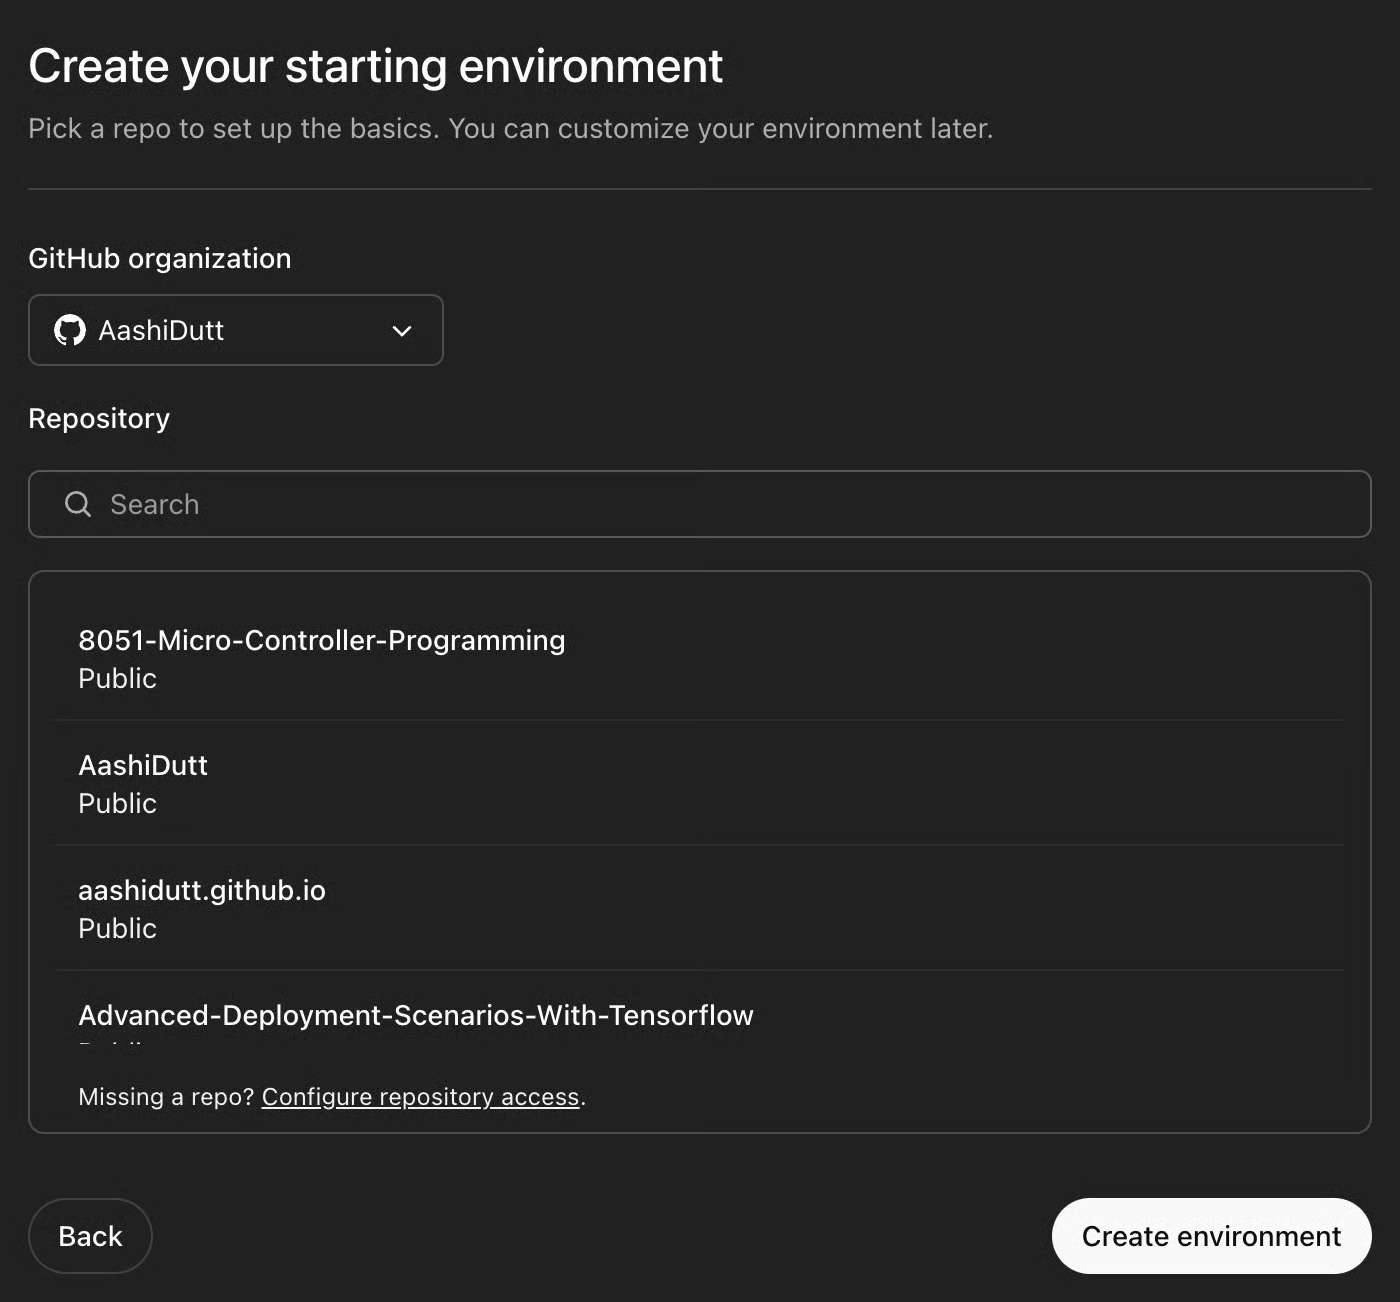
Step 4.3: Create environment
Select the repository you want to work with and click Create environment .
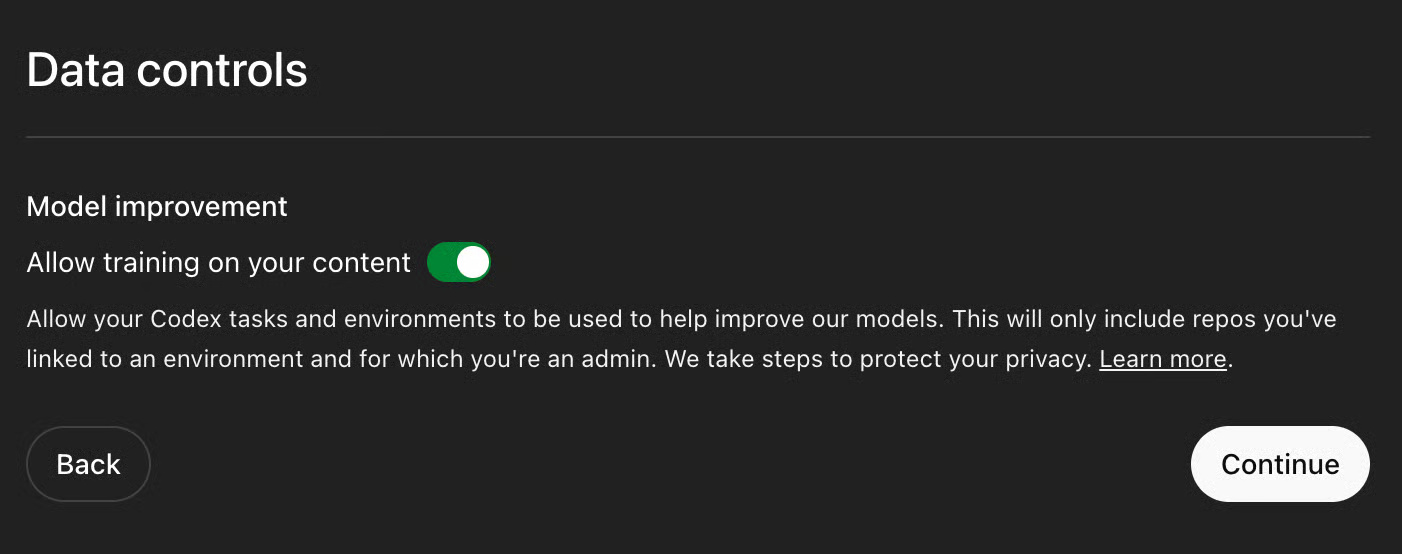
This will take you to Data Controls . The Codex is still in active development and you may see an optional prompt to allow the use of your data to improve the model. You can disable this and continue.
Now your environment is ready to explore. The Codex allows users to start tasks in parallel with pre-selected tasks.
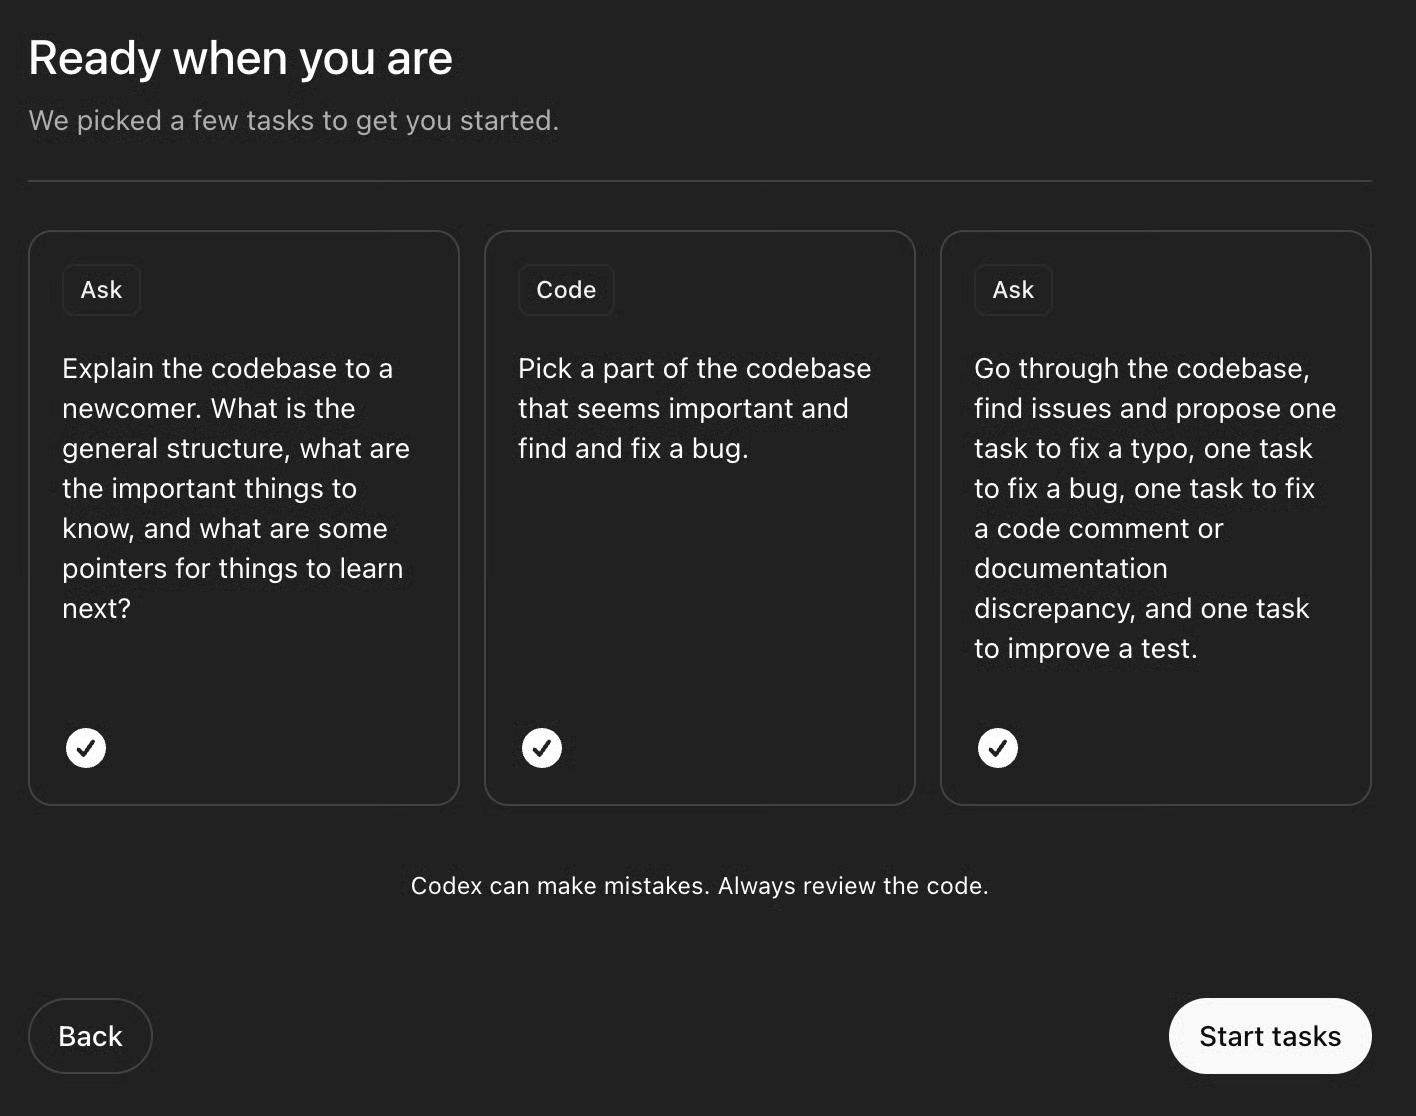
Simply click Start tasks or select the task of your choice. This will take you to an interface where you can ask a question or ask the agent to code a feature for you.
Once all the tasks are ready, choose the one you want to do - or you can do multiple tasks in parallel.
Step 5: AGENTS.md file (optional)
The AGENTS.md file is a special configuration file introduced by OpenAI for use with the Codex platform, specifically designed to help guide AI agents as they work in your codebase. You can think of it as a developer's guide for your AI teammates, much like a README.md, but focused on guiding automated agents. Here's an example of an AGENTS.md file:
# AGENTS.md ## Code Style - Use Black for Python formatting. - Avoid abbreviations in variable names. ## Testing - Run pytest tests/ before finalizing a PR. - All commits must pass lint checks via flake8. ## PR Instructions - Title format: [Fix] Short description - Include a one-line summary and a "Testing Done" sectionWhen Codex runs a task on your codebase, it will:
- Searches for AGENTS.md files whose scope includes the files it is modifying.
- Apply the instructions in those files to format, test, and record your changes.
- Prefer deeper nested instructions when applying multiple files (like cascading configuration).
3 Real-World Examples from OpenAI's Codex
Let's explore how Codex can help you in real-world development using 3 examples run on a repository.
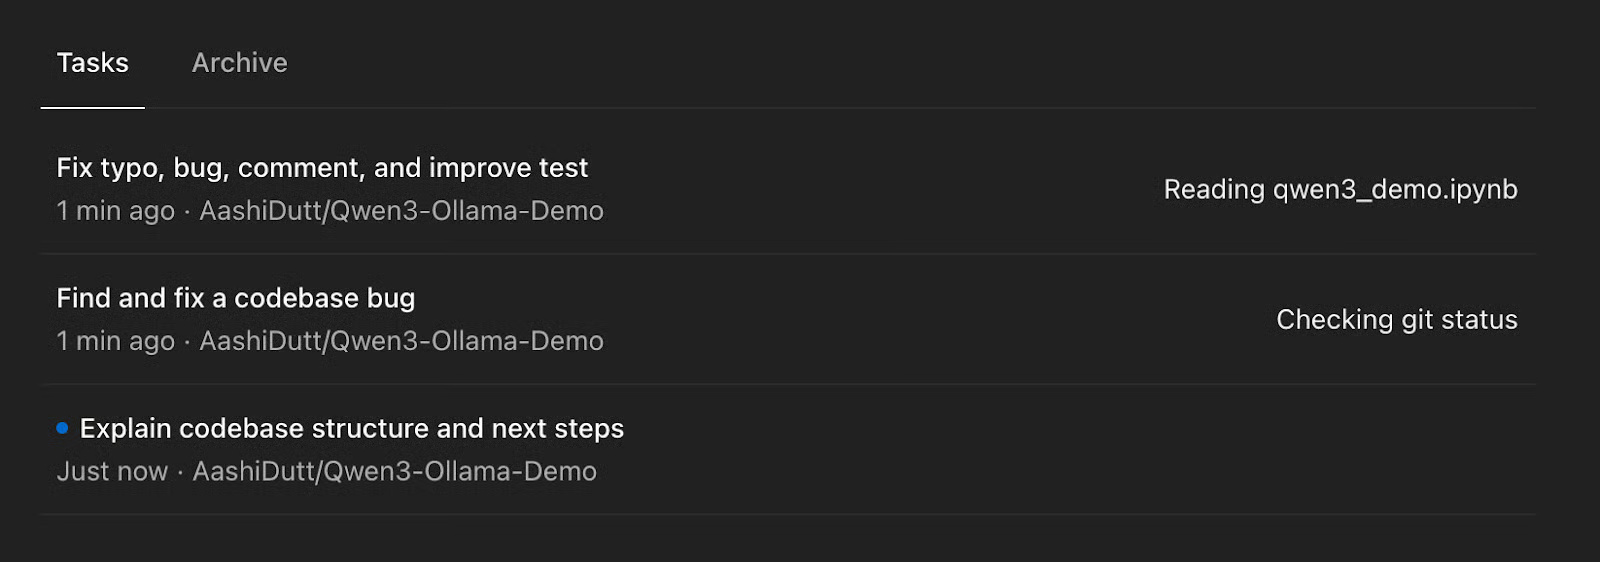
Example 1: Basic fixes and typos
Sometimes Codex breaks a request down into sub-tasks — like fixing a typo, improving a README, or writing tests — all within the same workspace.
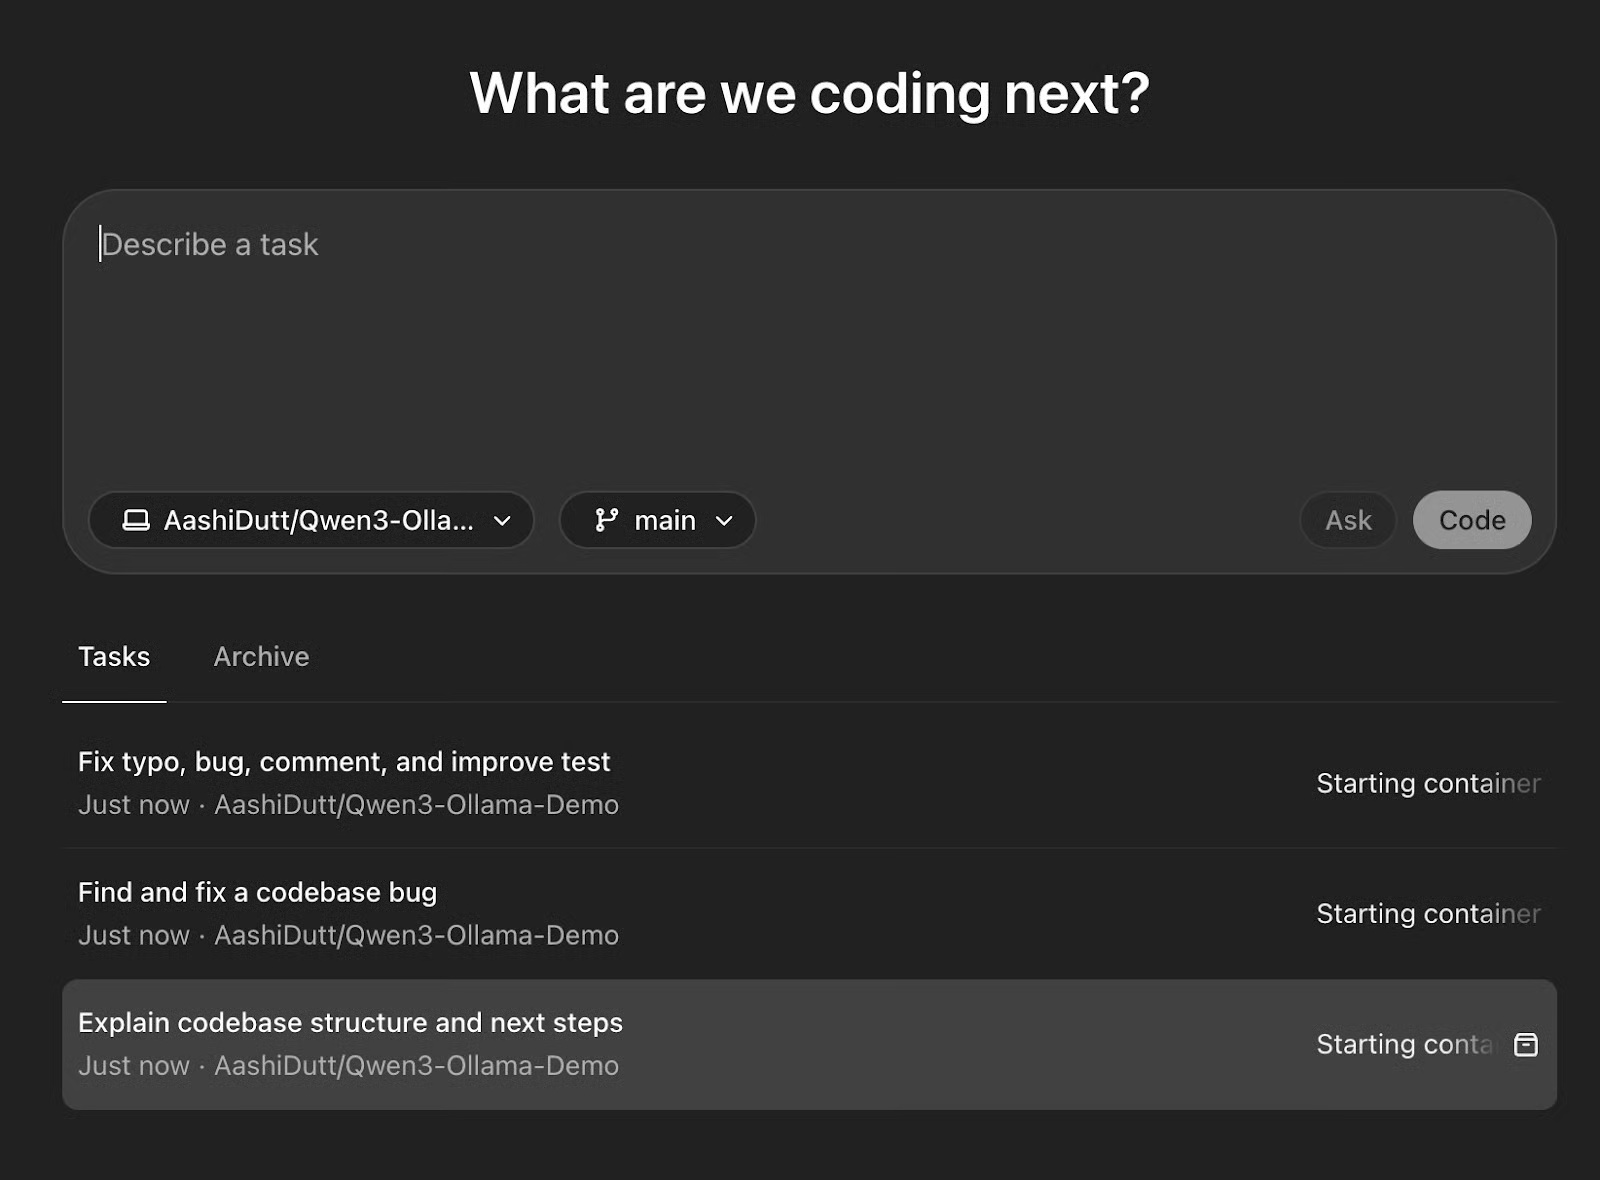
You can start a new task within an existing task based on initial reviews, request changes to an existing codebase, or ask a question via the text box. To expand a task or fix a new bug, click Code and start a new subtask directly.
Once you are happy with the changes, click Push , which will create a new pull request. After a few seconds, you can click View Pull Request to access the pull request and merge it into the main request.
Example 2: Explaining the codebase
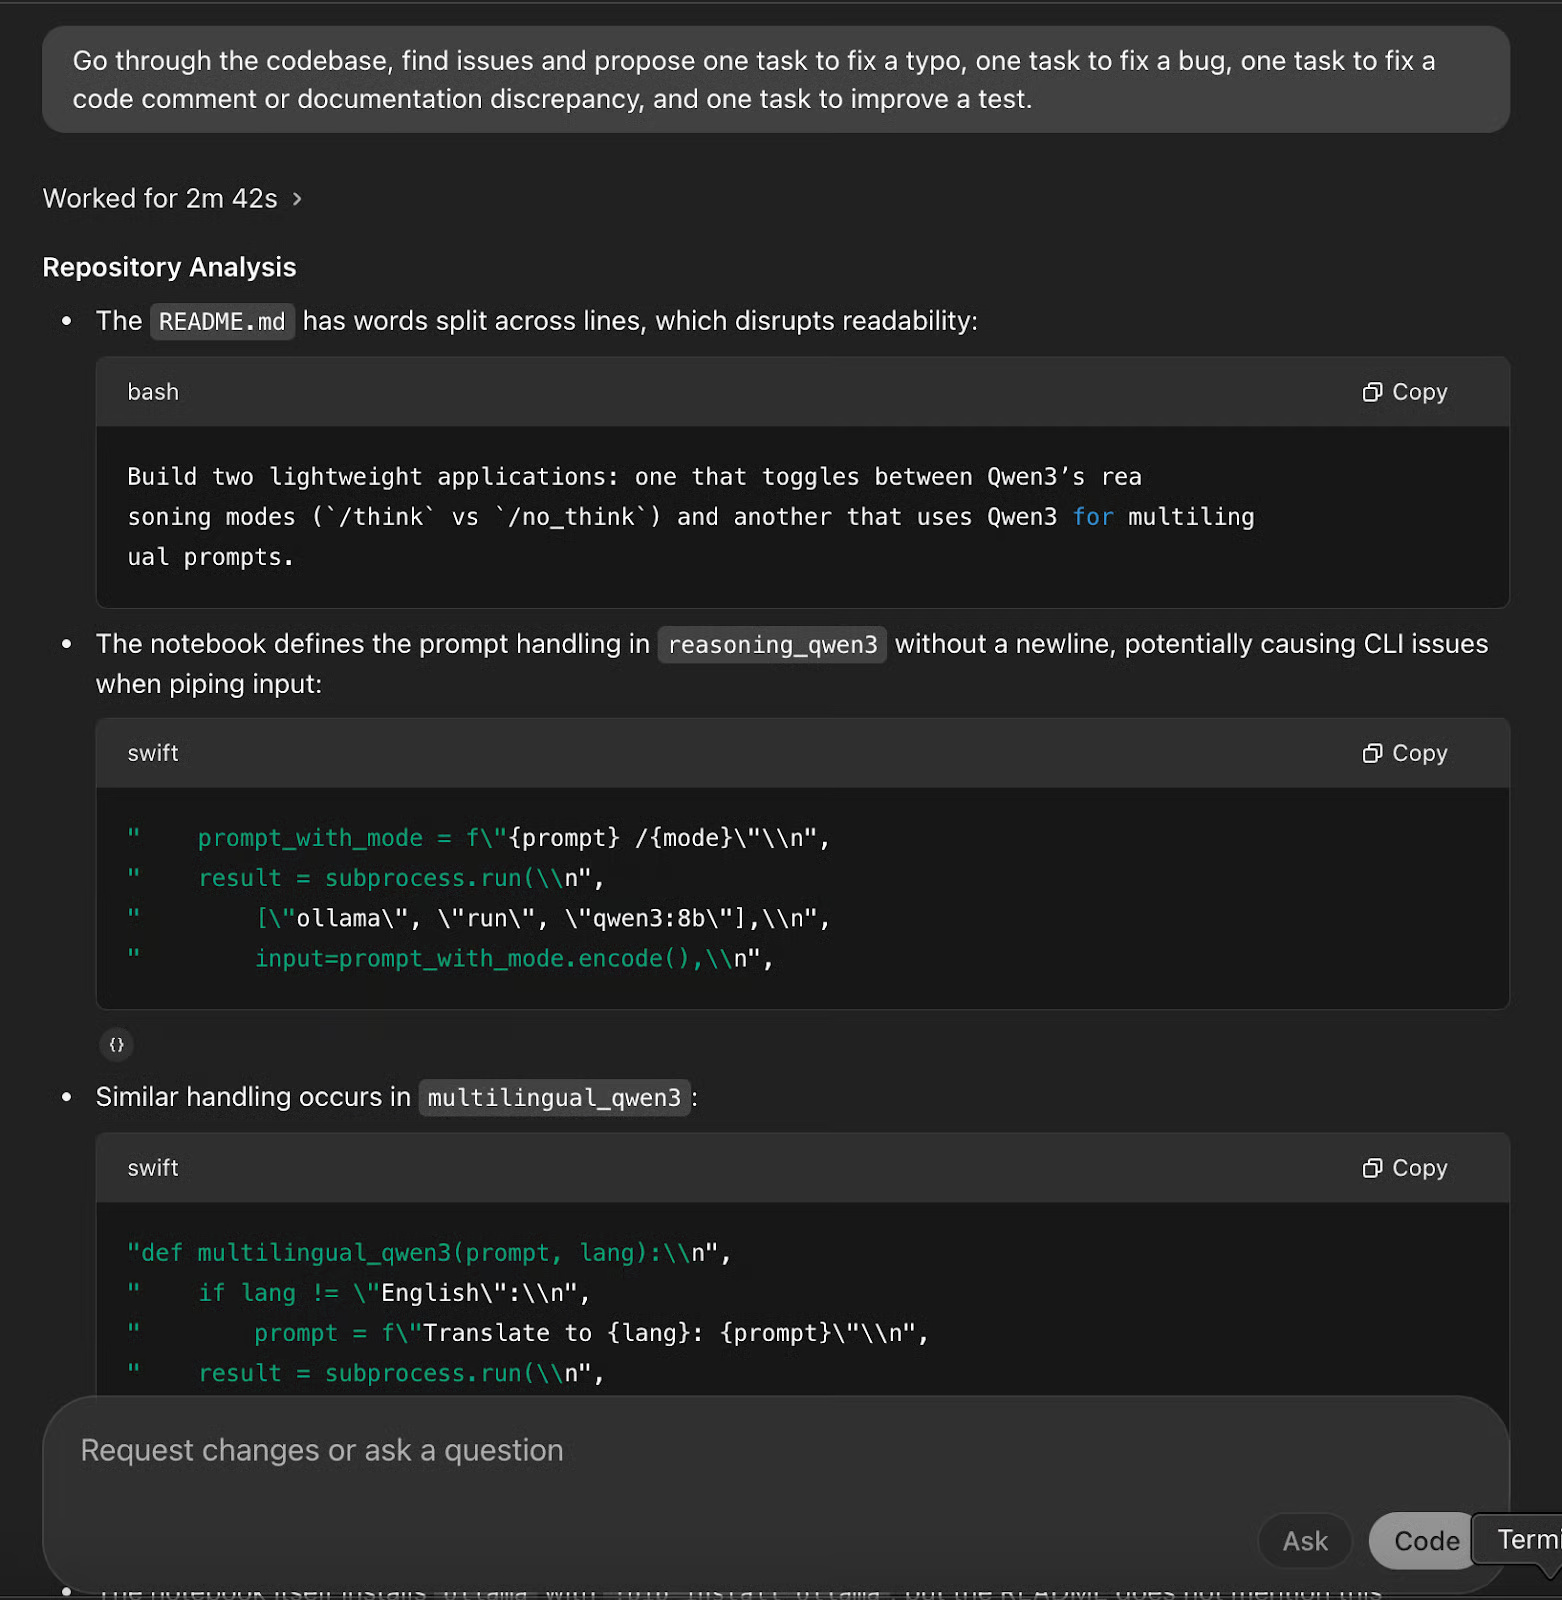
Next, use the Codex for a non-editing task: Explore the codebase and ask what you can do next. This is especially useful if you're new to a project, trying to get involved quickly, or just having trouble understanding how a certain feature works.
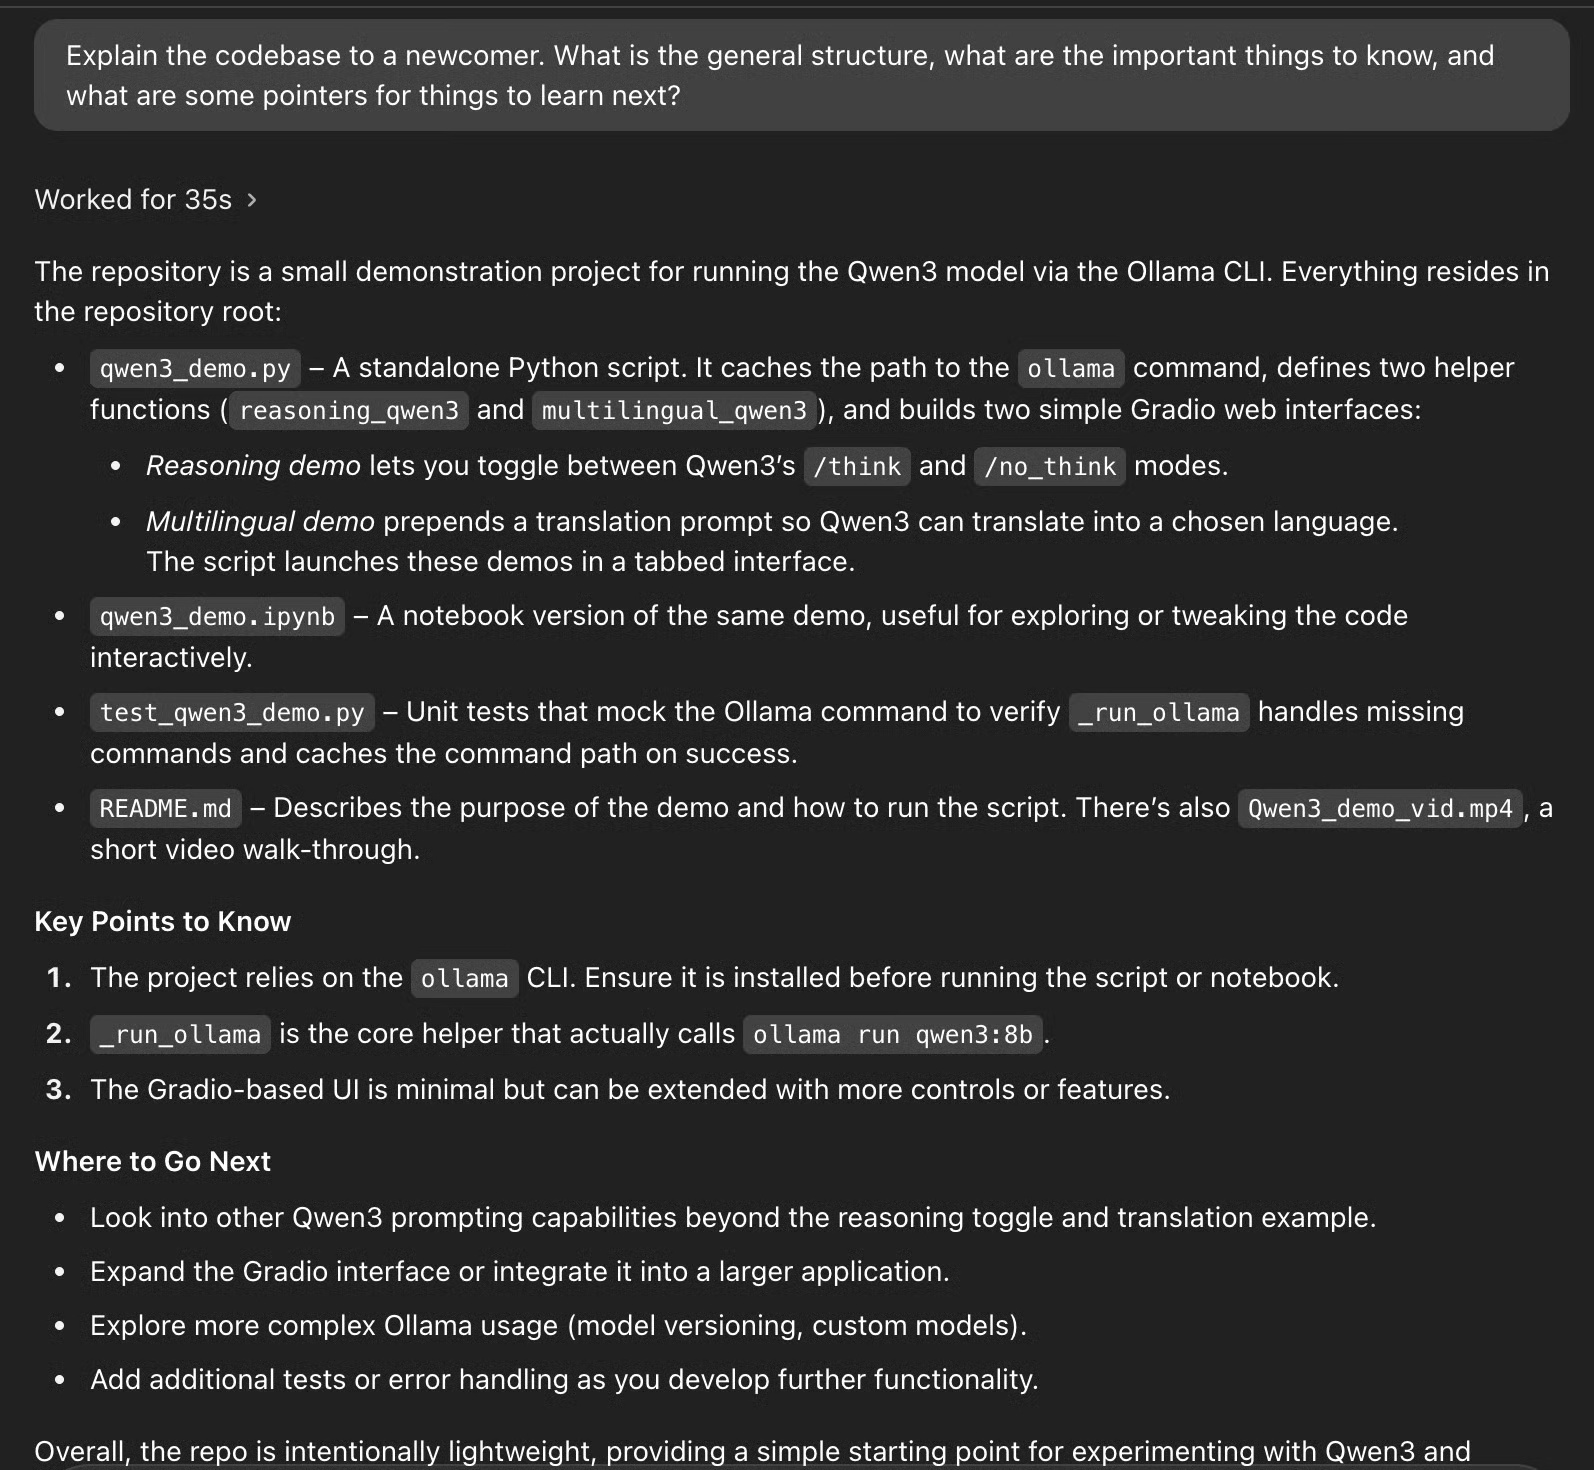
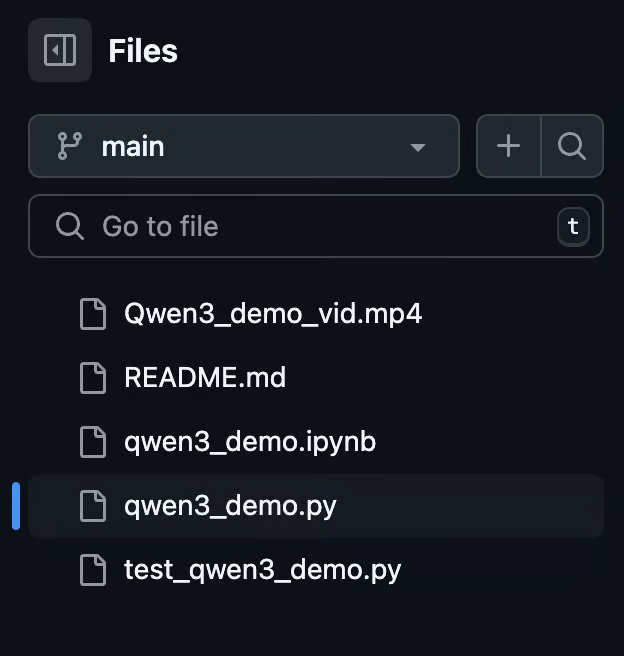
The Codex has guided the project and provided a clear, beginner-friendly breakdown of the structure of the codebase. Instead of simply listing the files, the Codex has grouped them by purpose:
- It highlights that qwen3_demo.py is the main script, which initializes two Gradio-based interfaces - one for switching reasoning modes and one for multilingual translation.
- It identifies qwen3_demo.ipynb as an alternative to the interactive notebook.
- It points to test_qwen3_demo.py for unit testing and README.md for documentation and video tutorials.
Additionally, the Codex lists 'key points to know,' such as dependencies (the Ollama CLI), the role of the _run_ollama function, and tips for extending the interface. It even suggests next steps, such as exploring model versions, improving the UI, and adding error handling.
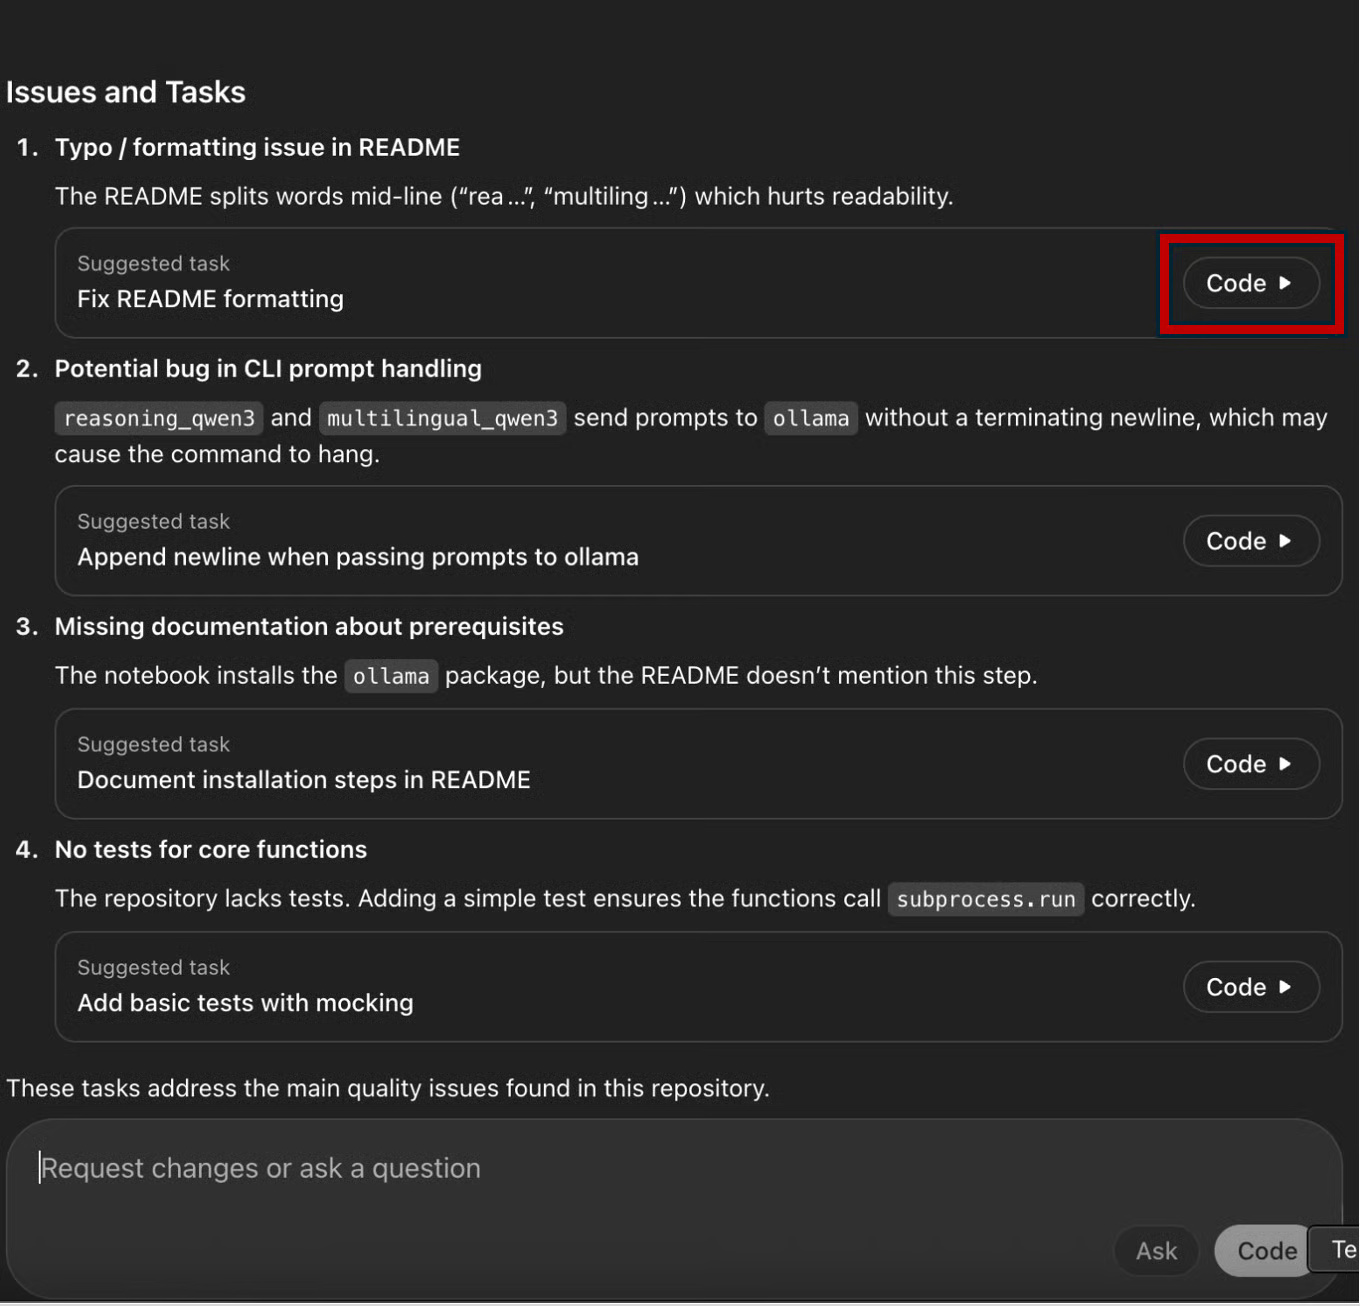
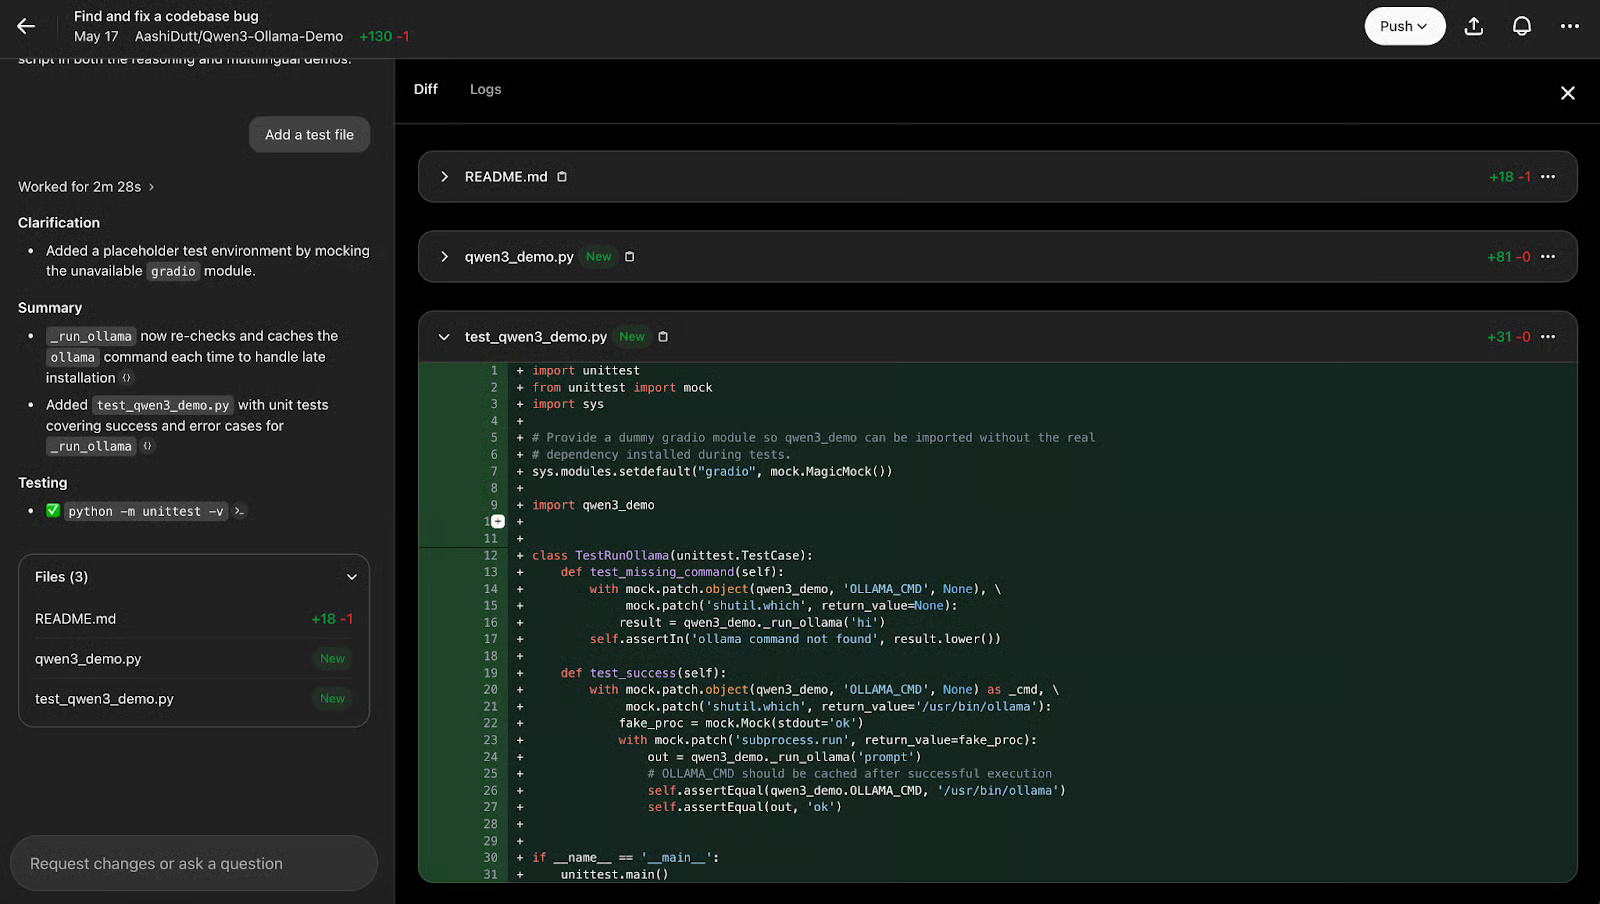
Example 3: Find and fix errors
Codex can scan your entire codebase, identify errors, suggest fixes, and show you previews of the changes. It's similar to reviewing code changes on GitHub.
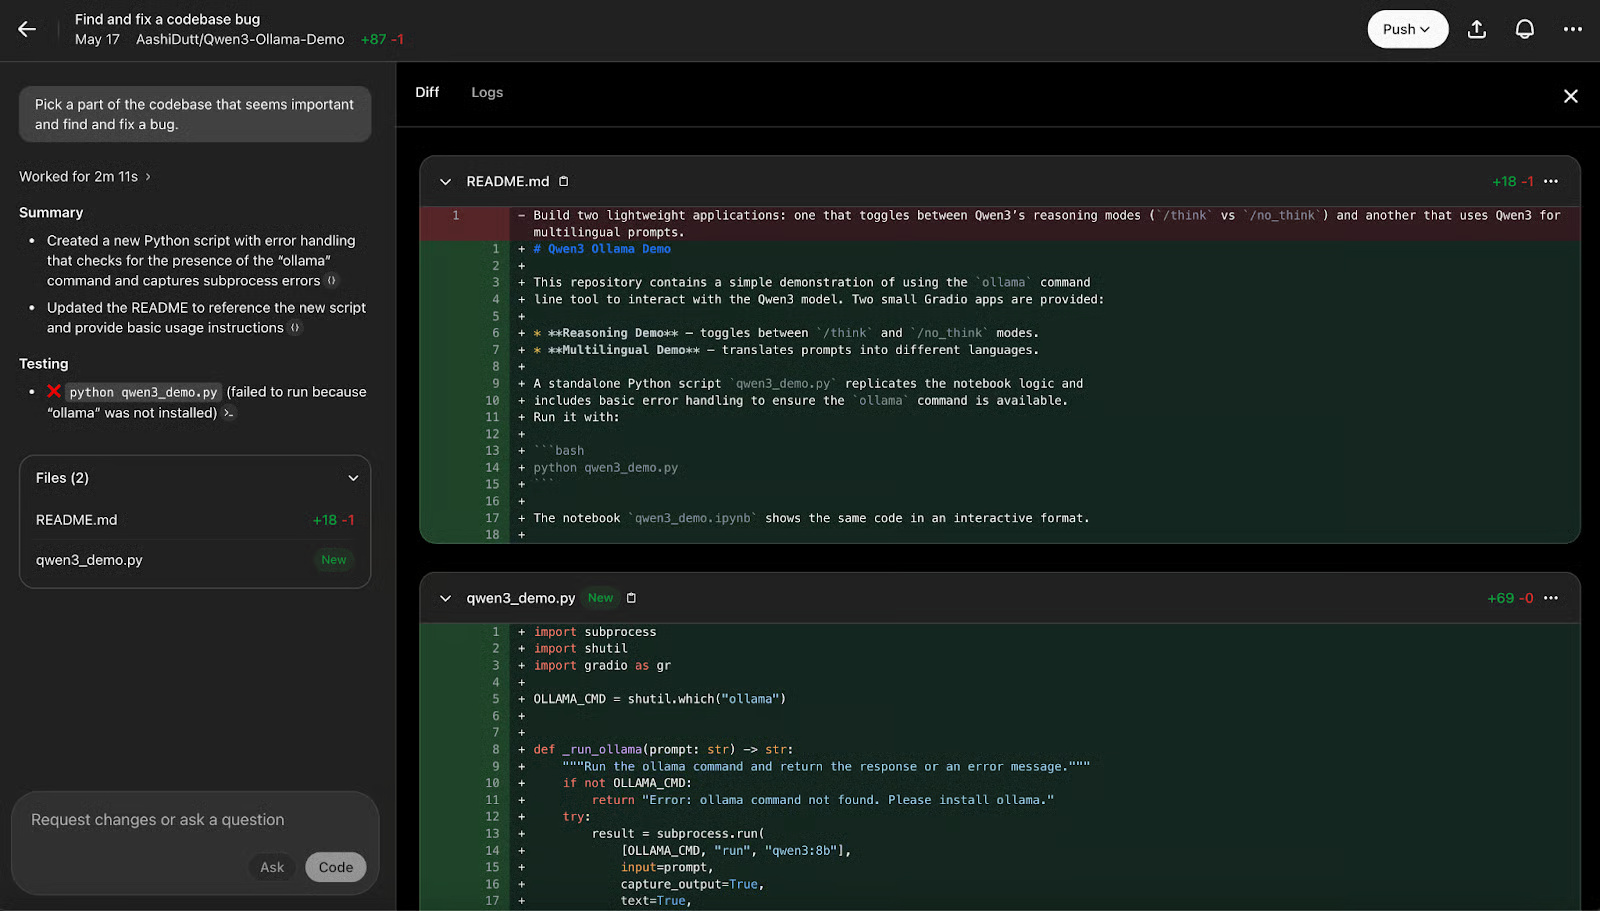
You can review the logs to understand the background process for the changes made by clicking Logs .
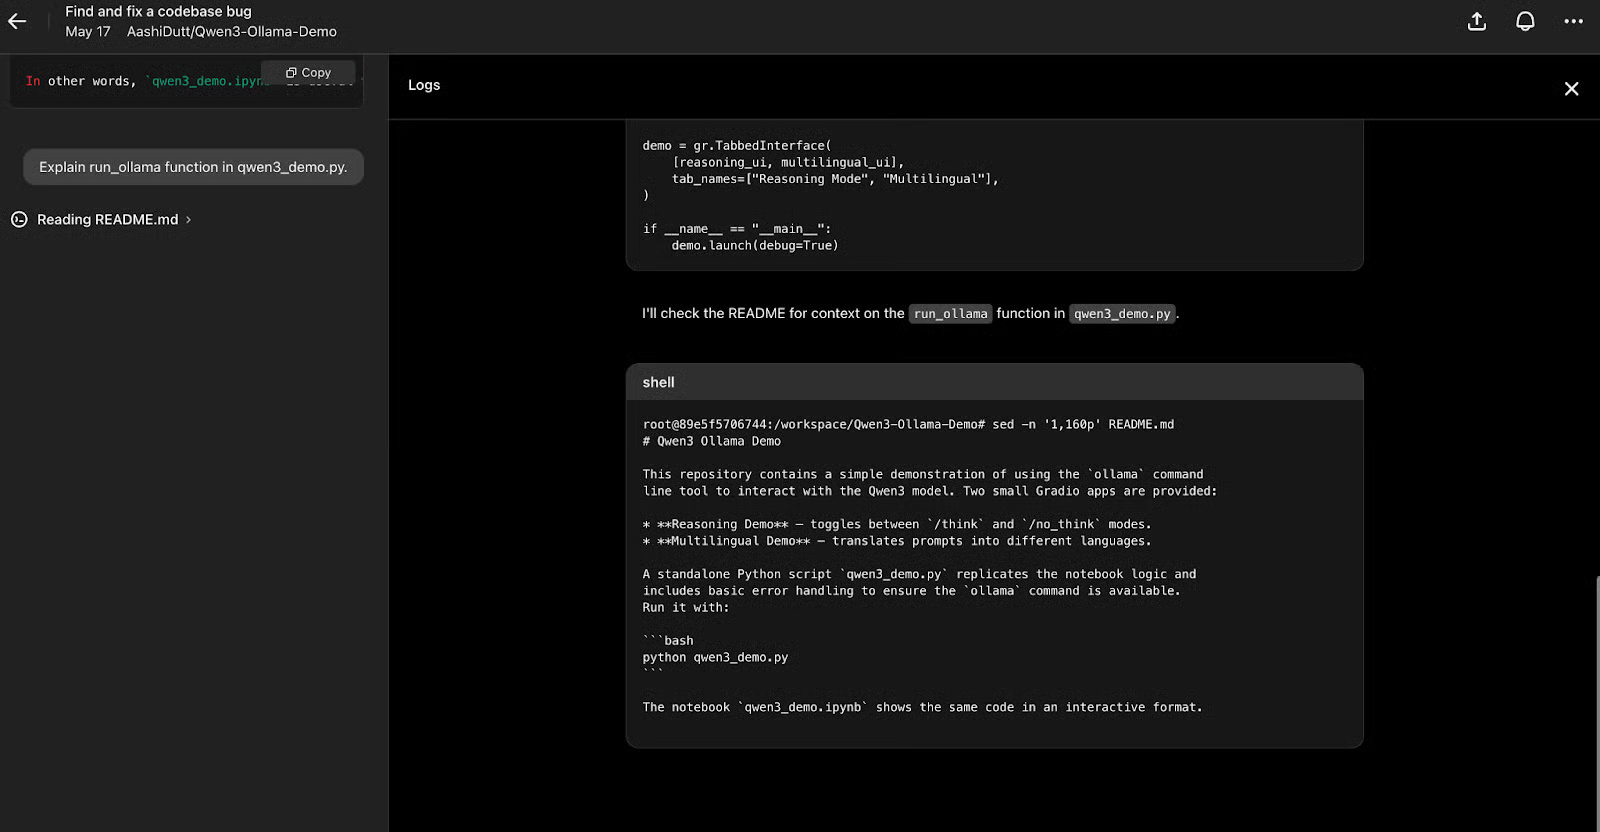
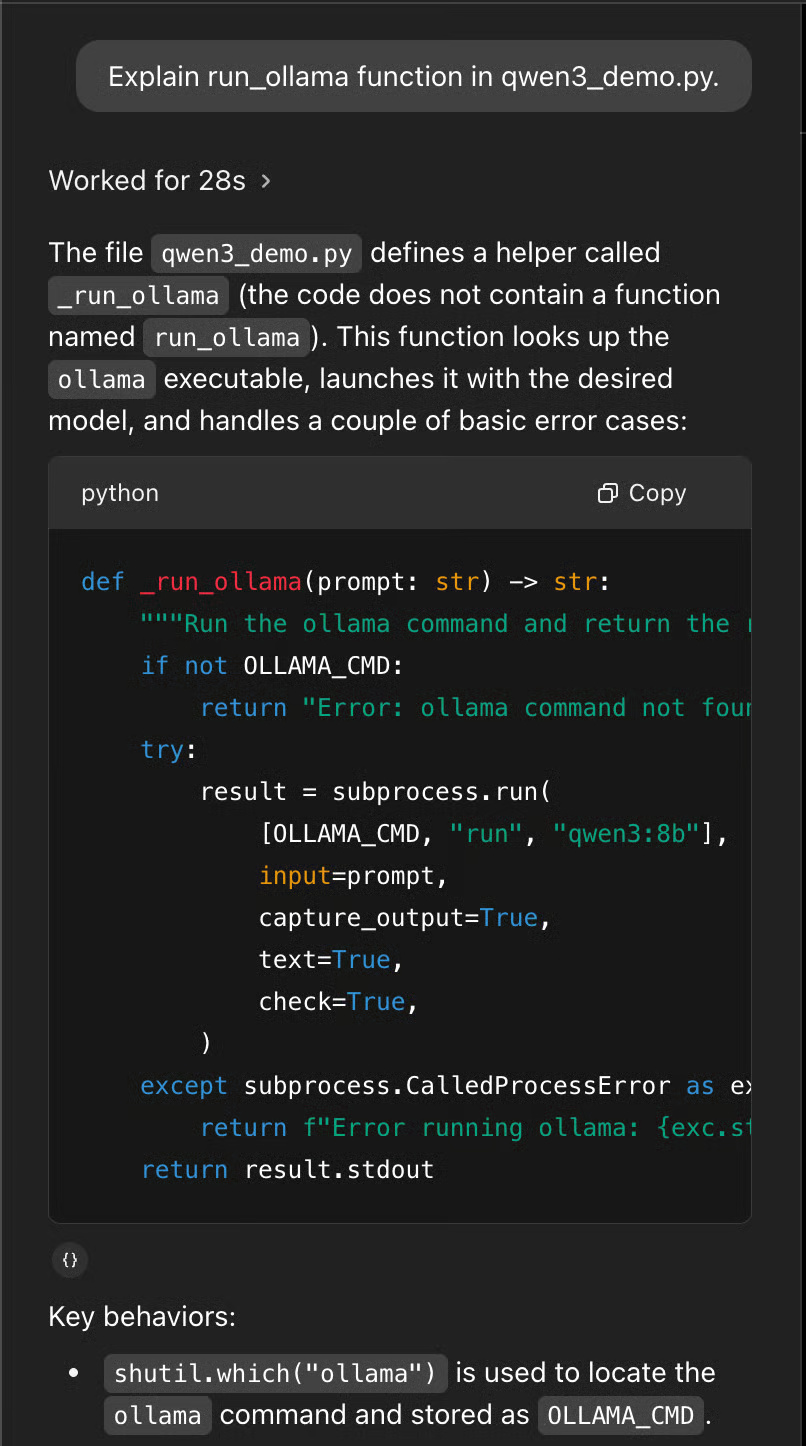
Codex returns a summary of the changes made, along with the files created or affected by those changes. You can also ask questions about the changes or request that Codex write new code to improve the current implementation.
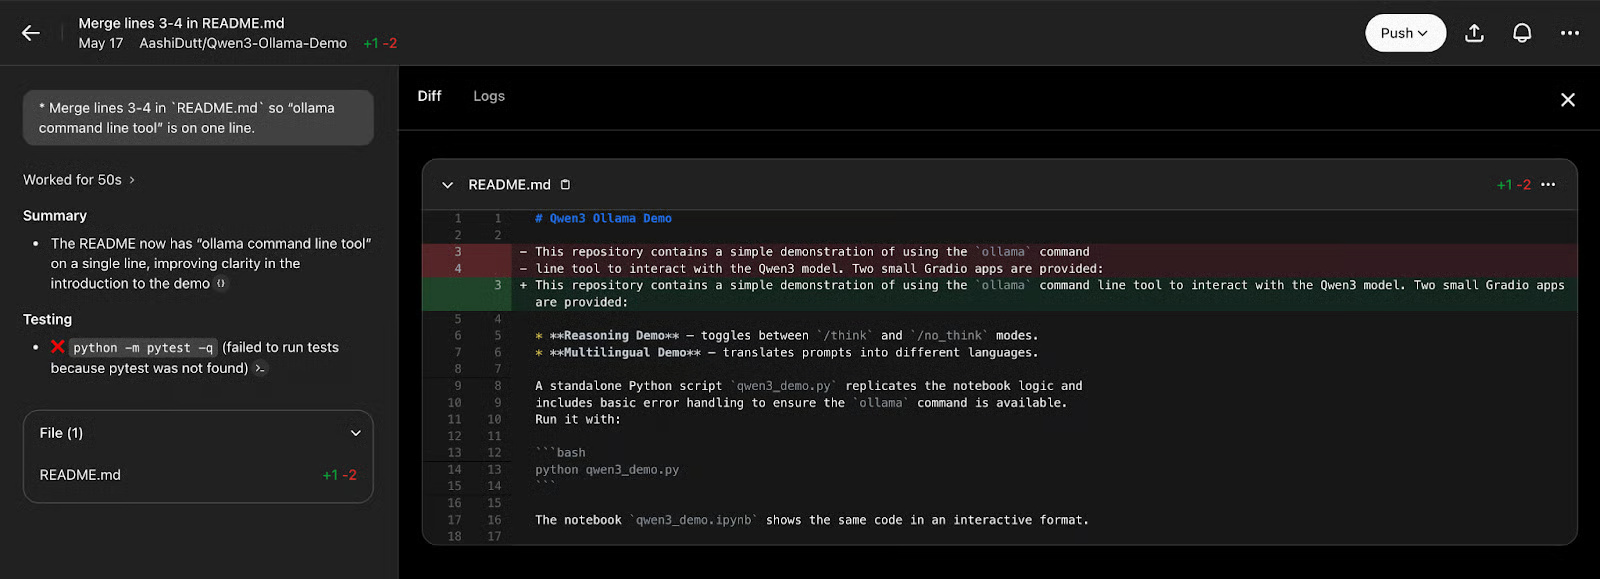
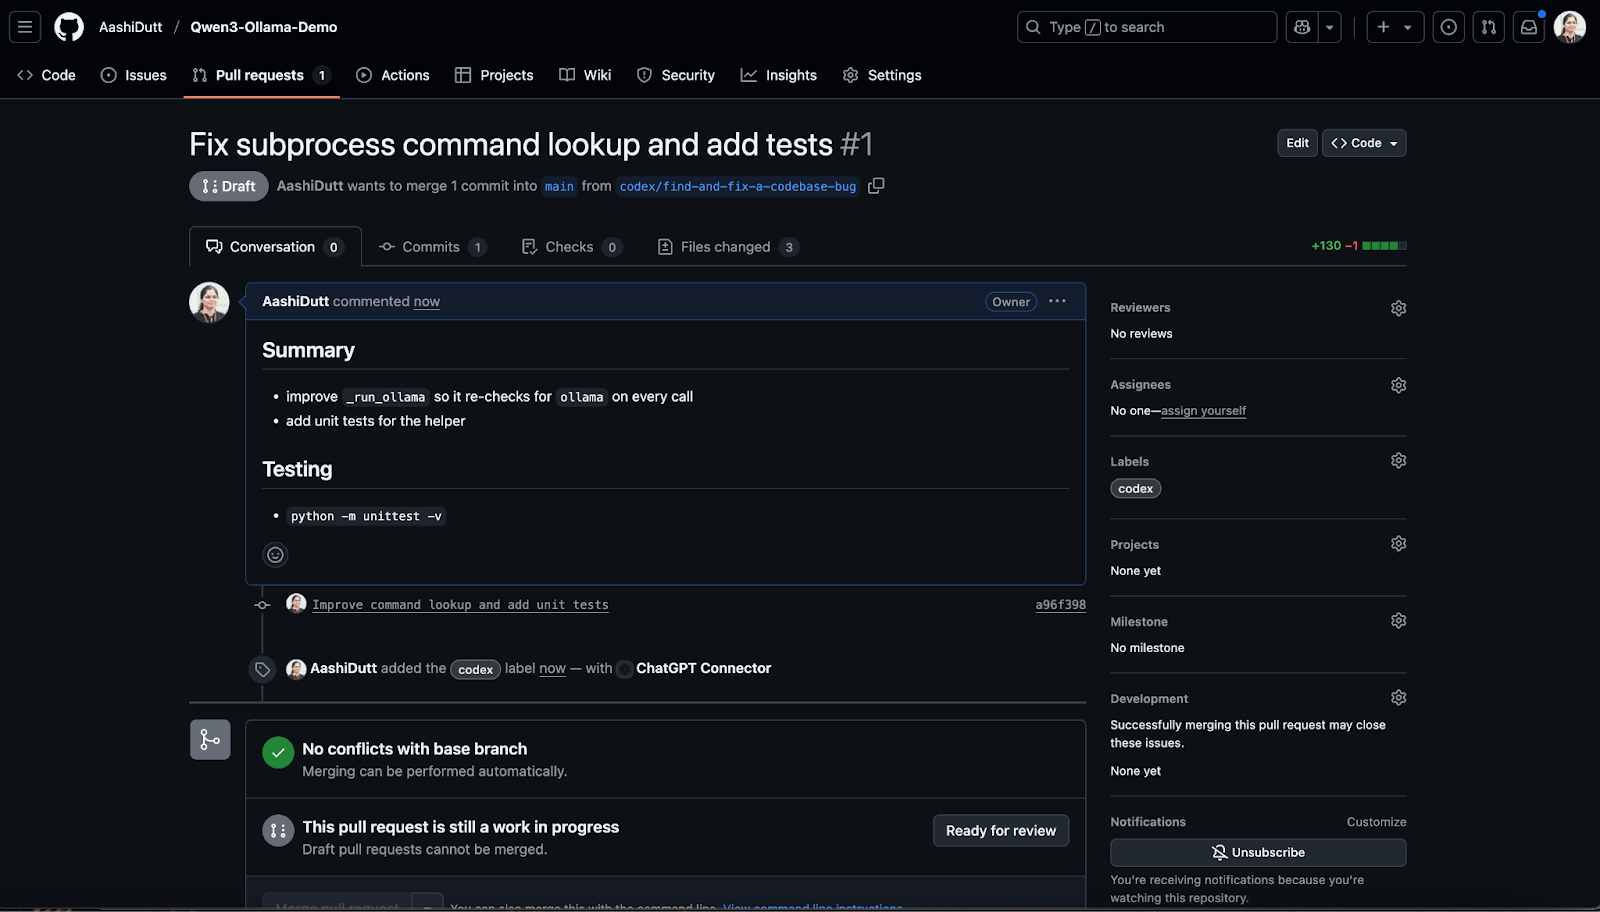
Once you are satisfied with the code fixes, click Push and Create New PR to open a new pull request.
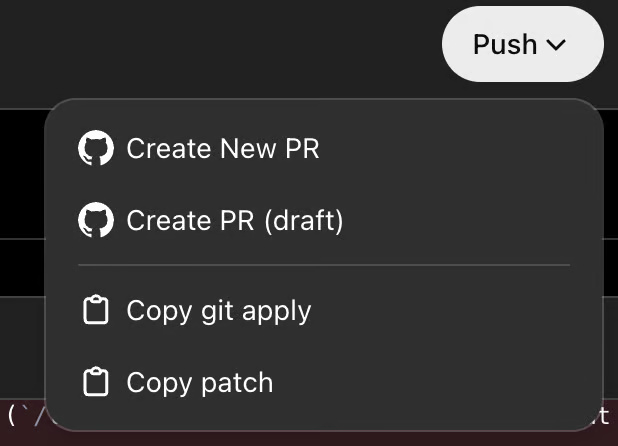
After a few seconds, you can click View Pull Request to access the pull request and merge it into the main request.

Codex helps merge changes with just a few clicks.
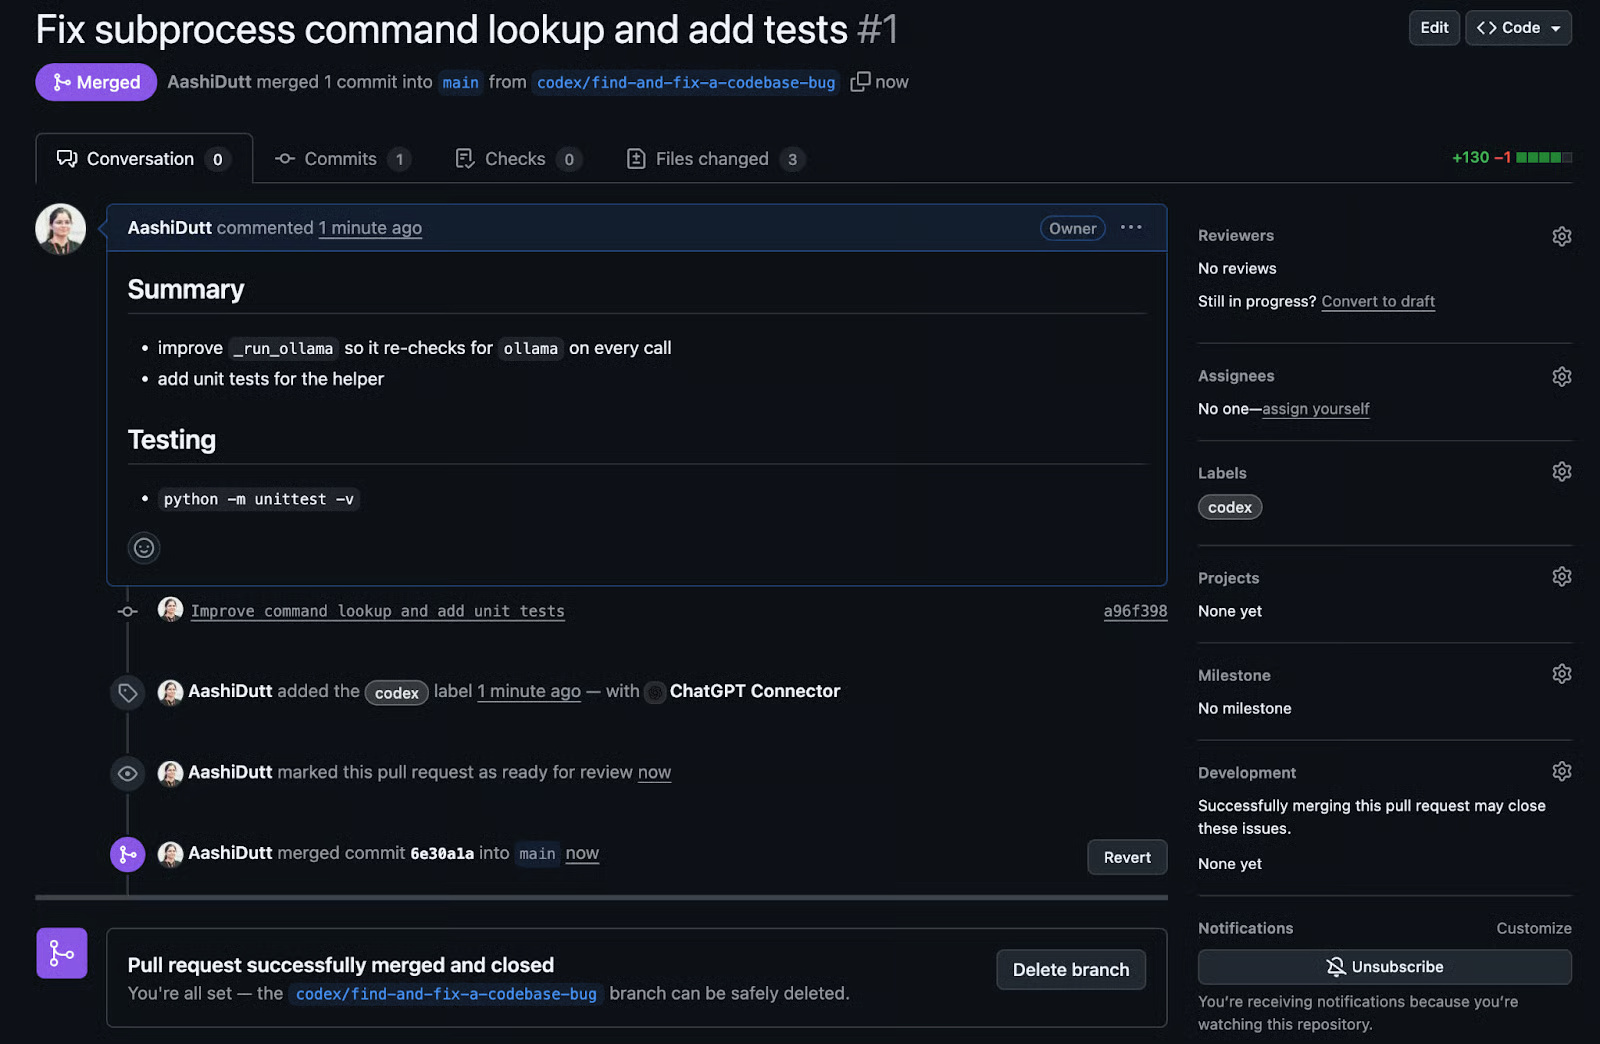
Main files are updated seamlessly on the repository.
- 5 exciting projects to help you explore the power of the OpenAI Codex.
- OpenAI Codex Officially Launches Globally, Adds Slack Integration and Codex SDK
- Testing Claude Code, Codex, and Antigravity on a real-world electronics project: What were the results?
- OpenAI Launches GPT-5-Codex: Upgrading Codex with Dynamic Thinking, Enabling More Powerful AI Programming
- How to use OpenAI Codex directly in Google Chrome
- 5 tips to turn OpenAI Codex into a more powerful AI Coding Agent
- How to enable and use the GPT-5.5 Codex in Cursor (detailed instructions)
- Based on GPT-3, they have developed a tool that can turn your commands into lines of code
- What are Subagents? A comparison of OpenAI Codex, Claude Code, and Gemini CLI.
- Existing OpenAI models and their best uses.
- 5 exciting projects to help you explore the power of the OpenAI Codex.
- What are the advantages of the Codex's Plan Mode?
- Why should the Claude Code be replaced by the Codex?
- Testing Claude Code, Codex, and Antigravity on a real-world electronics project: What were the results?
- How to run an AI coding agent safely?
- What are Subagents? A comparison of OpenAI Codex, Claude Code, and Gemini CLI.
- 5 tips to turn OpenAI Codex into a more powerful AI Coding Agent
- Reasons why the Claude Code should be replaced by the Codex.
- Is the Codex or Claude Code better for AI in programming?
- OpenAI Codex Officially Launches Globally, Adds Slack Integration and Codex SDK
-
 5 exciting projects to help you explore the power of the OpenAI Codex.
-
What are the advantages of the Codex's Plan Mode?
-
Why should the Claude Code be replaced by the Codex?
-
How to use OpenAI Codex directly in Google Chrome
-
5 tips to turn OpenAI Codex into a more powerful AI Coding Agent
-
Reasons why the Claude Code should be replaced by the Codex.
 5 exciting projects to help you explore the power of the OpenAI Codex.
 What are the advantages of the Codex's Plan Mode?
 Why should the Claude Code be replaced by the Codex?
 How to use OpenAI Codex directly in Google Chrome
 5 tips to turn OpenAI Codex into a more powerful AI Coding Agent
 Reasons why the Claude Code should be replaced by the Codex.