What is AMD Radeon installation?
If you have a gaming computer and decide to choose AMD as a graphics card, you will be familiar with Radeon Settings (installing Radeon) - formerly known as AMD Catalyst Control Center (AMD Catalyst Control Center). For most people, this may be an area that doesn't often touch and often allows the game to decide which graphics settings are best to use.
However, use it wisely, and this tool can increase your gaming experience by several steps. So, to help you, here is a list of all the main features you'll find in Radeon Settings, focusing specifically on "Gaming" and "Display".
The main Radeon installation
- The Adrenalin Edition feature
- AMD Link
- Radeon Overlay
- Connect
- Screen setting
- AMD FreeSync
- Virtual Super Resolution (Super-virtual resolution)
- GPU Scaling (GPU Balancing)
- Scaling mode (Extended mode)
- Settings for gaming in Radeon
- Anti-aliasing mode (Mode for removing jagged images)
- Anti-aliasing Method (Anti-aliasing method)
- Morphological Filtering (MLAA)
- Anisotropic Filtering - Anisotropic Filtering
- Quality texture filter
- Optimize surface format
- Vertical Refresh
- OpenGL Triple Buffering
- Shader Cache
- Tessellation mode
- Energy efficiency
- Control target frame rate
The Adrenalin Edition feature
As of December 2017, Radeon Settings has a bunch of new handy features, thanks to the 'Adrenalin' update. Here are the best features among them:
AMD Link
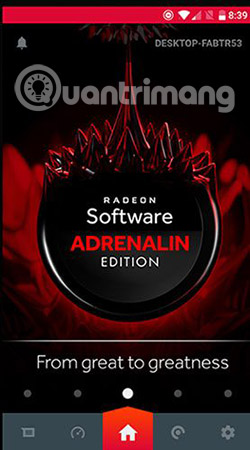
Besides the Notifications option on the main screen of Radeon Settings, there is a new " AMD Link " tab. This allows you to synchronize Radeon Settings and GPU Monitoring with the AMD Link application on your phone, so you can keep track of things like the fan speed, temperature and frame rate of the GPU. You can even use your phone to record gaming using ReLive!
Radeon Overlay
By pressing Alt + R by default, you can display a new layer that allows you to change your graphics settings, record your game footage, and enable frame rate control in Radeon.
Connect
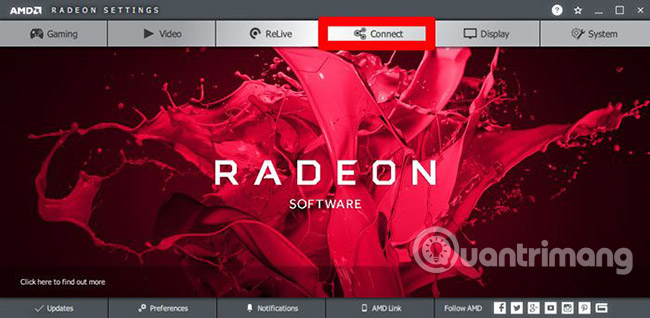
A new tab on Radeon Settings ' main screen is ' Connect ', which is basically a tool to manage all the scenes you shoot using ReLive. Share your content, edit it, and keep tabs on it in this handy new interface.
Screen setting
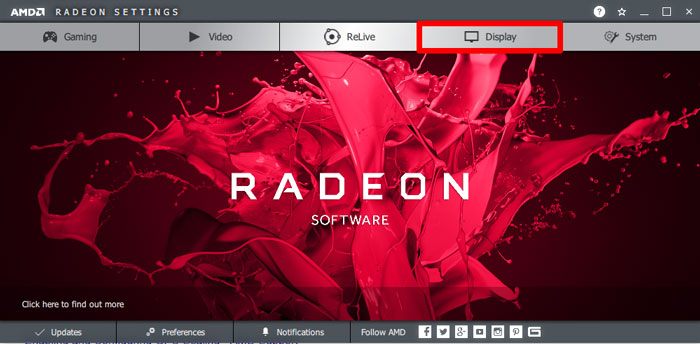
In the Radeon Settings menu, click 'Display' and it will take you to the settings related to your screen. Here is everything you need to know about them.
AMD FreeSync
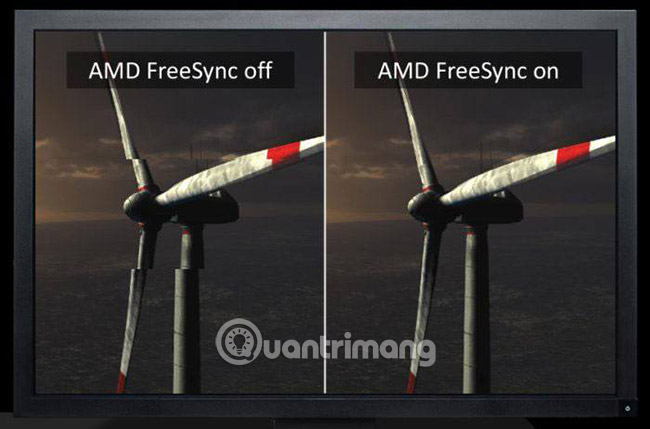
According to AMD's answer to Nvidia G-Sync, this "adaptive sync" technology is integrated into several GPUs and monitors. It synchronizes the refresh rate of the screen and graphics card, adjusts the screen's refresh rate to match the graphics card. Think of it as a very powerful V-Sync version (you can read more below).
Virtual Super Resolution (Super-virtual resolution)
This is from AMD's preferred replacement for 'downsampling' (lowering the sampling frequency). This opens up a higher resolution than the screen's ability (for example, 4k for a 1080p screen), then reduces the resolution to suit your screen size, creating an image The image is sharp and less prone to breakage.
GPU Scaling (GPU Balancing)
This setting uses your graphics card (instead of the screen) to match the resolution of anything running on the screen. For most gaming graphics cards, this is a better option than to have the screen perform the job itself and will make the image clearer.
Scaling mode (Extended mode)
In most cases, you will use the full size of the screen, but if you are playing a game with an aspect ratio of 4: 3, then forcing the game screen to fit to the full size The screen will relax and deteriorate the image. Maybe that doesn't bother you (in this case " Full panel ") but you should choose the " Preserve aspect ratio " option here.
Settings for gaming in Radeon
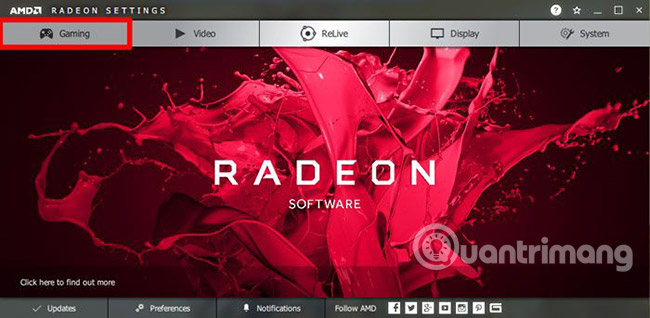
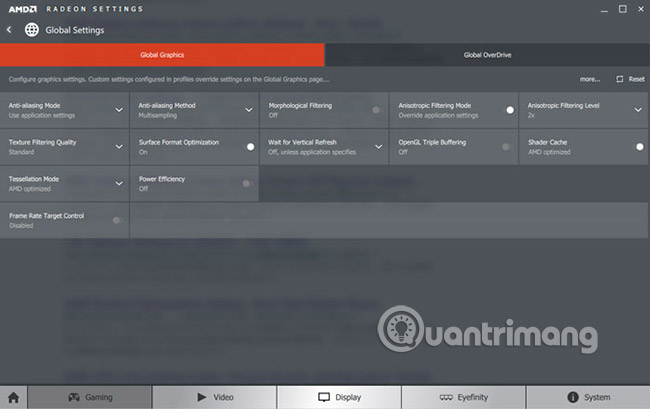
These settings are only applicable when you play the game. You can apply them to individual games, by clicking on the game mentioned in the Gaming tab or if you want to apply certain settings on all your games, click ' Global Settings ' .
Anti-aliasing mode (Mode for removing jagged images)
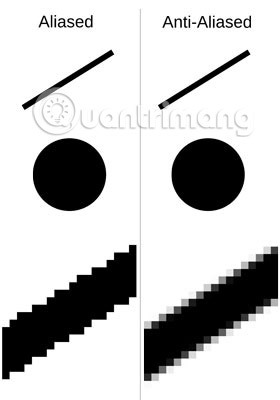
Especially on lower resolution screens, diagonal lines in video games (made up of individual square pixels) may look jagged and like a staircase, instead of smooth and straight. Anti-aliasing mode (AA) solves this problem by filling in the gaps in these jagged lines effectively to smooth them.
If you select the ' Enhance application settings ' option, the application will use what is called ' Enhanced Quality Anti-Aliasing ', which will layer your in-game AA settings to make the edges smoother. If you select " Override application settings ", this setting will use the settings listed below.
Anti-aliasing Method (Anti-aliasing method)
There are three anti-aliasing methods that you can use in Radeon Settings:
- Multisampling (MSAA) - Easiest on your GPU. MSAA reduces aliasing only on parts of the screen that really need it, usually along the edges of the object.
- Adaptive multisampling (Adaptive MSAA) - Medium. It reduces the jagged lines on the edges of objects with transparent elements (barbed wire fences, etc.).
- Supersampling (SSAA) - The strongest AA method (and requires graphics). It reduces aliasing on the entire screen.
Morphological Filtering (MLAA)
A specific AMD anti-aliasing method claims to have the same effect as SSAA but is less affected. In fact, its performance changes in every game, so it's worth experimenting with, to see where and when it works best.
Anisotropic Filtering - Anisotropic Filtering
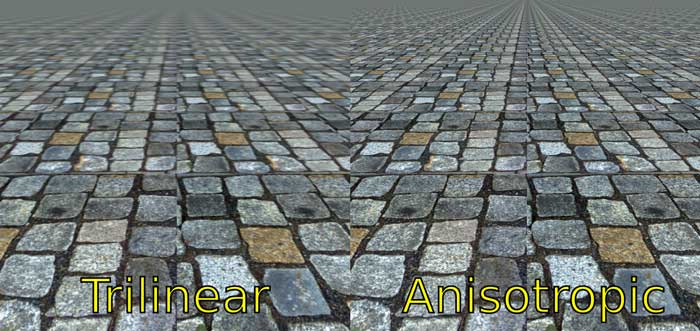
Like the anti-aliasing feature reduces aliasing on the edges, this improves the jagged lines in the structure (making the image more realistic, not just like an object). It also keeps the structure looking quite well according to the distance, not allowing them to become blurry and preventing textures from being jagged when viewed from tight corners.
If you enable this feature, you will get 2x Anisotropic Filtering options, 4x, 8x and 16x, even the highest level can run quite well on modern graphics cards.
Quality texture filter
This changes the texture quality to improve the smoothness and performance of the game. Its effect is negligible compared to other texture options and the popular opinion in the current gaming community is to set it to 'Performance'.
Optimize surface format
A somewhat outdated setting, this was used a few years ago on games to reduce graphics quality and improve performance, but there was not much effect on modern games and GPUs. You will definitely not miss anything if you ignore it.
Vertical Refresh

Here's a bit of a roundabout way for "V-Sync", which you may have heard of. If you have a game running at a higher frame rate (fps) than the screen refresh rate (Hz), you can see horizontal lines on the screen, called a tearing screen. form). V-Sync resists this by limiting the GPU's frame rate to the screen refresh rate.
OpenGL Triple Buffering
There are not too many games using the OpenGL API today, but for games that are still in use, enabling this feature along with V-Sync will allow your frame rate to change more smoothly. Therefore, the double buffer will reduce the fps speed to 30, even if it can run at 55, to compensate for the delay due to synchronization. The triple buffer will eliminate this problem, allowing the frame rate to run at any fps that your GPU can handle.
Shader Cache
Store shader for local games on your hard drive, significantly increasing load time (especially if you don't have an SSD). Warning is that this takes up a lot of hard drive space (30 GB or more).
Tessellation mode
Increase in-game graphics by breaking large polygons into smaller pieces, making the graphics smoother (like crushing pepper into pepper powder - if you like similar examples of food). ' AMD Optimized ' uses x64 tessellation, but if you choose ' Override application settings ', you can set a lower level if you think it has too much impact on performance.
Energy efficiency
It will not save you much money but this feature will reduce the clock speed on your GPU, for games with low demand, make your graphics card run smoothly when not working out. productivity. Some people have said this has a negative impact on modern games, so it is best to enable this feature only in the 'Profile' settings for older games.
Control target frame rate
Basically, limit the frame rate, make sure that your GPU doesn't work too much, such as 120fps in the old game, when your screen can only handle 75Hz or run at high frame rates in the game menus. That means your graphics card will rest more when possible, cooler and therefore extend its life longer.
Hopefully the above information will give you the confidence to test slightly more AMD settings. Remember that all of these settings can also be applied to individual games (to add a game configuration to Radeon Settings, go to Gaming -> Add -> Scan ) and what suits some games This may not work with other games.
Good luck!
See more:
- Optimize graphic display
- How to set up PC game graphics settings quickly
- How to install, use Kemulator to play Java games on your computer
You should read it
- ★ AMD Radeon RX 6600 XT: As strong as NVIDIA GTX 1080 Ti, priced at about 399 USD, released in August
- ★ How to Tweak AMD Radeon Settings for Best Gaming Performance in Windows
- ★ AMD unveils Radeon RX 6900 XT liquid cooling version
- ★ AMD launches Radeon Pro W5700, the first 7nm GPU for workstations
- ★ Leaked benchmark results of AMD Radeon RX 6700M 'Navi 22' laptop GPU