Instructions for making your own heating fan for yourself, in the coming winter
Technology people often have to sit by the computer, cold weather makes cold hands to type on the keyboard becomes very difficult. And this is a way.
Table of Contents
Technology people often have to sit by the computer, cold weather makes cold hands to type on the keyboard becomes very difficult. And this is a way.
The weather has started to change the monsoon and the outdoor temperature is getting lower. Sitting at work on a computer with cold hands, the work efficiency will be greatly reduced. Today we will show you how to make a mini fan for winter that is no longer a nightmare for your hands every time you have to work at the computer.
Prepare :
- A mini USB fan or fan type depending on your preference (Price about 50,000 VND)
- A hot scallop TEC-12706 (cost about VND 60,000)
- A heat sink aluminum plate (cost about VND 10,000)
- A bit of computer CPU heat sink glue (cost about 5,000 VND)
- A round source jack costs about (2000 VND)

Theory of heating methods:
Before embarking on our work, let's find out what " cold scallop " is and how it works. "Cold scallop" or " Peltier ", is a semiconductor component that has a single-sided cooling property, and the other side is heated when a direct current is passed . This is the kind of material that you have learned in Level 2 physics textbooks.
Its structure is quite simple, 2 copies of materials are close together, when supplying DC current to 2 polar plates, the physical phenomenon happens is that one side will heat up and the other will cool. Conversely, if 1-sided heating and 1 face cooling, at the two ends of the wire will appear 1-way current.
And now is the way to make:
Step 1 :
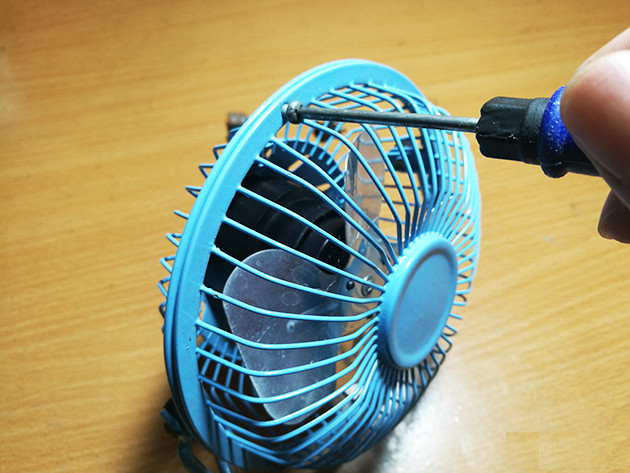
Remove the protective cage of the fan
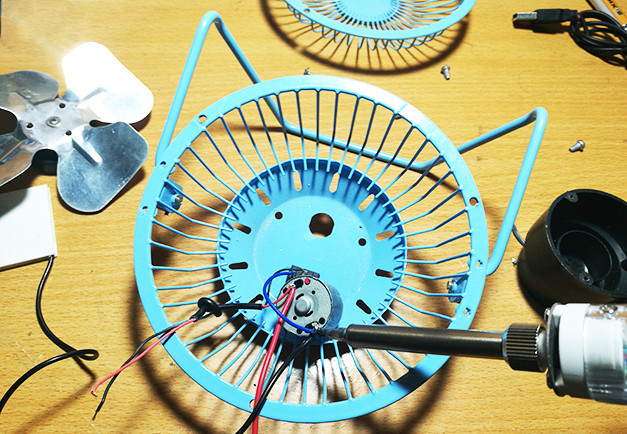
Then turn to the back of the fan to remove the engine part.
The engine has been exposed after removing the screws.
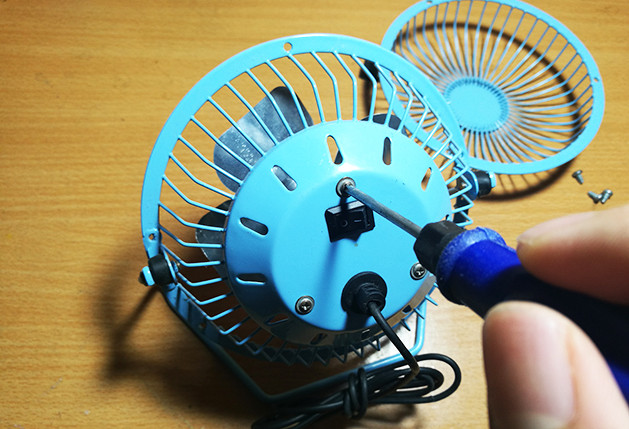
Step 2
Then cut the main power cord. We just need a short paragraph.
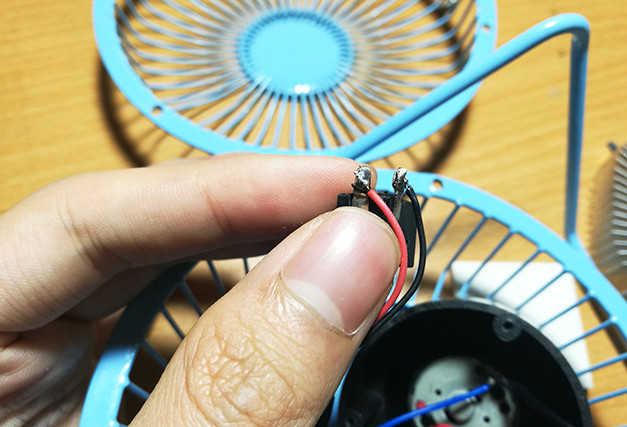
You solder this power cord to the circular power plug pin. The red wire is soldered to the pile at the back of the power jack, the light wire is colored to the pile on the side of the power jack.
After welding, you fix this power plug on the fan with candle glue.

A round hole is available on the fan body to thread the wire. We will use this hole as a hole to plug in the power.
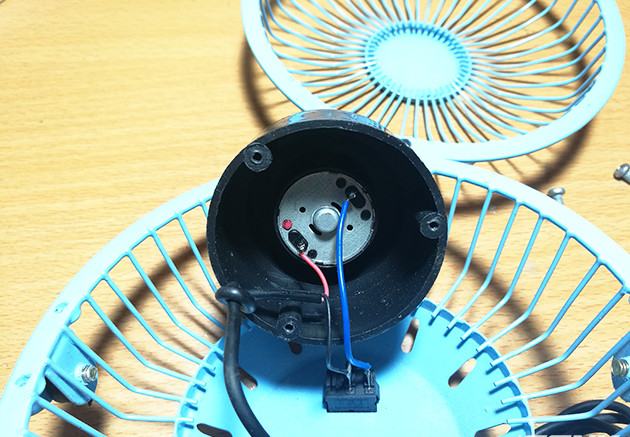
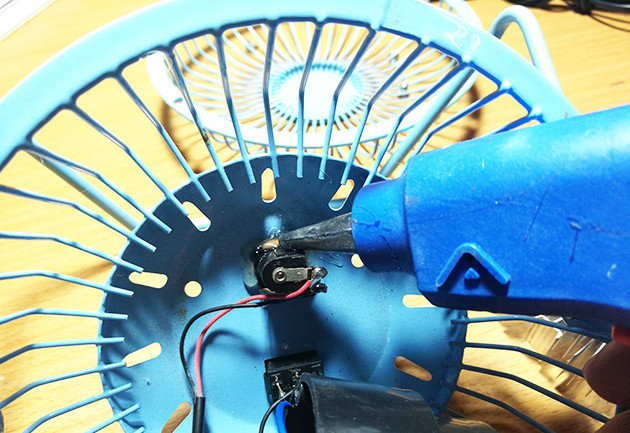
Step 3
To connect hot and cold oysters to the power source, you solder two shells of electricity to the motor.Red wire (oyster's pole) welded with red wire on the motor, black wire (oyster's cathode) welded with blue wire on the motor. So it is finished connecting the wire.
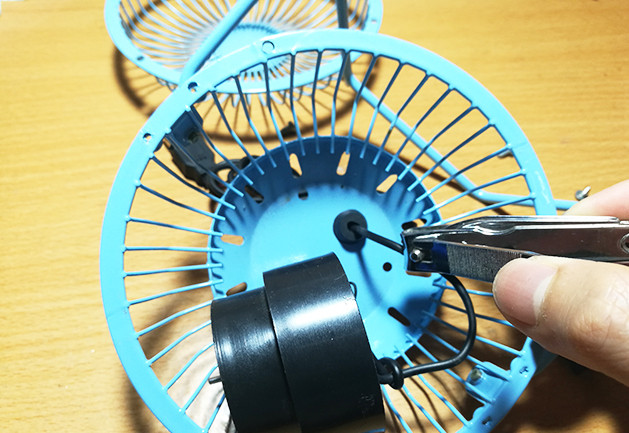
Step 4
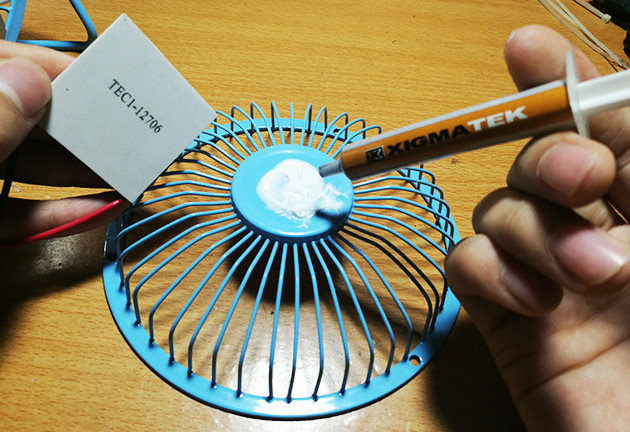
Pump a bit of heat sink glue to the cage fan then put the scallop up. You notice that the face with the word is the cold side and the face without the word is the hot face.
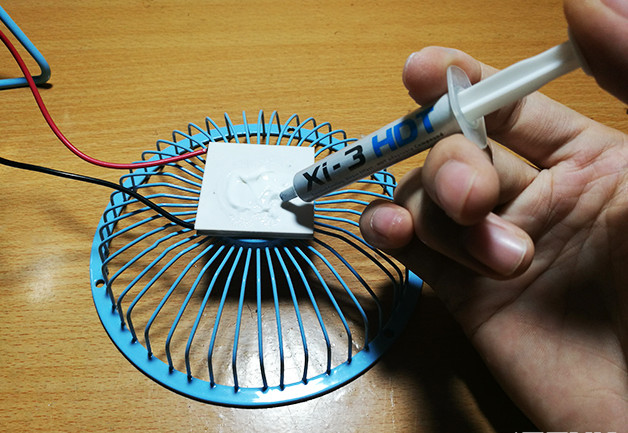
After placing the scallop, pump a little bit of heat glue onto the face without the scallop letter. Spread out and place the heat sink aluminum plate
Step 5

To fix the aluminum plate with the fan cage, you can use tight wire to tighten it.
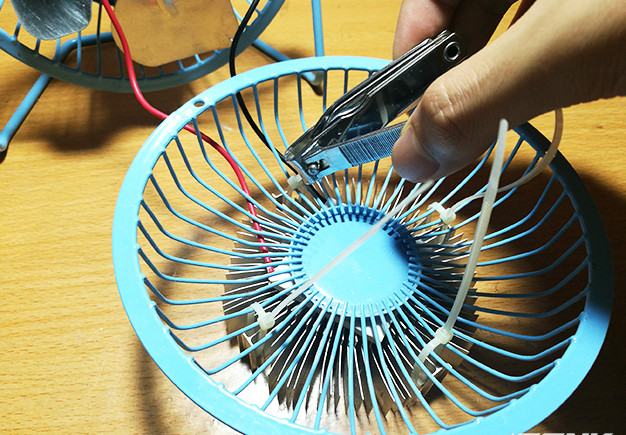
After that, you cut off the extra piece of drawstring on the inside to make it compact

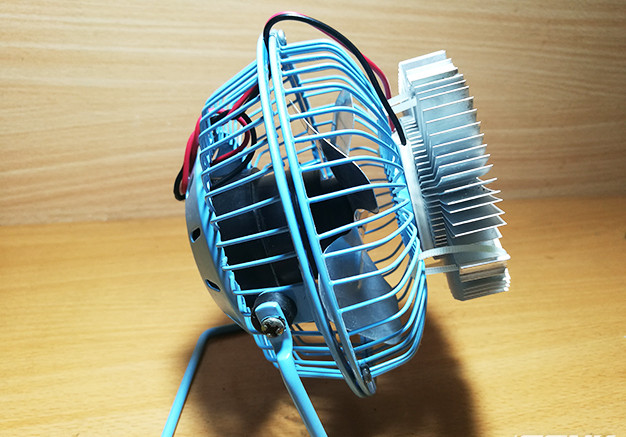
So we are done. When the fan is completed, it will look like this, it looks quite strange. When the fan is operating, warm steam will be generated from the hot side of the shell and transmitted through the aluminum radiator plate. Wind from the fan will help blow this warm air to your hand.

To use this mini fan, you need to power it. Voltage is 12V DC with current intensity of 1A to 5A . You can use adapters of Router network models for convenience.
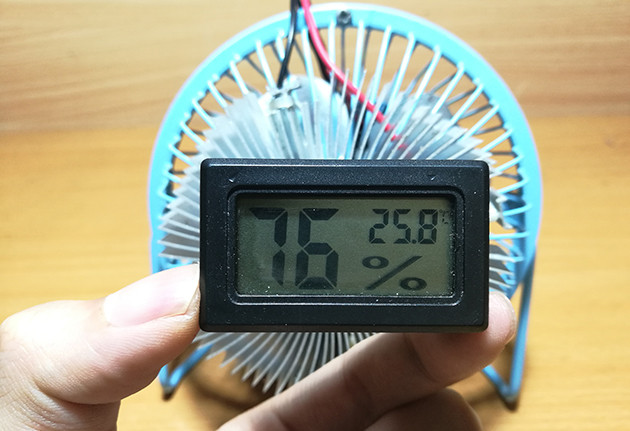
In the process of using this mini heating fan works quite effectively. Before turning on the fan, the room temperature is nearly 26 degrees C.
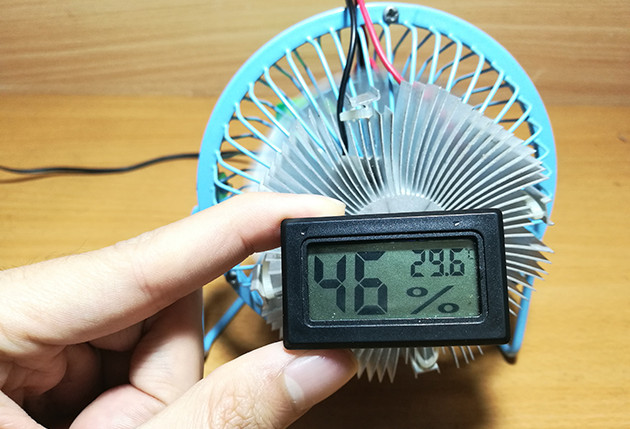
Immediately after the fan has been operating for more than a minute the pre-fan wind temperature has increased by nearly 30 degrees Celsius, the warmth is moderately pleasant.
What are you waiting for. Start working right away for me to remove the cold of this winter.
Good luck!
Was this article helpful?
Your feedback helps us improve.
Related Articles
 Make your own winter heating bag with heart-shaped warmth4 minutes read
 Things to note when using a winter heating fan5 minutes read
 Indispensable heating in winter7 minutes read
 Choose to buy a winter heating fan correctly6 minutes read
 Instructions for installing bath heating lamps and safe usage4 minutes read
 4 samples of cheap and hottest ceramic fan fans this winter6 minutes read
Reader Comments 0
Sign in with email or Google to join the discussion.