Table of Contents
You are a fan of speed games, are you tired of playing Asphalt 8 games in the usual way? Let's play Asphalt 8 in our new and exciting way below.
In the article today we will show you how to make homemade, an Asphalt 8-enabled gaming device is extremely unique and creative. This device will help you experience the feeling of being behind a real steering wheel. So why hesitate any longer, start working on making your own steering wheel right away.
Prepare:
- A Broad Arduino UNO R3 (Price about VND 180,000)
- One Servo (about 50,000-180,000 VND)
- A 10K variable resistor (cost about 10,000 VND)
- A Broad test circuit (cost 20,000 VND)
- Duc - Cai and Cai - Cai connecting wires (cost about 7000 VND)
You can replace the Arduini UNO R3 with the Broad Arduino mini or Nano for cheap, the price is only about 50,000 VND, and you can also connect the wires directly for long term use without Broad circuit test. Thus, the lowest cost for making this toy is only about 100,000 VND)

Step 1 :
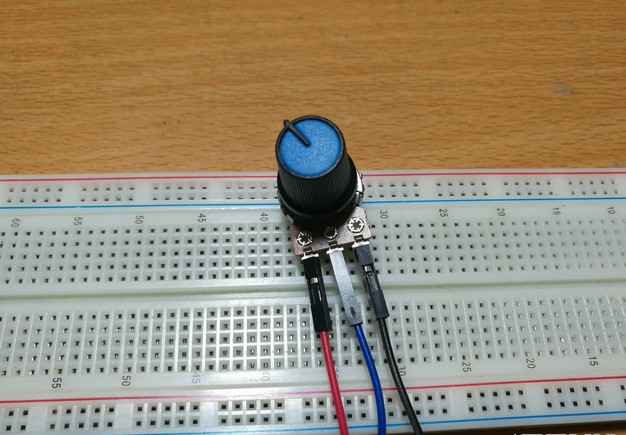
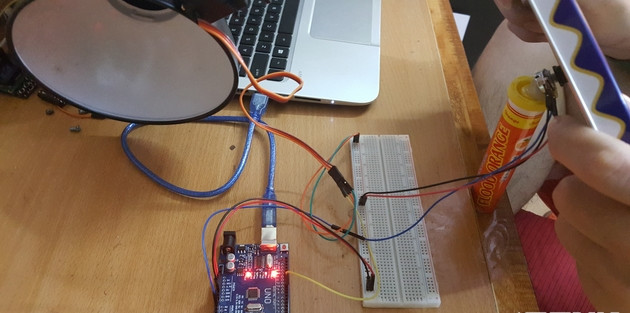
You plug the cord into the three pins of the resistor.

Then plug the Arduino's 5V and GND wires into Broad test circuit.
Step 2 :
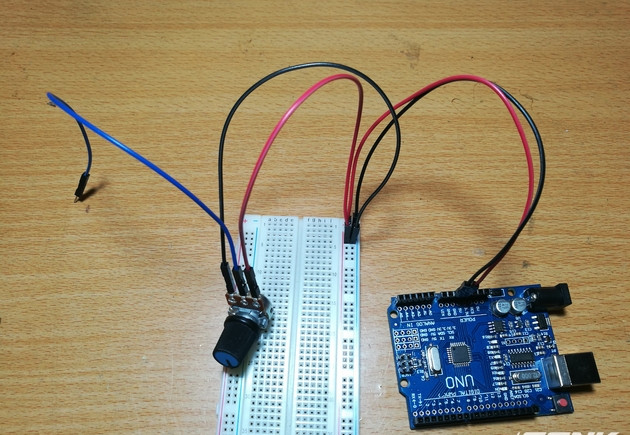
You plug two external wires of the switch into broad test circuit.

Then plug the middle wire of the transformer back into pin A0 on the Arduino.
Step 3: Connect the wires to the Servo.
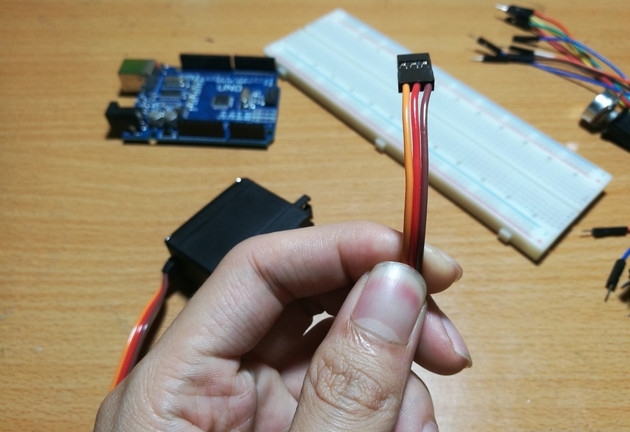
You see our Servo has 3 wires, yellow wire will be the signal wire. Red is 5V wire and orange is GND wire.

You connect the wires to gold on pin 9 on Arduino.
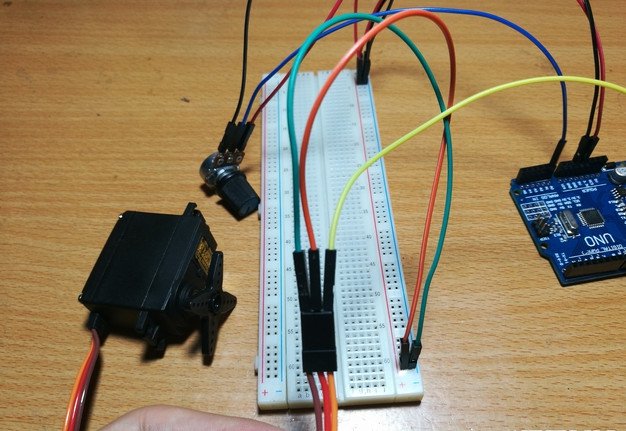
Two wires of 5V and GND are connected to Broad test circuit.
So we have finished the circuit connection.
Step 4:
Please copy the following code and paste it into Arduino 1.6.13 software on the computer.
#include
Servo genkservo;
Int bientro = A0;
Int servo Pin = 9;
Void setup ()
{
Genkservo. attach (servoPin);
Serial. begin (9600);
}
Void loop ()
{
Int value = analogRead (bientro);
Int servoSos = map (value, 0, 1023, 180, 0);
Genkservo. write (servoPos);
Serial. println (servoPos);
Delay (100);
}
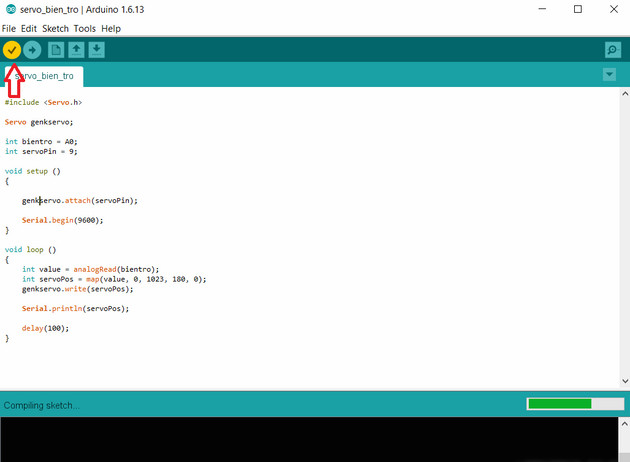 Click the V sign icon to translate the code.
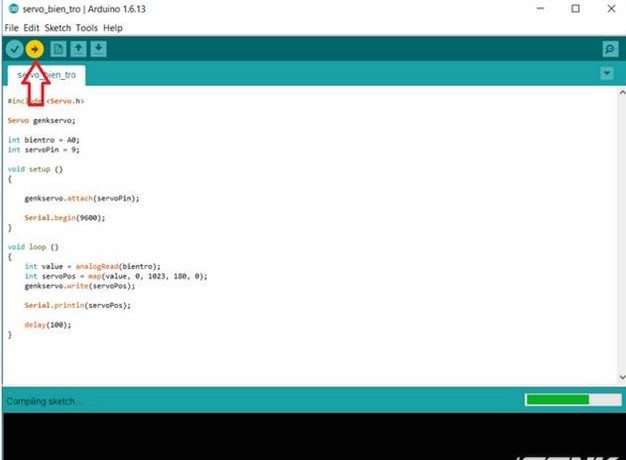 Click on the arrow icon to load the code.
Step 5:
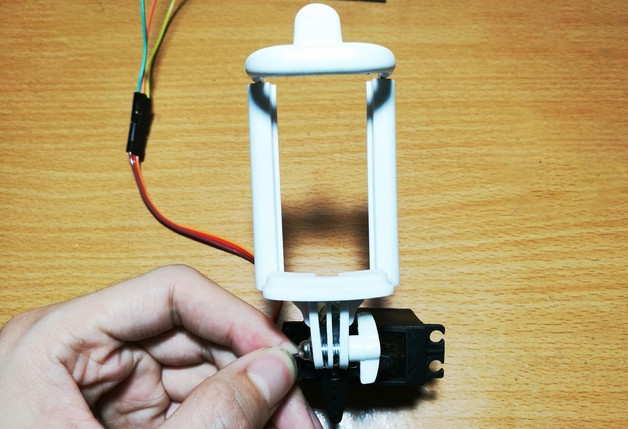
You stick a phone clamp on the Servo, this clip can be taken at the selfie stick.
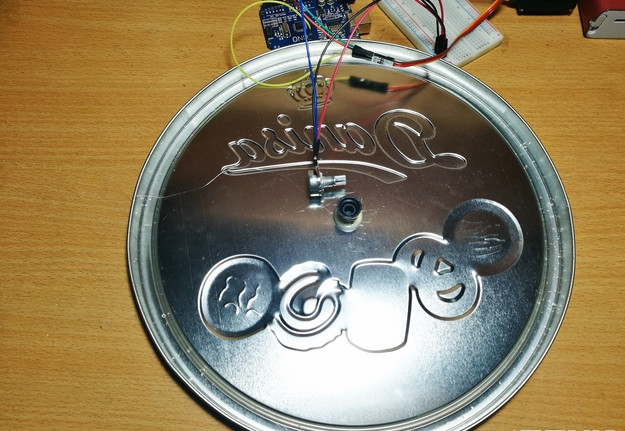
And paste the switch back into a lid of the cake box (or something round) to make the steering wheel.
So we're done. Let's play the game.
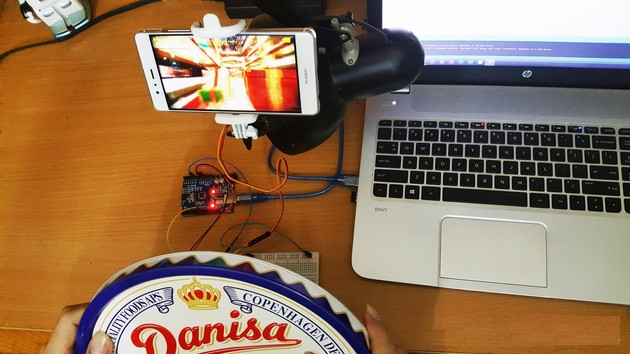
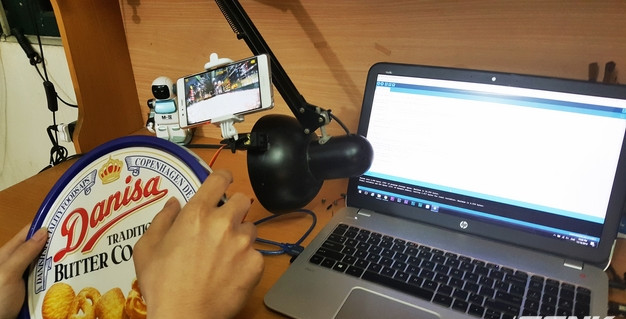
 Behind the steering wheel
When playing Asphalt 8 game with this device, it feels very good, all actions like Drift or nitro can be used normally. What are you waiting for without making yourself a set?
Wish you have fun playing games. .
FAQ
What is homemade?
You are a fan of speed games, are you tired of playing Asphalt 8 games in the usual way?
What makes homemade notable?
Then plug the Arduino's 5V and GND wires into Broad test circuit.
What are the key facts about homemade?
Step 3: Connect the wires to the Servo.
Related Articles
 How to Making Steering Wheel with Carton Cover to Play Racing Games5 minutes read
 How to Steer Your Car: Step-by-Step Guide11 minutes read
 Plastic Roads Are Capable of. Self-filling Potholes in the Netherlands3 minutes read
 Tips to Play Asphalt 9: Legends to Win6 minutes read
 Asphalt Overdrive Updates Additional New Features and Supports Xbox3 minutes read
 Asphalt Absorbs More Than 11,000 Liters of Water Every Hour, Running Out of Flooding4 minutes read
Reader Comments 0
Sign in with email or Google to join the discussion.