Table of Contents
Learning how to use palm timer to take selfies on Android doesn't have to be complicated. This updated guide presents a clear workflow, practical checks, and troubleshooting advice you can use while completing the process.
Key Takeaways
- Review take a photo with google's palm timer.
- Explore what if i don't have a pixel phone.
- Understand check your Android phone.
Take a Photo with Google's Palm Timer
Google's Palm Timer should be enabled by default, but to make sure it is, open the camera app on your Pixel phone.
Tap the small gear icon in the lower left corner of the screen.

Now, tap on the More settings button in the Photo Settings pop-up window that appears.

Find the Palm Timer option and make sure the switch next to it is on.
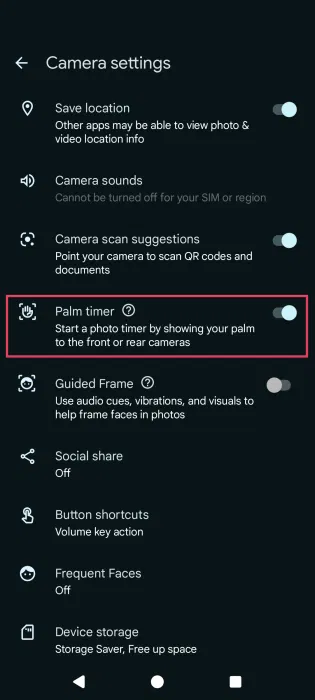
Stand in the frame and make sure you have enough light. This helps you take a photo with the front or rear Pixel camera. Hold your hand up with your palm facing the camera and wave it steadily. A 3-second timer will start - enough time to flash your best smile when you lower your hand!
What If I Don't Have a Pixel Phone?
Even if you don't have a Pixel phone, you can still take photos hands-free. Let's explore your options.
Check Your Android Phone
Other Android manufacturers have included similar options on their phones. Samsung phones, for instance, offer their own gesture control feature that allows you to use your palm to activate the selfie camera and take a photo. Unfortunately, this option isn't available for the main camera.
On your Samsung phone, open the camera app and switch to selfie. Then, find the Settings icon and tap it.
On the Camera Settings screen, open Shooting Methods.
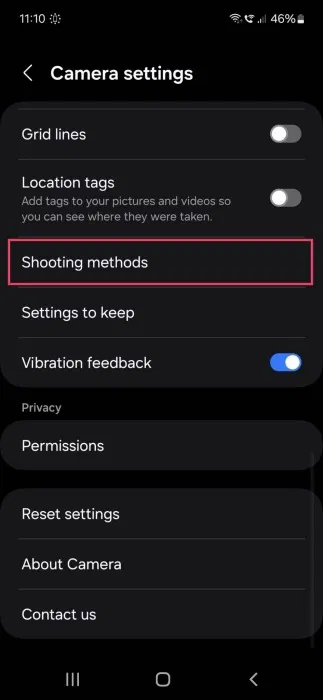
Make sure the Show Palm toggle is active.
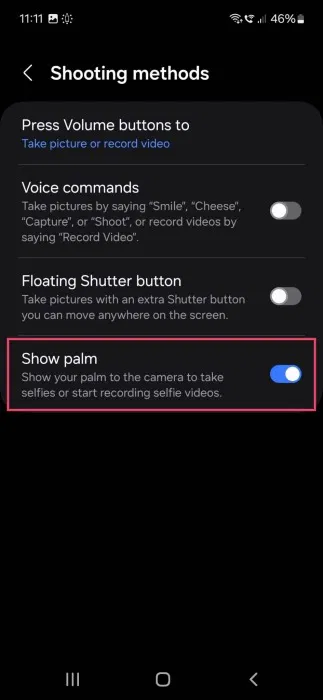
Now, when you want to take a selfie, just raise your palm and the camera will take a photo in seconds.
Other phone manufacturers, such as OnePlus, Huawei, RealMe, or Motorola, also have similar options that allow you to easily take photos hands-free.
Take a Photo with Your Voice
If your phone doesn't have a gesture feature for taking hands-free photos, no problem! Most Android devices now offer the Google Assistant service (now being replaced by Gemini ), and you can use it to take photos without touching your phone's screen.
You first need to set up Google Assistant on your phone and train it to recognize your voice. This helps you be able to take photos this way. Open Settings -> Apps -> Assistant -> Voice Match.
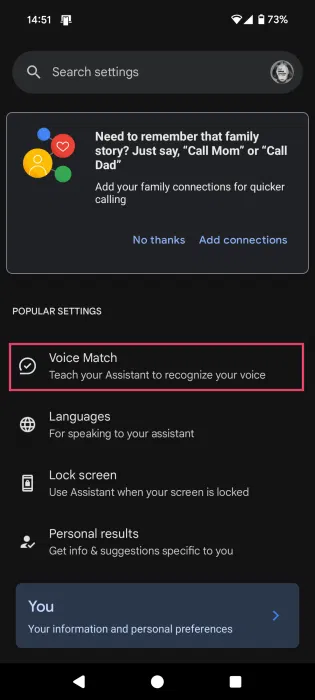
Make sure the Hey Google keyword is enabled. Select the appropriate option below if you need to keep the voice match pattern.
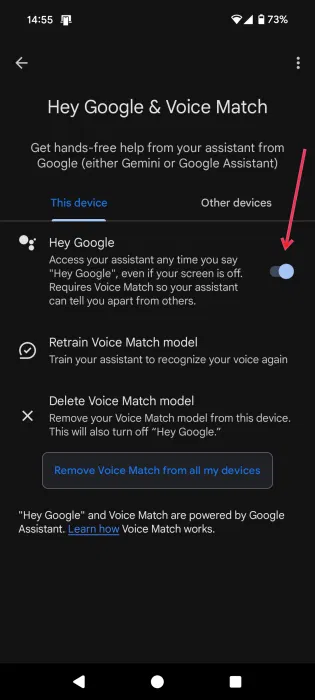
Once done, say something like 'Hey Google, take a selfie'. You can also add something like "10 seconds" to give yourself time to get to the desired location.
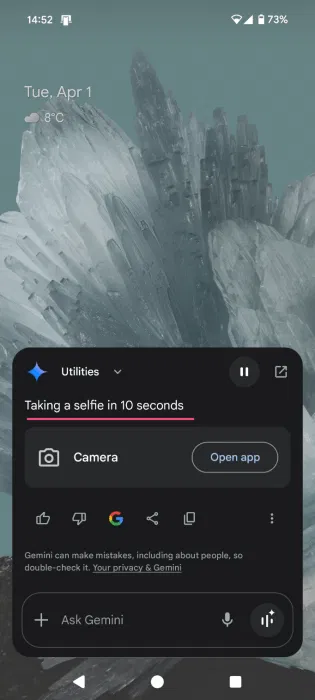
Also, if you want to use the rear camera to take a photo, say something like 'Hey Google, take a picture with the main camera'.
Install Third-party Apps
Alternatively, if you don't want to go through all the trouble of training Google Assistant to recognize your voice and you have some free space, you can try a third-party app. For instance, Camera for Android - Fast Snap will take a photo from both the main and selfie cameras when you make a sound.
Install and open the app. Tap on the 3-bar option in the top right corner and select Setting.
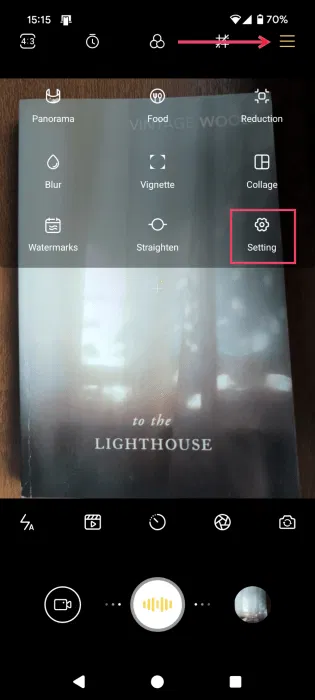
Find the Shooting methods section and enable the Voice capturing option.
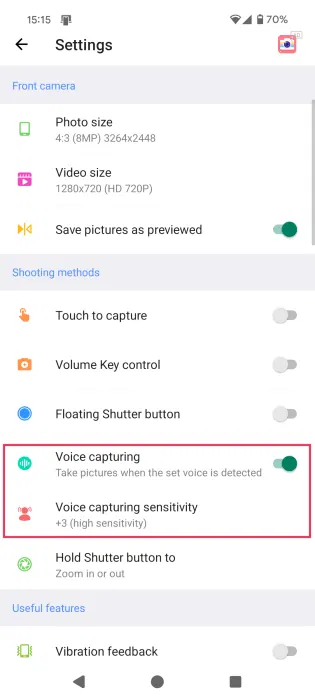
Also, make sure to open the Voice capturing sensitivity section. Here, you can set the sensitivity to low or high. We recommend choosing an option in the middle. Even the slightest sound (like typing on a nearby laptop) can trigger the camera when you choose maximum sensitivity.
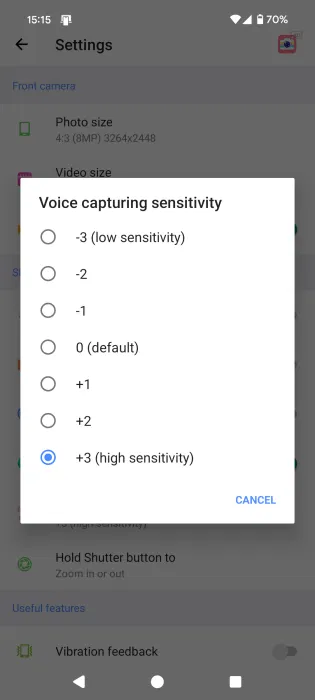
Anyway, with this option, you can now say something like 'Take photo' or 'Snap' and the app will take a photo. The photo will be saved to your phone's Camera folder.
Check out our list of tips for taking better photos at night if you want to take better Android photos. Also, check out photo editing apps that use AI to enhance your images.
Final Thoughts
The most reliable way to handle use palm timer to take selfies on Android is to follow the process in order, verify each important setting, and test the result before moving on. Use the guidance above as a practical reference, then adjust the details for your device, software version, or specific goal.
FAQ
What should I check before I use palm timer to take selfies on Android?
Use the latest available software, confirm that your device meets the requirements, and make sure you have the necessary permissions, account access, or backup before changing anything.
Why might I be unable to use palm timer to take selfies on Android?
Common causes include outdated software, missing permissions, incompatible settings, incomplete setup steps, or a temporary network problem. Recheck the process from the beginning and restart the app or device if needed.
Is it safe to use palm timer to take selfies on Android?
It is generally safe when you use official tools, review every permission, and back up important data before making system-level or account-level changes.
Related Articles
 Palm Revived with a Tiny Phone Model Just by ATM Card5 minutes read
 How to Palm Reading Using ChatGPT: the Intersection of Classic and Technology7 minutes read
 Instructions for Using Faceu to Take Unique Selfies5 minutes read
 Google Palm 2 vs. Openai GPT-4: Key Differences9 minutes read
 The Cult Phone Palm Was About to Be 'Revived' Once3 minutes read
 What Is Google's New Palm 2 LLM?6 minutes read
Reader Comments 0
Sign in with email or Google to join the discussion.