Table of Contents
This updated guide explains how to check VRAM capacity on Windows 11 with clear steps, practical tips, and useful context. VRAM is the memory on the GPU, used to store images, videos and other data needed to display on the screen. Also, the VRAM capacity on the computer will also affect the quality and speed of graphics output, especially when you play games, or use intensive design applications.
Check VRAM Capacity in Settings
Step 1:
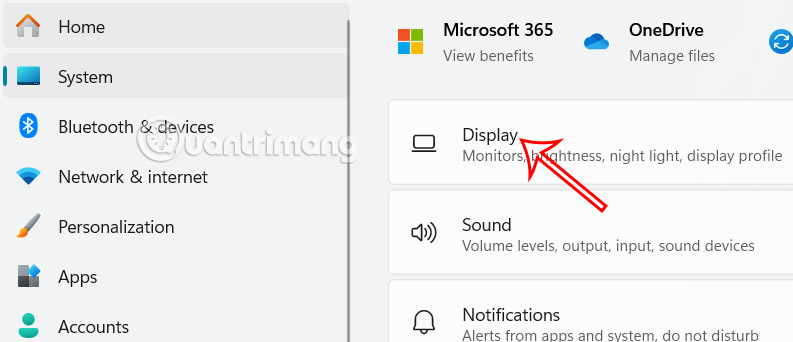
Open Settings and select System , select Display in the side interface.
Step 2:
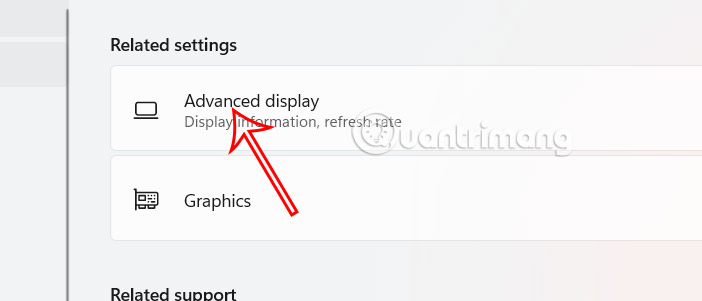
Scroll down and select Advanced display .
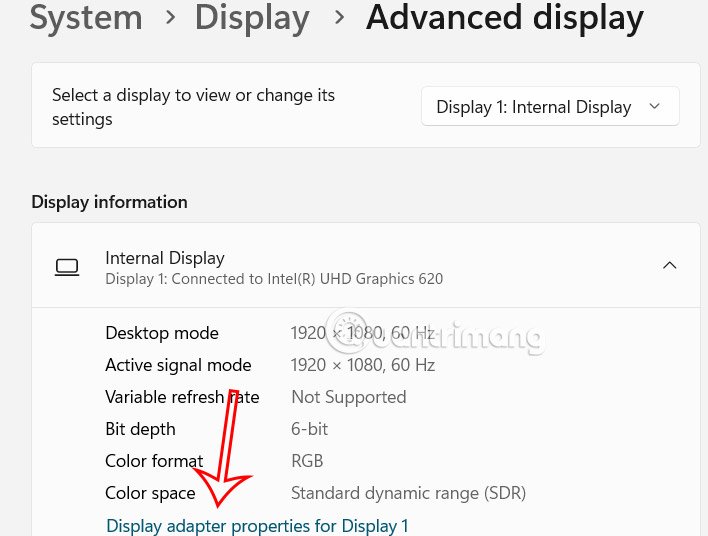
Continue clicking on Display adapter properties for Display 1 shown below. If there are multiple monitors, select the correct monitor to check.
Step 3:
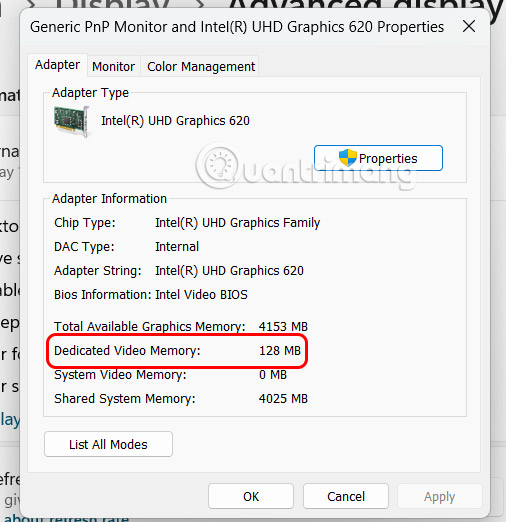
In the display interface, select the Adapter tab and look down at Dedicated Video Memory , users will know how much VRAM capacity is in their computer.
Check VRAM Capacity via DirectX
Step 1:
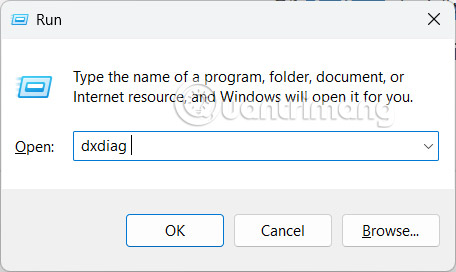
Open the Run dialog box, type dxdiag and press OK to access the DirectX Diagnostic Tool .
Step 2:
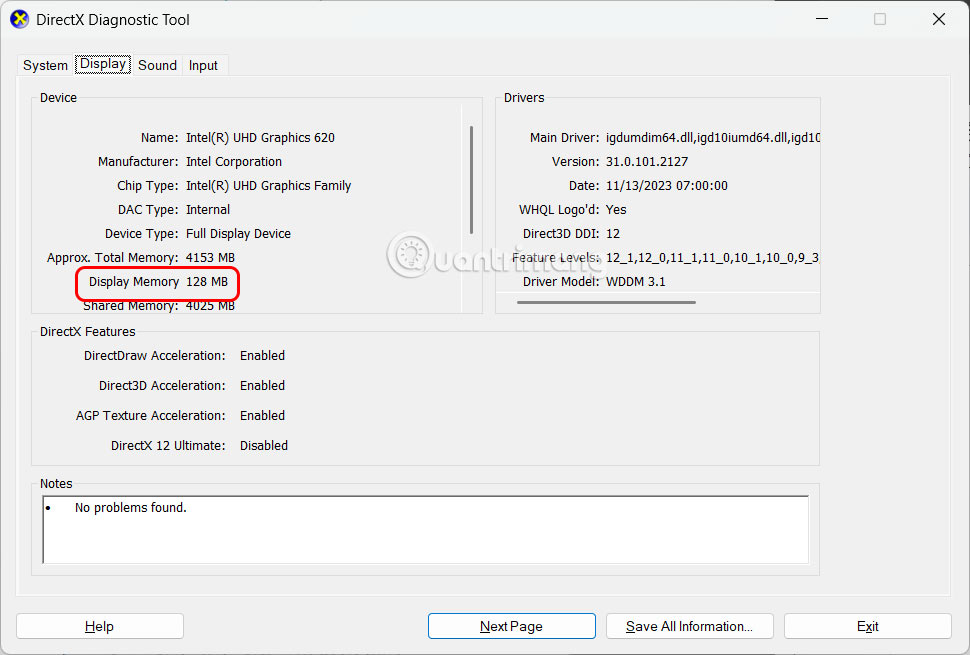
We select the Display tab and look down to find Display Memory . This is the amount of VRAM available on your graphics card.
Check VRAM from Task Manager
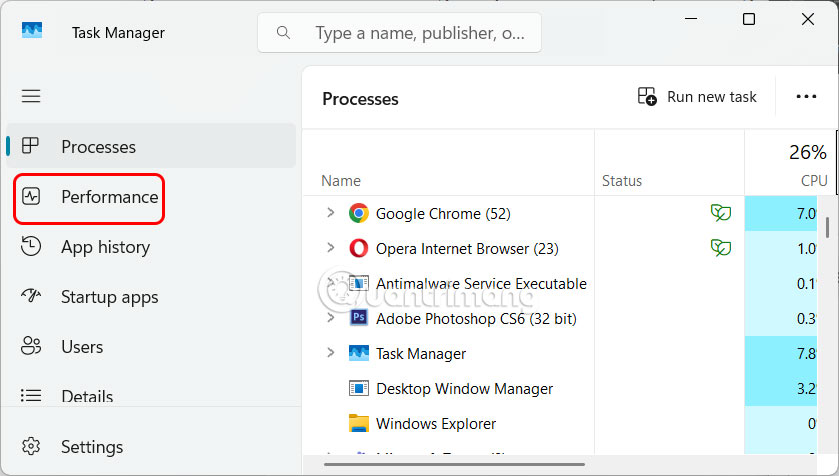
Right- choose on the Taskbar and select Task Manager . In this new interface, the user selects Performance .
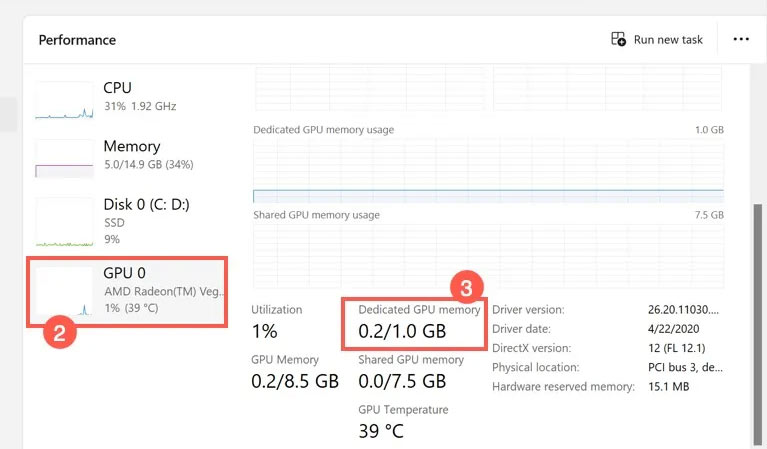
Looking at the content next to the GPU graph, we will see the Dedicated GPU Memory line, which represents the total VRAM capacity and current usage.
For light games or mainly browsing the Internet, using office applications and watching videos, you only need a maximum of 4GB of VRAM, but if you use it for heavy games or video editing, you need more, maybe 6-8GB or more. If it is not enough, you need to increase the VRAM.
FAQ
What should I prepare before I check vram capacity on windows 11?
Review the requirements and options in the guide first. Having the correct device, app version, account access, or materials ready helps prevent avoidable errors.
How long does it take to check vram capacity on windows 11?
The time depends on the task and your setup. Most basic steps can be completed quickly, while downloads, updates, scans, or troubleshooting may take longer.
What should I do if the steps do not work?
Repeat the instructions in order, confirm that your software or device is supported, and check permissions, connectivity, and available updates before trying again.
Related Articles
 How to Check VRAM Capacity on Mac4 minutes read
 How to Check VRAM on Windows 105 minutes read
![[AZ] All Information About What Is Vram? Simple Way to Increase VRAM](/data8/thumbs_200x120/[az]-all-information-about-what-is-vram-simple-way-to-increase-vram-capacity_thumbs_200x120_5ABtbAYUM.png) [AZ] All Information About What Is Vram? Simple Way to Increase VRAM10 minutes read
[AZ] All Information About What Is Vram? Simple Way to Increase VRAM10 minutes read What Is VRAM?10 minutes read
 4 Best Ways to Check RAM Capacity on Windows 116 minutes read
 Increase Vram Win 10: How to Increase VRAM in Windows 105 minutes read
Reader Comments 0
Sign in with email or Google to join the discussion.