How to build a custom ChatGPT with your own data
Use the OpenAI API and LangChain provide ChatGPT with custom data and up-to-date information by 2021 to create a custom instance of ChatGPT.
Table of Contents
Offering GPT technology in a powerful and easy-to-use chatbot, ChatGPT has become the world's most popular AI tool. Many people use ChatGPT to provide engaging conversations, answer queries, offer creative suggestions, and assist with code generation and writing. However, ChatGPT is limited as you cannot store your data for long-term personal use and the knowledge data cut-off point is September 2021.
An alternative is to use OpenAI and LangChain's APIs to provide ChatGPT with custom data and updates by 2021 to create a custom instance of ChatGPT.
Step 1: Install and download pre-made software and scripts
Please note that the following instructions are for Windows 10 or Windows 11 machines.
To provision custom data for ChatGPT, you need to install and download the latest Python3, Git, Microsoft C++ and ChatGPT-retrieval script from GitHub. If you have some software installed on your PC, make sure that they are updated to the latest version to avoid any hiccups in the process.
Start by installing:
- (Free of charge)
- (Free of charge)
- (Free of charge)
Python3 and Microsoft C++ installation notes
When installing Python3, make sure you tick the Add python.exe to PATH option before clicking Install Now . This is important because it allows you to access Python in any directory on your computer.

When installing Microsoft C++, you will want to install the Microsoft Visual Studio Build Tools first. After installation, you can check the option Desktop development with C++ and click Install with all optional tools automatically selected on the right sidebar.

Now that you have the latest versions of Python3, Git, and Microsoft C++ installed, you can download Python scripts to easily query custom local data.
- (Free of charge)
To download the script, click Code , then select Download ZIP . This will download the Python script to your default or selected directory.

Once downloaded, you can now set up the local environment.
Step 2: Set up the local environment
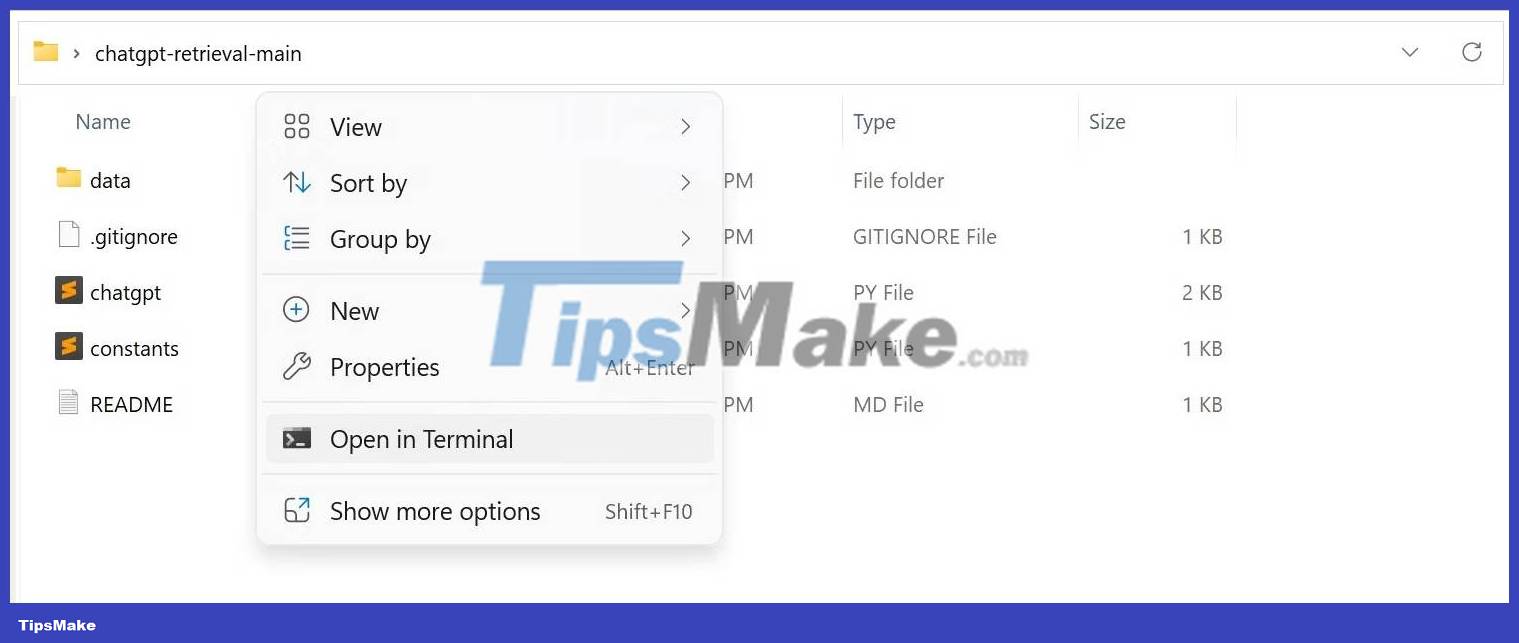
To set up the environment, you need to open a terminal in the chatgpt-retrieval-main folder you downloaded. To do that, open the chatgpt-retrieval-main folder , right-click and select Open in Terminal .
Once the terminal is open, copy and paste this command:
pip install langchain openai chromadb tiktoken unstructuredThis command uses Python's package manager to create and manage the required Python virtual environment.
After creating the virtual environment, you need to provide the OpenAI API key to access their services. First, you need to generate an API key from the OpenAI API key website by clicking Create new secret key , adding a name for the key, then pressing the Create secret key button .

You will be provided with a string of characters. This is your OpenAI API key. Copy it by clicking the copy icon next to the API key. Please note that this API key must be kept secret. Do not share it with others unless you really intend to let them use the same key with you.
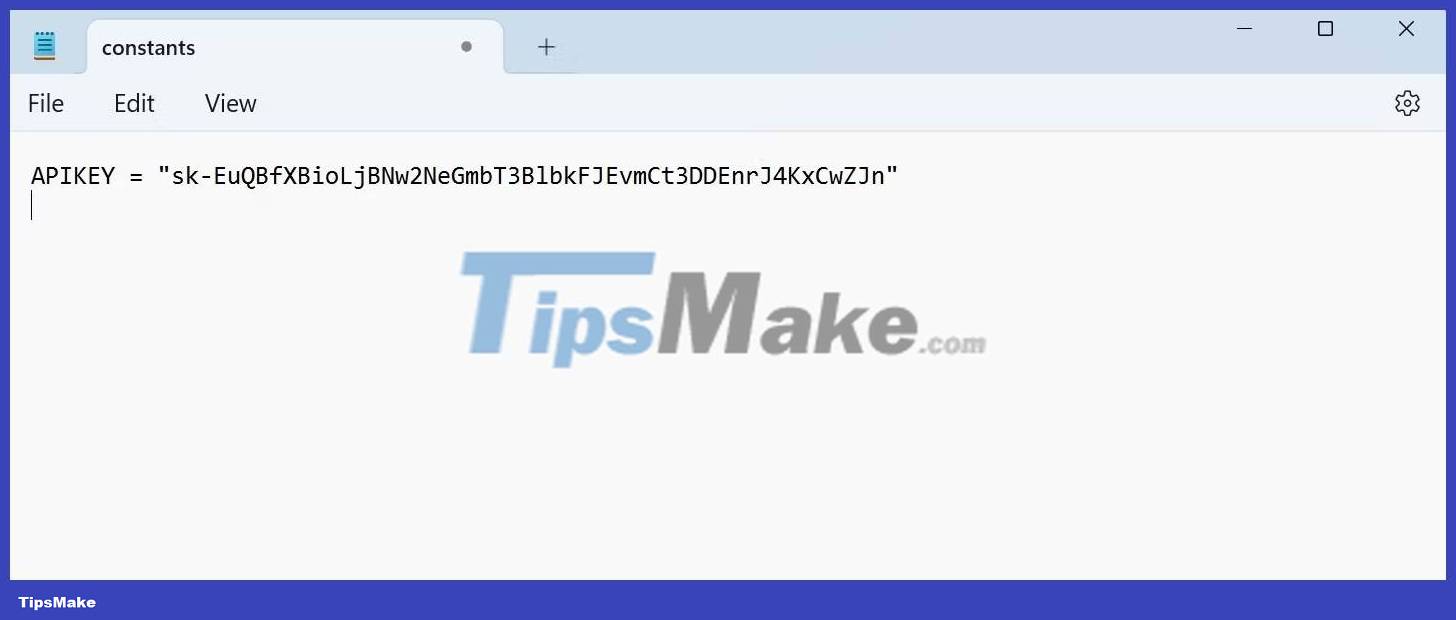
After copying, go back to chatgpt-retrieval-main folder and open constants with Notepad. Now replace the placeholder with your API key. Remember to save the file!
You have now successfully set up your virtual environment and added the OpenAI API key as an environment variable. You can now provide your custom data to ChatGPT.
Step 3: Add custom data
To add custom data, put all your custom text data in the data folder in chatgpt-retrieval-main. The format of the text data can be PDF, TXT or DOC.

As you can see from the screenshot above, the example has added a text file containing a pre-made personal schedule, an article written about AMD's Instinct AI Accelerators, and a PDF document.
Step 4: Query ChatGPT via Terminal
Python scripts allow you to query data from custom data added to the data directory and the Internet. In other words, you will have access to the regular ChatGPT backend and all data is stored locally in the data directory.
To use the script, run the python chatgpt.py script and add your question or query as an argument.
python chatgpt.py "YOUR QUESTION"Make sure to put your question in quotes.
To check if your ChatGPT data has been successfully provided, the example will ask a personal question regarding the Personal Sched.txt file.

Everything works! This means that ChatGPT can read the previously provided Personal Sched.txt. Now, see if you have successfully provided information that ChatGPT is unaware of due to its knowledge cut-off date.
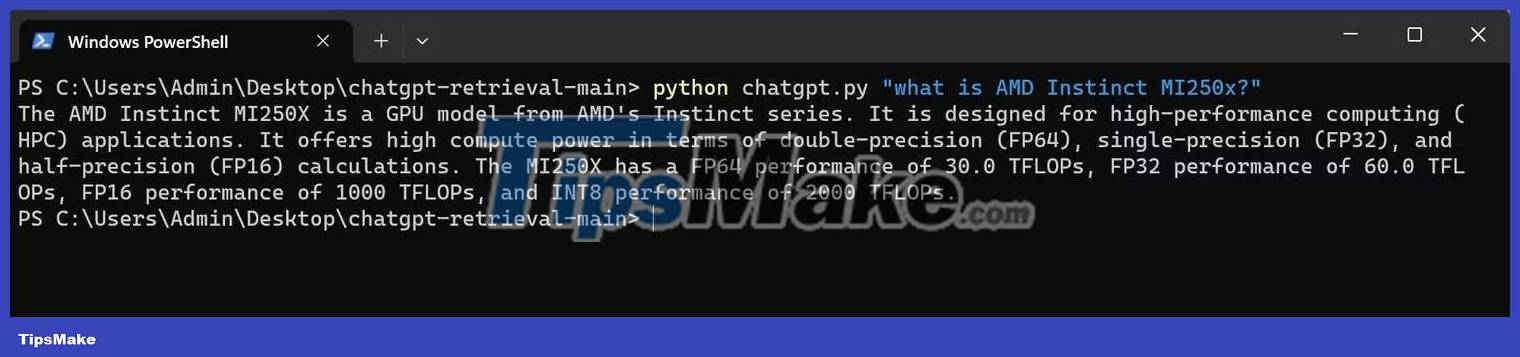
As you can see, it accurately describes the AMD Instinct MI250x, which was released after the ChatGPT -3 knowledge cut-off date.
Was this article helpful?
Your feedback helps us improve.
Related Articles
 ChatGPT's Custom GPT Can Reveal Your Data: Here's How to Stay Safe!7 minutes read
 10 Custom GPTs That Really Make ChatGPT Better9 minutes read
 How ChatGPT helps build a cheap, powerful PC9 minutes read
 Custom GPT is the least noticed feature of ChatGPT6 minutes read
 How to check and delete personal data on ChatGPT6 minutes read
 How to build custom directives in Angular8 minutes read
Reader Comments 0
Sign in with email or Google to join the discussion.