What you will learn
- Sort complete records rather than isolated cells.
- Use single- and multi-level sorts.
- Apply value and criteria filters to consistent data types.
- Recognize and clear active filters before interpretation.
What you need
- A clean Excel table with headers.
- At least ten rows containing text, numbers and dates.
Rows are records that must stay together
Microsoft warns that sorting can affect formula results and documents sorting a complete range or table by values, formats or custom lists.
Excel filters hide rows that do not match selected values or criteria without rearranging the remaining data.
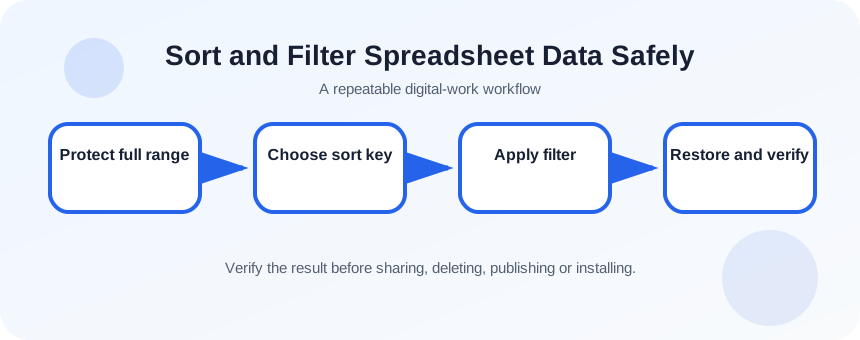
Convert the range to an Excel table or select the entire dataset before sorting. A filter changes visibility, not ownership or deletion. Always communicate when a screenshot, chart or total reflects a filtered subset.
Inspect the table before changing it
Confirm one header row, no blank separator rows and consistent data types. Save a copy or use version history for consequential work. Identify the current row count and any formulas that depend on row position.
- 1
Confirm the full table range.
- 2
Count visible data rows.
- 3
Check headers for uniqueness.
- 4
Find mixed types in the sort column.
- 5
Save or create a version checkpoint.
- 6
State the question the sort or filter should answer.
Sort the table and verify relationships
Choose a cell in the table and use the Data sort controls. For a multi-level sort, define priority explicitly: for example Region, then Revenue largest to smallest. After sorting, inspect a known record across all columns to confirm the row stayed intact.
- 1
Select a cell in the table.
- 2
Open the Sort dialog.
- 3
Choose the primary column and order.
- 4
Add a secondary level if needed.
- 5
Apply the sort.
- 6
Locate a known record.
- 7
Verify its related values remain on the same row.
Filter with explicit conditions
Use header filter buttons to select values or criteria. Do not mix text, numbers and dates in the same column because the available filter behavior becomes inconsistent. Record the active filter in a visible note when sharing results.
When copying filtered data, understand whether the application selects visible cells only. Totals may include hidden rows unless you use a function designed for filtered lists. Clear filters before deleting rows or concluding that data is missing.
- 1
Apply a filter to one category.
- 2
Add a numeric or date criterion.
- 3
Count visible rows.
- 4
Record the filter conditions.
- 5
Clear one filter and observe the difference.
- 6
Clear all filters and confirm the original row count.
Return to a known state
Before saving a shared workbook, decide whether recipients should see the filtered view or full data. Clear filters for a neutral handoff, or document the active view clearly. Confirm formulas, charts and summaries still represent the intended rows.
- A known record retains all related values after sorting.
- Active filters and visible row counts are documented.
- The workbook can return to the complete original dataset.
Answer two questions with one table
Use sorting and filtering, then restore the dataset.
- 1
Save a checkpoint.
- 2
Sort by one numeric field.
- 3
Add a secondary text sort.
- 4
Filter one category and date range.
- 5
Record visible row count.
- 6
Clear all filters and verify the original count.
Common mistakes to avoid
- Sorting only one column.
- Filtering a column with mixed data types.
- Presenting a filtered total as the full total.
- Deleting rows while filters hide records.
Key takeaways
- Sort complete records, not isolated cells.
- Filters change visibility, not the underlying data.
- Document and clear conditions before handoff.
Frequently asked questions
Why are some filter options missing?
Mixed data types or blank headers can affect filter behavior. Normalize the column and convert the range to a table.
Does sorting change formulas?
It can, especially when formulas rely on row positions or volatile references. Inspect calculated results after sorting.
Sources and further reading
- Sort data in a range or table in ExcelMicrosoft Support
- Filter data in a range or table in ExcelMicrosoft Support
Ready to continue?
Mark the lesson complete so your Learning Path progress stays current on this device.