How to Make a 1 Ohm to 100 Megaohm Resistance Decade Box
A variable resistor with a built in readout is very useful for electronics hobbyists. A method to construct a 1 ohm to 100 mega ohm resistance substitution box is provided here.. Be sure that you have all of the things needed.
Table of Contents
Method 1 of 2:
Soldering the resistors to the switches
-
 Separate each switch from the others if they come to you as connected. Be careful not to break the clips that connect the switches to each other.
 -
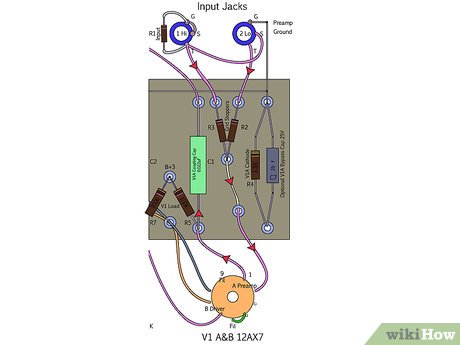 Start with the lowest value resistors, the 1 ohm resistors and solder them as as shown in the wiring diagram.
 -
 Connect one end of the resistor to pin 9 and the other end to pin 8 of the switch. Connect the next resistor in the chain to pin 8 (two resistor leads are connected to pin 8) and pin 7. The third resistor will connect to pin 7 and pin 6 and so on until resistor 9 is connected to pin 1 and pin 0. Do not connect anything to the common pin (C) yet.
 -
 Check the performance of the single switch with the soldered resistors using an ohmmeter. Do not be surprised if you have strange readings. They are most often caused by accidental shorts. Remove these shorts with desoldering braid if they are caused by solder bridges.
 -
 Keep this switch aside
 -
 Start on the 10 ohm switch connecting resistors between each pin as described above. Test and correct errors. Keep aside.
 -
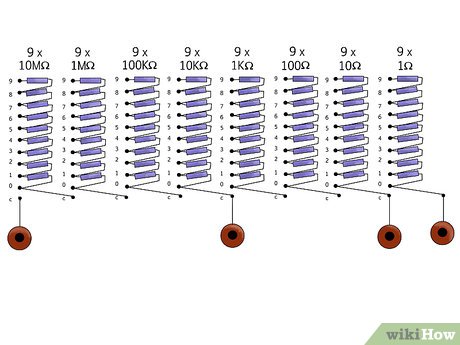 Do this for the remaining six switches. 100 ohm, 1000 ohm, 10k ohm, 100k ohm, 1 M ohm, and 10 M ohm. Nine resistors per switch. Test, correct if needed and keep aside.
 -
 Solder a wire to pin 0 of all the switches.
 -
 Snap the 1 ohm switch to the 10 ohm switch to create a switch with 2 decades. Solder the wire from pin 0 of the 1 ohm switch to the Common pin of the 10 ohm switch. Test the value of these 2-decade switch by connecting your ohmmeter to the common pin of the 1 ohm switch and the wire coming off from pin 0 on the 10 ohm switch. If readings are correct, keep snapping one additional switch into the ganged switches, soldering pin 0 to the common pin.
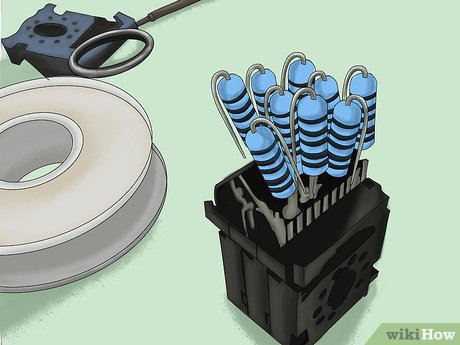
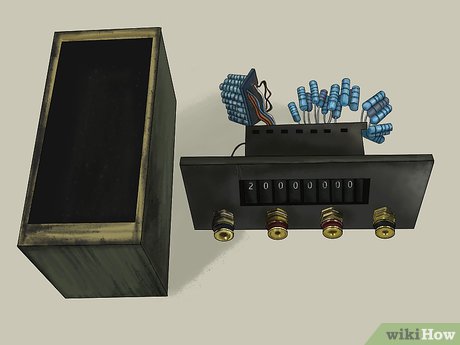
- As shown in the pictures below, the first 5 decades are soldered as mentioned. The last 3 decades are soldered on a small Vero board. The board was then soldered to the switches. For some people it could be an easier way to build this device. Smaller resistors are much simpler to solder directly to the switches. Switches with PCB holes at their terminals instead of the pins would also make life easier.
- Finally there should be 8 switches ganged to each other with pin 0 of the previous switch connected to common pin.
- Test the whole circuit and make corrections if needed.
Method 2 of 2:
Making the box for the resistance decade switches
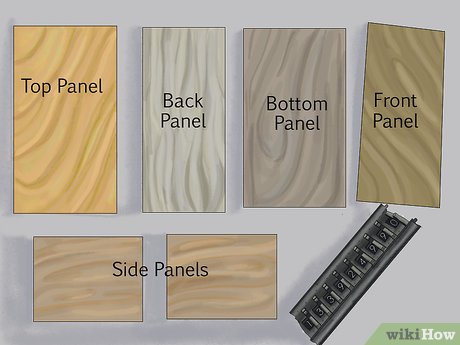
- Measure the amount of space taken by the switches and the resistors plus the space required for the binding posts and draw these directly on 1/4th inch think hardboard (or plywood). Cut the pieces on a bandsaw and then create a box by gluing the bottom to the two sides (which are made of 1/2 inch plywood scraps) and to the back panel. Do not connect the top and the front.
- Draw the holes and rectangular cutout dimensions directly on the front panel and then drill out the 4 holes for the binding posts. Then cut out the rectangular opening for the switches on the bandsaw.
- Paint everything black with an water based acrylic paint which is absolutely non-conductive. Note that some of the blackboard paints are weakly conductive.
- Snap in the switch into the rectangular opening and put a spot of hot glue so that it would not snap out.
- Screw in the four binding posts and add a spot of hot glue.
- Attach a 1 inch (2.5 cm) length of 24 gauge wire to each of the binding posts. To the other end of this wire, attach the leads from the switch as shown below, and in the diagram above.
- The binding post closest to the 1 ohm switch (the one furthest right if we are looking at the front panel from the front) was connected to pin 0 of the 1 ohm switch.
- The second binding post from the right was connected to common pin of the the 10 ohm switch. This would allow to tap low resistor values (0-99 ohms) by using these two posts.
- The third binding post from the right was connected to the common pin of the 10k switch giving 0 to 99,999 ohms at this terminal.
- The fourth and last binding post was connected to the common pin of the 10M switch giving 0 to 99M ohms between the first and the last binding posts.
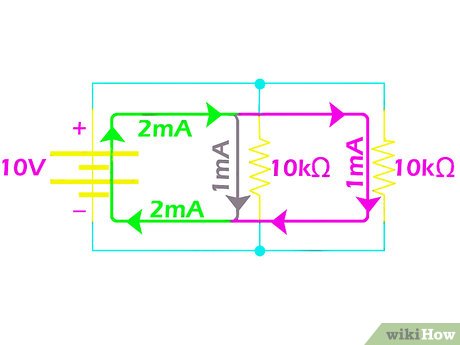
- The neat trick about the multiple binding posts is that a voltage dividers can be created quite easily from a single resistance box. It also reduces the switch contact resistance for the low ohm values.
- Final assembly and testing
- The box was assembled by attaching the front with two screws to the side panel. The top was nailed in without using the glue.
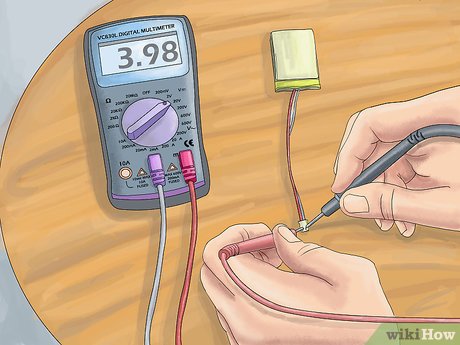
- Values were tested with a multimeter set to read ohms.
- When measuring the switch resistance, even at 0 ohms, there is a reading of 0.7-0.9 ohms between the left most and right most terminal. The resistance measured between the two right most terminals is 0.3 ohms. So there will always be 0.3 ohms higher resistance for the 1-99 ohm range.
- Then check the resistance for all the values. They should be within 2% of the switch setting. A bit better accuracy should be at higher values. The resistors used here were 1% error (or 99% accuracy). The setting were also repeatable over 10 cycles of testing.
- The only thing to add is the labels.
Was this article helpful?
Your feedback helps us improve.
Related Articles
 Increase resistance & immune system in 5 simple but effective ways9 minutes read
 What is the IP water resistance standard? A guide to finding the correct information.8 minutes read
 What to eat to increase resistance, help the body fight viruses4 minutes read
 Review Resident Evil: Resistance: Gifts 'bundled' misery was cursed9 minutes read
 Bad news: German cockroaches have evolved to become 'immortal', the chemical technology in hand3 minutes read
 What is IP54? A detailed explanation of its dust and water resistance capabilities.6 minutes read
Reader Comments 0
Sign in with email or Google to join the discussion.