Table of Contents
This practical guide explains how to interact with smart contracts using javascript with clear steps and useful context. It also covers common requirements, potential problems, and the details that can help you get better results.

What Is Web3.js Library?
Web3.js is a JavaScript library that provides an interface to the Ethereum blockchain. It simplifies the process of building decentralized applications (DApps) by providing methods and tools to connect to Ethereum nodes, send transactions, read smart contract data, and process events. to sue.
Web3.js connects blockchain technology with traditional development, allowing you to create secure and decentralized applications using familiar JavaScript syntax and functions.
How to Import Web3.js into a Javascript Project
To use Web3.js in a Node project, you first need to install the library as a dependency of the project.
Install the library by running the following command inside the project:
npm install web3 hoặc yarn add web3After installing Web3.js, you can now import the library in your Node project as an ES module:
const Web3 = require('web3');Interaction with Deployed Smart Contract
To illustrate how you can interact with smart contracts deployed on the Ethereum network using Web3.js, you will create a web application that works with the deployed smart contract. The purpose of the web application will be a simple voting ballot where the wallet can vote for a candidate and record those votes.
To get started, create a new directory for your project and initialize it as a Node.js project:
npm initInstall Web3.js as a dependency and create a simple index.html and styles.css file in the project root directory.
Enter the following code in the index.html file:
Voting App Candidate A Vote 0 votes Candidate B Vote 0 votes Candidate C Vote 0 votes Inside the styles.css file, enter the following code:
/* styles.css */ body { font-family: Arial, sans-serif; text-align: center; } h1 { margin-top: 30px; } .candidates { display: flex; justify-content: center; margin-top: 50px; } .candidate { margin: 20px; } .name { font-weight: bold; } .vote-btn { padding: 10px 20px; background-color: #4CAF50; color: white; border: none; border-radius: 4px; cursor: pointer; } .vote-count { margin-top: 5px; }Below is the resulting interface:

Now that you have a basic interface to start with, create a contract folder in the root of your project that contains the code for the smart contract.
Remix IDE provides a simple way to write, deploy, and test smart contracts . You will use Remix to deploy contracts to the Ethereum network.
Navigate to remix.ethereum.org and create a new file in the contracts folder. You can name the file test_contract.sol .

The.sol extension says this is a Solidity file - one of the most popular languages for writing modern smart contracts.
Inside this file, write and compile the Solidity code:
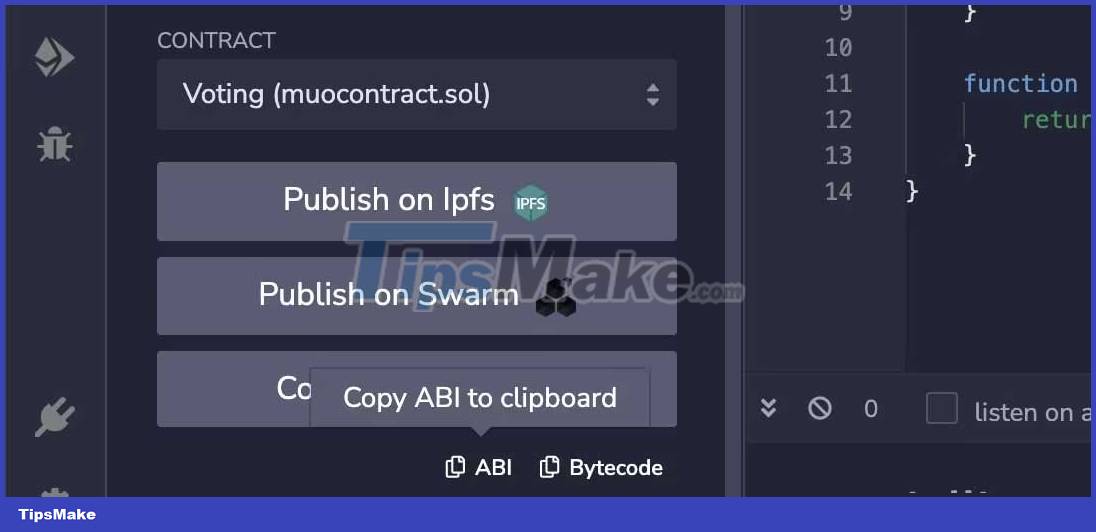
// SPDX-License-Identifier: MIT pragma solidity ^0.8.0; contract Voting { mapping(string => uint256) private voteCounts; function vote(string memory candidate) public { voteCounts[candidate]++; }; function getVoteCount(string memory candidate) public view returns (uint256){ return voteCounts[candidate]; }; };When Remix compiles Solidity code, it also creates an ABI (Application Binary Interface) in JSON format. The ABI defines the interface between the smart contract and a client application.
It will specify the following:
- Name & type of function, event exposed by smart contract.
- Order of arguments for each function.
- The return value of each indigo.
- Data format of each event.
To get the ABI, copy it from within the Remix IDE. Create the file contract.abi.json in the contract at the root of the project and paste the ABI inside the file.
JavaScript has the ability to interact with smart contracts used in decentralized applications in a very simple way. Just follow the instructions above and you will be successful!
Conclusion
Understanding Javascript makes it easier to compare options, avoid common mistakes, and apply the information in this guide more effectively. Review the relevant requirements before making changes or choosing a solution.
FAQ
How do you interact with smart contracts using javascript?
Follow the steps in this guide in order, confirm the required settings or tools, and verify the result before making additional changes.
Is it safe to interact with smart contracts using javascript?
It is generally safe when you follow the recommended instructions, use trusted tools, and avoid changing settings you do not understand.
What should you do if the process does not work?
Recheck the requirements, restart the device or application when appropriate, and review each step for missed settings or compatibility issues.
Related Articles
 What Is JavaScript?6 minutes read
 Syntax of JavaScript1 minutes read
 What Are Smart Contracts?4 minutes read
 What Is JavaScript? Can the Internet Exist Without JavaScript?11 minutes read
 How to Running Node JavaScript Code in n8n8 minutes read
 What Is Currying in Javascript? How to Use Currying in Javascript5 minutes read
Reader Comments 0
Sign in with email or Google to join the discussion.