Table of Contents
This guide explains how to hide photos and videos on iPhone using safevault using a clear, step-by-step process. It also highlights the settings and checks that can help you avoid common errors.
Pictures, videos or other data on the phone can be seen by others, especially when you lend your phone. To secure data on iPhone, we can install SafeVault application - Hide Pics & Videos.
The app supports users to hide important photos or videos, private with a set password or fingerprint. The amount and size of hidden files will not be limited, so users can completely secure any data you want. The steps below explain how to hide photos using SafeVault application - Hide Pics & Videos.
- How to hide photos, videos, personal data on iPhone / iPad?
- How to hide images in Microsoft Word for easier reading
- How to hide photos on iPhone without application
Instructions for hiding videos and photos with SafeVault iPhone
Step 1:
Users click the link below to install SafeVault application and then install.
- Download the SafeVault iOS app
Step 2:
Using SafeVault does not require an account, click New User And install a 4-digit PIN code To protect and prevent access to the app. Click Confrim To continue.
If you register for an account, you will have 150MB to store data in the cloud and hide files unlimitedly.


Step 3:
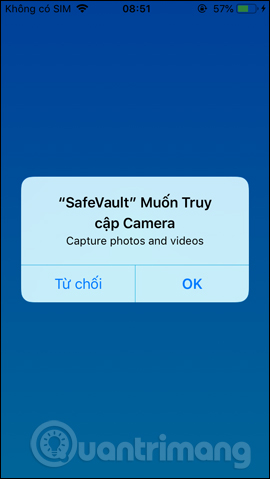
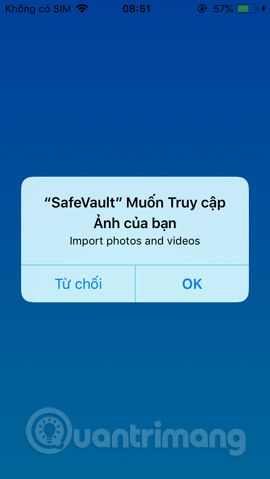
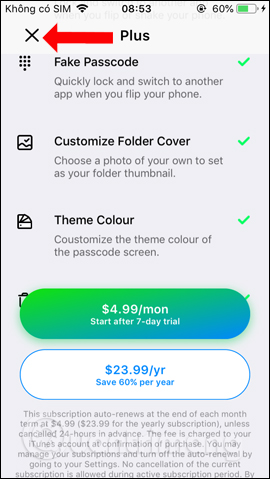
Next, users grants permission for SafeVault application To access videos And Photo albums On the device. In the next interface, users will see the features when upgrading to Plus version. Press X To skip and use the free version.
The free version will limit a few features.
Step 4:
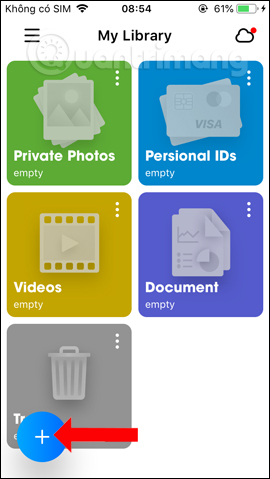
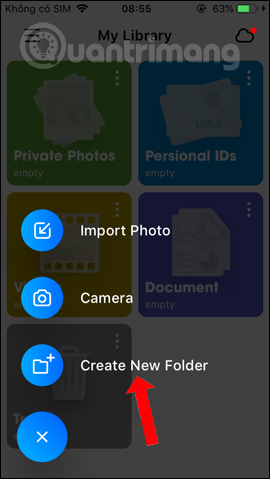
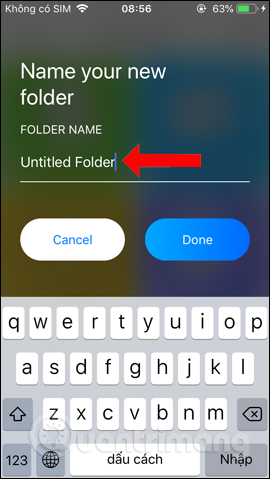
The main interface of the app appears with several built-in file directories. Click The plus sign And select Create New Folder To add a new folder when needed. Name the folder And press Done to save it.
Step 5:
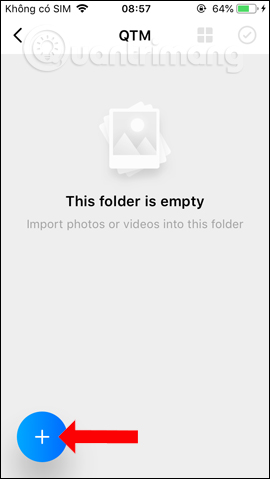
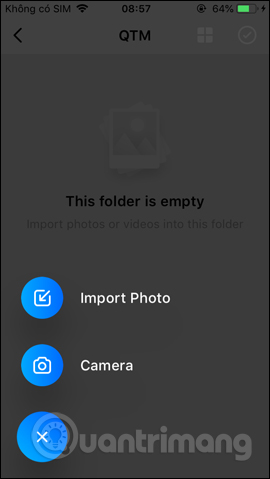
Click The newly created folder and Then click the plus icon to add the file. Select Import Photo to get the photos / videos available on the device, or press Camera to get photos and videos directly from the camera.
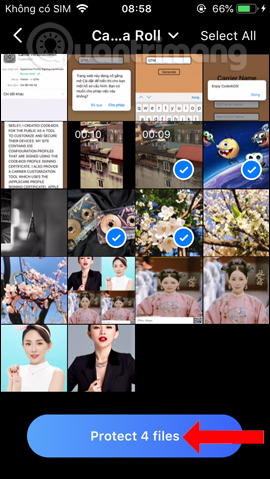
Display the album interface on the device, tap the image and video to hide. the app will list the total number of files that we choose.
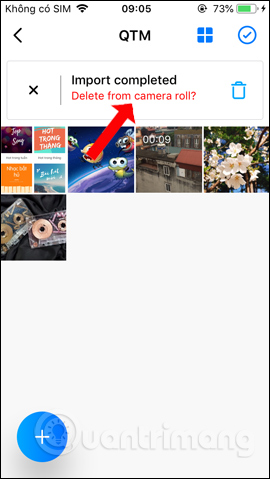
After selecting the app, ask if you Want to delete the original image , press the trash to delete, press the x button to save the original file. If you do not press the default, the app will retain the original file. click The v In the top right corner to continue.
Step 6:
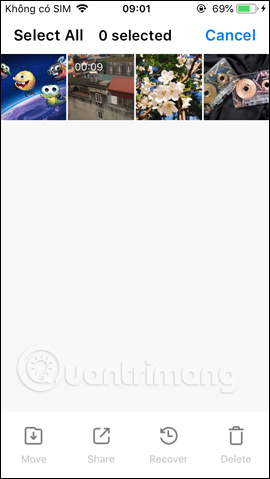
Then below the screen will display different options such as moving the file to another folder (Move), Share (Share), Recover (Extract into album), Delete (Delete).
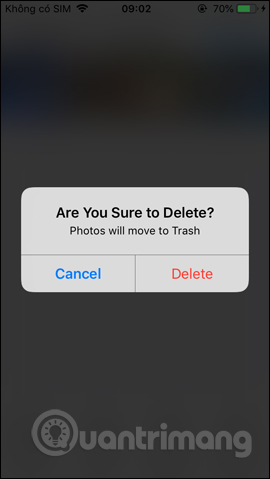
Note If you click delete files on the app will be stored in the trash 30 days, but cannot be recovered, unless upgraded to the Plus version.
Step 7:
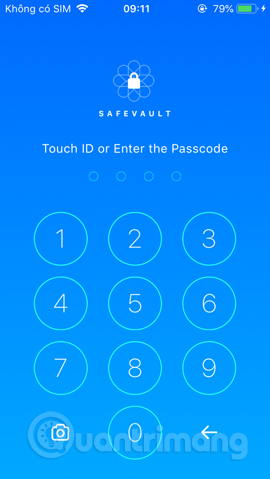
Now when you exit the app and then access users again, you need to enter the correct password.
Step 8:
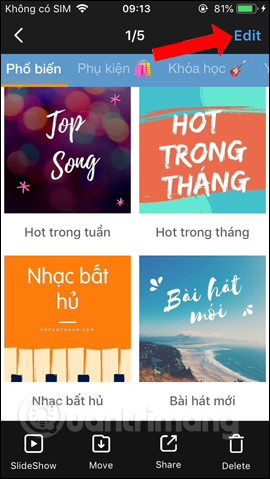
In addition to hiding the file on iPhone, SafeVault application also has the ability to edit photos, with tools or effects. Open the image And click The Edit button In the top right corner.
Users have photo cropping tools, brightness correction, colors, mirror effects, color filters. Click Done to save the edit.


Step 9:
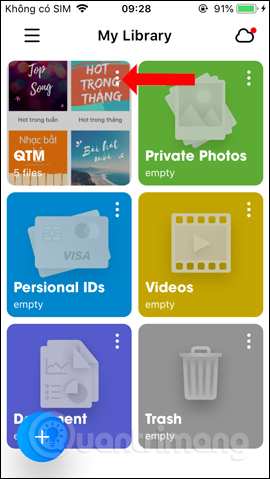
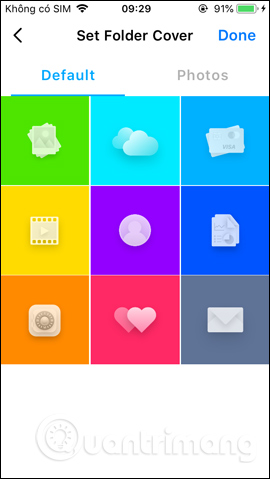
When saving images to a folder will display the avatar, when needed to hide or change, click The 3 dots icon in the folder , select Set Folder Cover To select the cover image as a symbol or image.
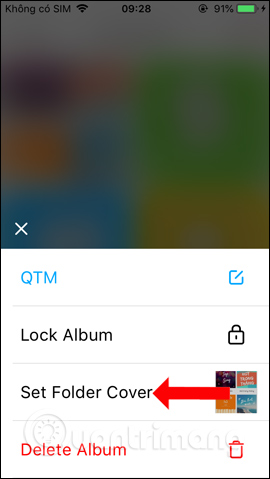
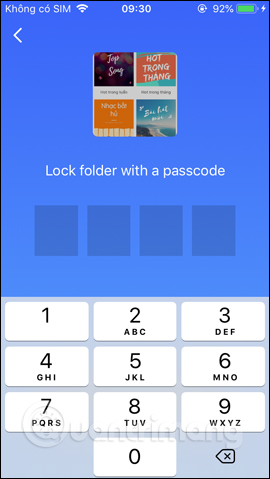
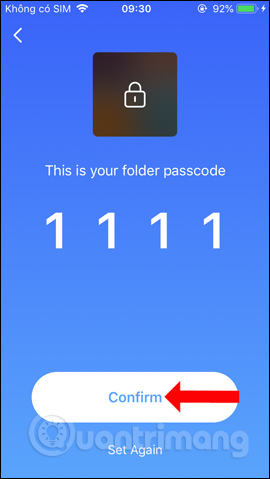
Also when clicking Lock Album You will have the option to set Password protection for each folder . If you forget your access password, you can enter your email address to retrieve your password.

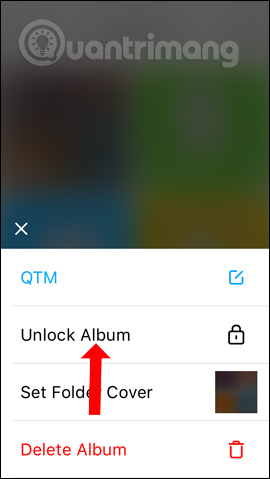
To cancel the lock for the folder press Unlock Album And confirm the password again.
Step 10:
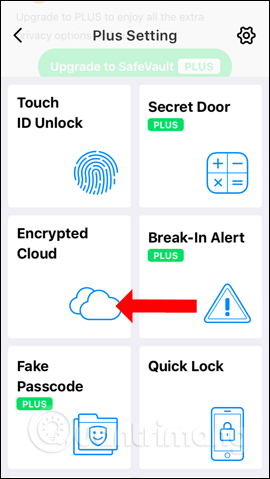
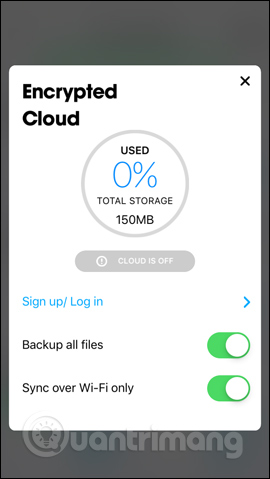
At the app interface click the Dash And see the interface of the app. If you have created an account using SafeVault, click The cloud icon To sync to SafeVault's server. Click Sign up / Login To login your account.
Step 11:
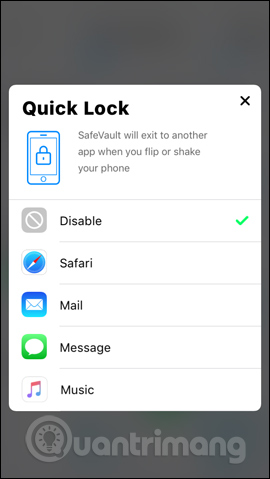
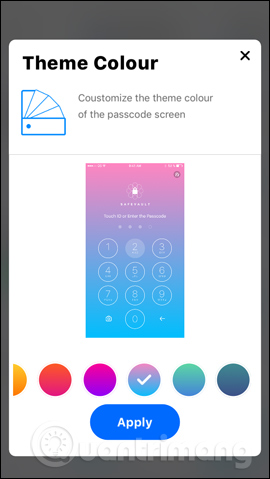
Also at this interface, users will have different options, such as security with fingerprints (Touch ID Unlock), quick lock when shaking or flip (Quick Lock), change color of login screen (Theme Color).
Step 12:
To change the app login password click The Alias Icon , select Change Passcode In the new list. Then Enter a new PIN To access the app.
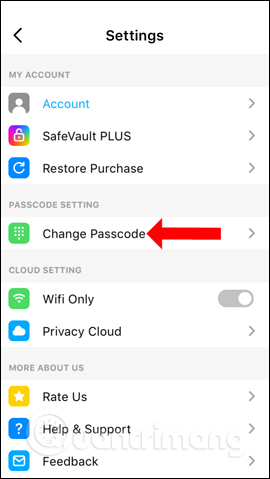
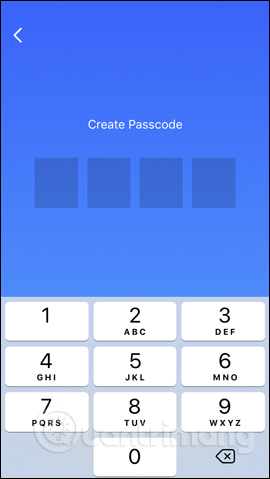
Above is to use SafeVault to hide pictures or videos on iPhone. In addition to setting the PIN code to access the app, users will have the option to set a password for the folder to save the image. Basic image editing features are also integrated in SafeVault.
- How to hide photos without deleting photos on Instagram?
- How to hide important data files and applications in Android devices
- How to hide data on Google Drive
I wish you all success!
FAQ
What should I prepare before I hide photos and videos on iPhone using safevault?
Review the requirements in the guide, confirm that your device or software is compatible, and save important work before changing settings related to hide photos and videos on iPhone using safevault.
Why might hide photos and videos on iPhone using safevault not work as expected?
The most common causes are incompatible versions, missing permissions, incorrect settings, or an interrupted internet connection. Recheck each step and restart the app or device when appropriate.
Can beginners follow these hide photos and videos on iPhone using safevault steps?
Yes. Follow the steps in order, avoid skipping confirmation screens, and compare your interface with the screenshots because labels may differ slightly between versions.
Related Articles
 Complete on Photos Apps on iPhone and iPad - Part 13 minutes read
 5 Best Software to Hide Photos, Videos on iPhone, Android Best5 minutes read
 How to Hide Photos, Videos, Personal Data on iPhone / iPad?6 minutes read
 How to Use Xfiles to Hide Photos and Contacts on Iphone8 minutes read
 4 Free Software to Hide Photos and Videos on Android7 minutes read
 How to Use Safe Pixel to Hide Images on Iphone5 minutes read
Reader Comments 0
Sign in with email or Google to join the discussion.