Table of Contents
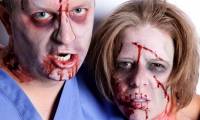
In the article below, we will introduce and guide you a few basic steps to create funny photos on the Zombie theme in the annual Halloween festival. This article explains the key facts and context behind zombie photos.
Video tutorial to create zombie photos in Photoshop:
Steps to create Zombie photos with Photoshop.
To do this, please preview the reference video above, which can easily capture the basic sequence steps, and the remaining process will be much simpler. This is a photo used in our sample test, you try to find a face portrait, the higher the resolution, the better:
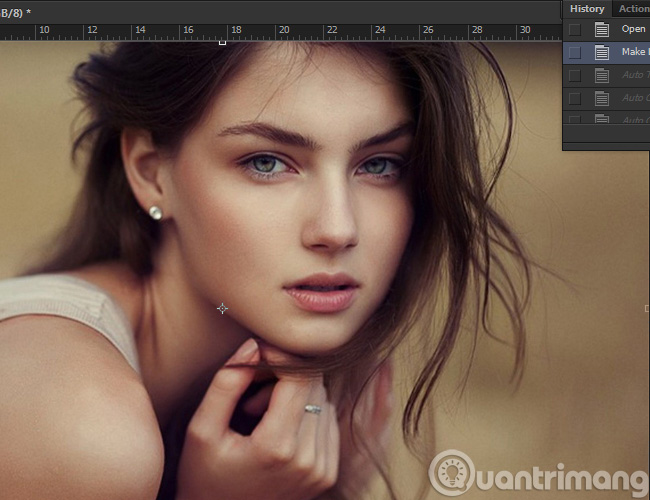
We will start with creating layers - the. Layer Adjusts the color specification of the image, including. Hue / Saturation and Levels. Press Ctrl + U Shortcut to display this function:
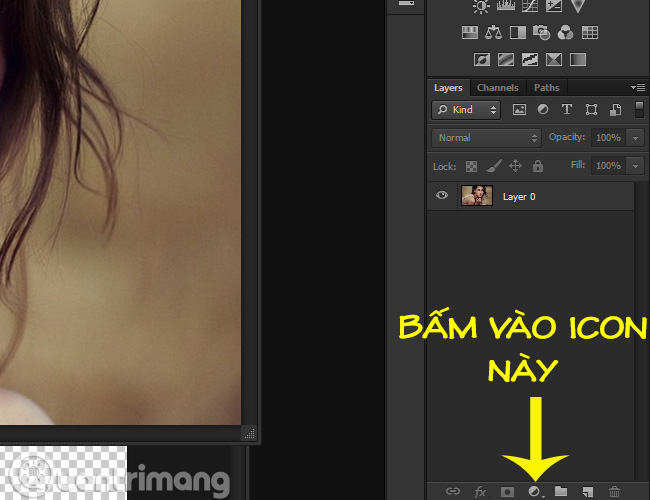
For example, adjust Hue Parameters, Saturation And Lightness As shown

Hue / Saturation : change and adjust the specifications here to suit our purposes. Specifically here, try to turn the outer layer of skin color into a gray or pale green.

Levels : change the brightness of the image, and create a shadow effect through the face parts, namely the eyes and cheeks (done on the newly created Levels and Hue / Saturation). Shortcut is. Ctrl + L, Guys.

Photo after applying the Invert Effect (shortcut Ctrl + I )
Invert : function to reverse the Layer , press the shortcut Ctrl + I. In the above video tutorial, we do it via. Image> Adjustments> Invert Menu .
The next step is to be very tired, everyone. Brush Tool : This tool will be used a lot here, mainly. Soft Mode with Hardness Set to 0%, Size 70 px As shown above. Use this function to fill in the parts displayed on the. Hue / Saturation Layer (shown in the video). Here, I made a brush on all the skin on the face and arm:

After 1 brush period:
After completing the Brush section temporarily on the Hue / Saturation layer, continue to the Brush section on the Levels layer. This time, you move the brush around the entire facial contours (as in the example here, I brush around the forehead, eyes, nose, mouth, ears and hands):
Draw the main curves on the face with a low. OpacityBrush And Soft Edges Mode . Draw more bone lines into the cheekbones to make the face thinner. Note that we perform all of the above operations with the. Brush In Opacity Mode from 10 - 15%. Use WC Rhesus A Bta font, dingbat pattern with unusual details to create a bleeding effect. Using the Text function, fill the bright red of blood to create an effect at this step:
Text tool: In our example, typing. Jk And font set will display the character as shown above.

Color : color the blood flowing from the face, usually red. You can choose freely, or in this test, code. D90101 . Then, merge all these Layers Into a single layer by pressing. Ctrl + G , and finally using Duplicate Layer Function :

Free Transform and Rotate: Press Ctrl + T To select the rotation mechanism, then go to. Edit> Transform> Rotate:
Assign a texture sample to your system, created by member Kayli Harden on Flickr.
Eyedropper : select any point inside the eyes to fill in a new. Layer . Press Ctrl + Shift + N To create a new Layer, then press I to open the. Eyedroppper Tool.
Create a new Layer By pressing Ctrl + Shift + N , and change the Opacity As shown below:

After that, change between the different modes of the. Layer To preview the effect, like the example above is. Normal or Multiply.
Good luck!
FAQ
What is zombie photos?
In the article below, we will introduce and guide you a few basic steps to create funny photos on the Zombie theme in the annual Halloween festival.
What makes zombie photos notable?
Hue / Saturation Layer (shown in the video).
What are the key facts about zombie photos?
Press Ctrl + Shift + N To create a new Layer, then press I to open the.
Related Articles
 Create Ghosts in Photoshop or GIMP7 minutes read
 Halloween Applications Help Turn Ordinary Photos into Scary Ghost5 minutes read
 Halloween Wallpapers for Phones3 minutes read
 How to Use Photoshop CS6 (Part 2): Create Fashion Collage Images17 minutes read
 Halloween Wallpapers for Computers3 minutes read
 Guide to Disguise as a Horror Zombie on Halloween6 minutes read
Reader Comments 0
Sign in with email or Google to join the discussion.