Table of Contents
You can fold this flat-bottomed paper boat with a raised canopy from one square sheet of paper—no glue is required. Make firm, accurate creases and slow down at the final inside-out step, where the folded diamond becomes the boat.
What you need
- One square sheet of paper. Medium-weight craft or printer paper is easiest to reverse without tearing.
- A flat surface for sharp creases.
- Scissors only if you need to cut a rectangular sheet into a square. Children should have adult help with cutting.
Decorated paper works well, but practice first with scrap paper. If you enjoy simple paper crafts, try these easy handmade gift ideas or a folded-paper snowman.
How to fold the canopy boat
1. Mark the center of the square
Place the square flat. Fold it corner to corner, crease, and reopen it. Repeat with the other diagonal. The two diagonal creases should cross at the exact center.
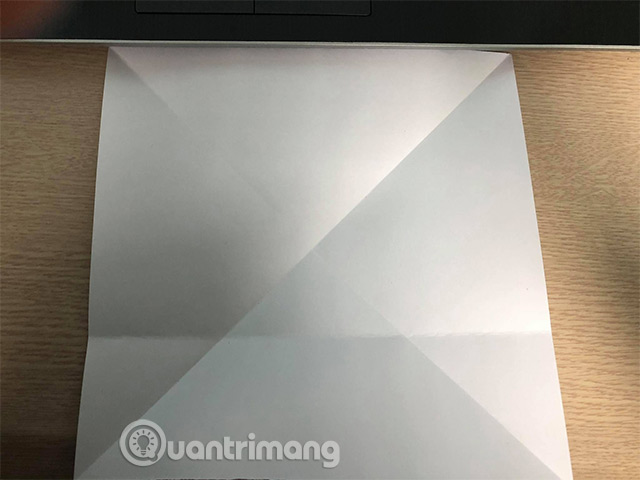
2. Bring all four corners to the center
Fold each corner inward until its tip meets the intersection of the diagonal creases. Press every edge firmly. You should now have a smaller square made from four triangular flaps.
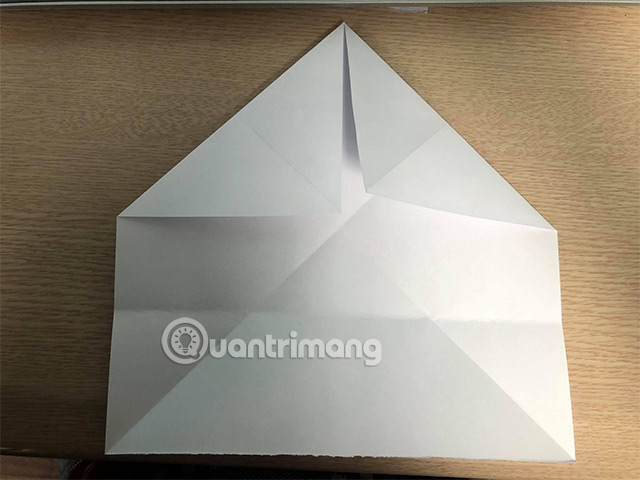
Check that the four tips meet neatly and the folded edges align without large gaps.
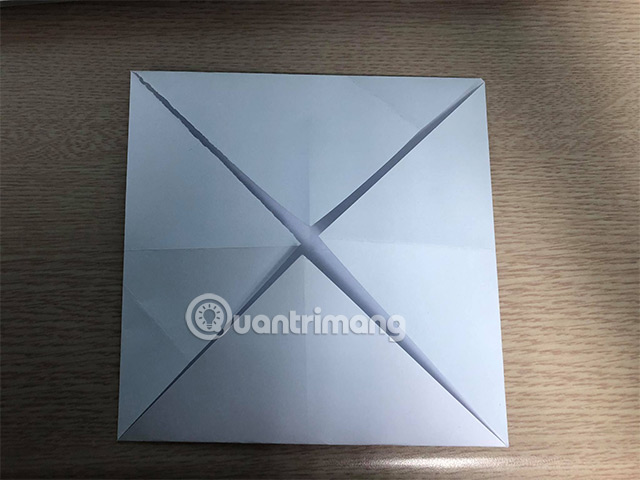
3. Fold the four inner tips outward
At each corner of the smaller square, fold the tip back outward as shown. Keep the folds even so the finished canopy and ends remain symmetrical.
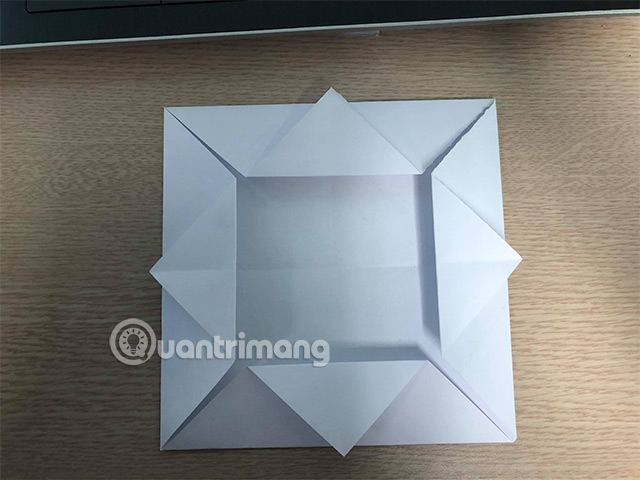
4. Turn the model over and fold the sides inward
Flip the entire model so the previous folds face down. Bring the left and right sides toward the center line, matching the positions shown in the photo, and crease them firmly.
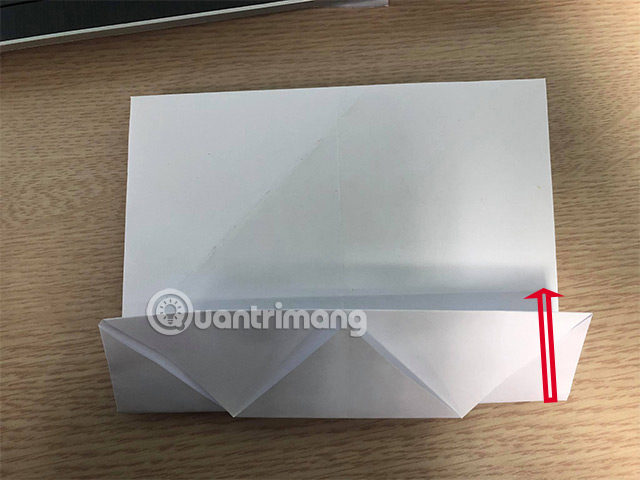
The folded shape should now be narrow and symmetrical. If one side overlaps more than the other, reopen it and correct the crease before continuing.
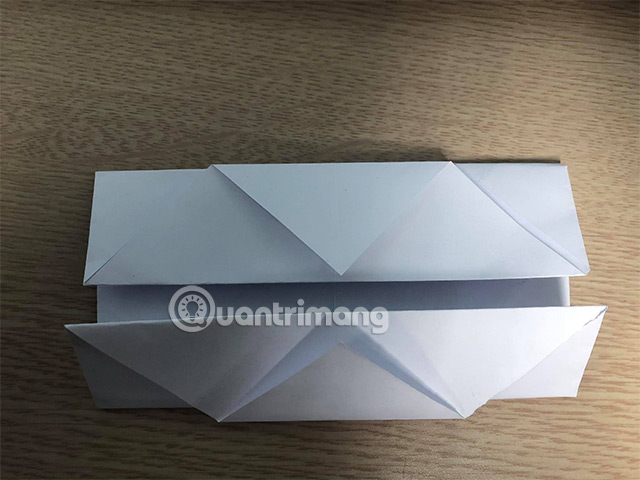
5. Fold the remaining corners toward the center line
Working with the visible corners, fold each one inward to meet the center line, following the angle in the image. Repeat the same fold on the opposite end.
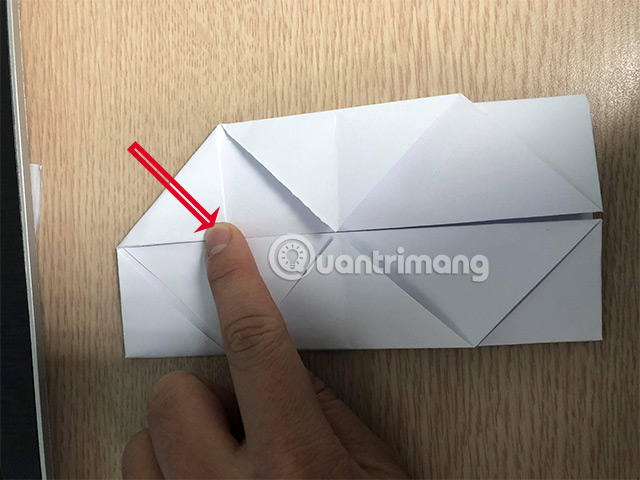
6. Fold again to form pointed ends
Fold each of the four corner sections once more so the ends become pointed. Keep the layers flat and repeat the same fold on every corner.
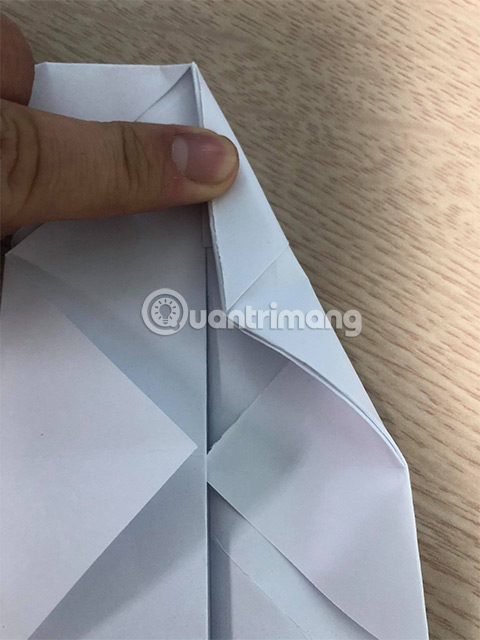
When all four folds match, the model should look like a diamond.
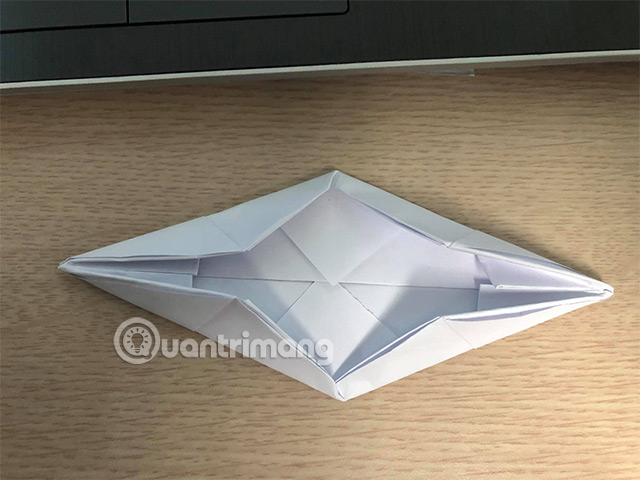
7. Fold the horizontal points inward
Bring the left and right points of the diamond inward as shown. Reinforce the creases; they help define the flat bottom when the model is reversed.
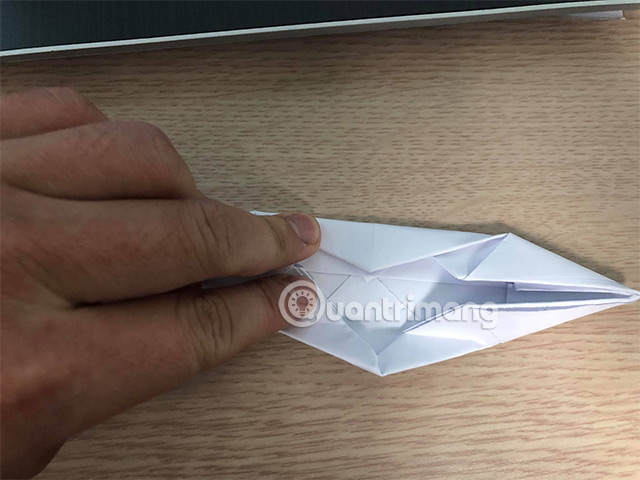
8. Open and reverse the model
Open the center pocket. Hold the layers on both sides and gently turn the model inside out, a little at a time. Do not pull on one thin flap; support the folds with both hands to prevent tearing.
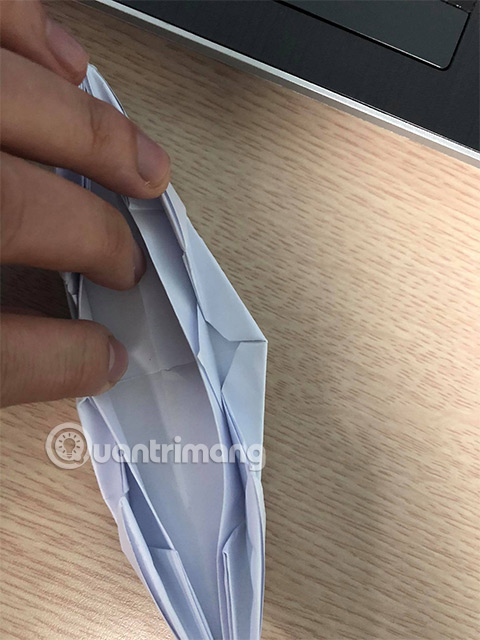
Flatten and shape the bottom so the boat can stand. The surface that was underneath the diamond becomes the interior of the boat, while the prepared folds form its underside and raised canopy sections.
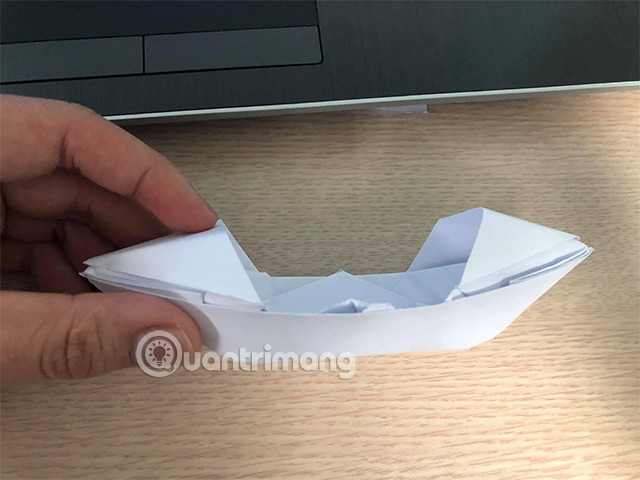
Adjust the finished boat
Pinch the base creases to make the boat sit more evenly. To create an open flat-bottomed boat without the raised canopy, fold the two raised end sections down carefully. Avoid repeated folding if the paper has begun to split.
Troubleshooting
| Problem | How to fix it |
|---|---|
| The boat leans to one side | Check that corresponding folds are the same depth and re-crease the base. |
| The paper tears during reversal | Use thinner paper, open the center wider, and reverse small sections gradually. |
| The corners do not meet | Return to the first diagonal creases; an inaccurate center shifts every later fold. |
| The bottom will not stay flat | Square the base with your fingers and sharpen the two side creases. |
This model may float briefly on calm water, but ordinary paper absorbs water quickly. Use a dry tray for display, and remove wet paper rather than leaving it outdoors.
Related Articles
 How to Drive a Pontoon Boat: Step-by-Step Guide13 minutes read
 AT&T's CNN Buys Privacy-minded Recommendations Startup3 minutes read
 How to Transfer a Boat Title: Step-by-Step Guide9 minutes read
 How to Drive a Bass Boat: Step-by-Step Guide12 minutes read
 How to Donate a Boat to Charity: Step-by-Step Guide4 minutes read
 The Most Famous Way of Folding Clothes in the World3 minutes read
Reader Comments 0
Sign in with email or Google to join the discussion.