How to connect Claude Code to Discord using Claude Code Channels
Claude Code is now much more interesting. Instead of being tied to the command line window, you can now send commands to a Claude Code session directly from Discord. That feature is called Claude Code Channels, and it really works.
Table of Contents
This guide covers everything: what Channels are, what you need to prepare before you begin, and the entire step-by-step setup process from installing plugins to testing the first response of your Discord bot.
If you have already installed Claude Code and have a Discord account, you can skip this section. Otherwise, get started now!
Prerequisites: What you need before you begin
Prepare these things before doing anything else.
Skipping any steps will cost you time later.
- Claude Code version 2.1.80 or later is installed on your computer.
- A Claude.ai account logged in via Claude Code (not authentication using an API key).
- A Pro or Max subscription package
- Bun has been installed, as the Discord channel plugin depends on it.
- A Discord account has access to the server where you can add bots.
One thing many people initially struggle with is that Claude Code Channels doesn't work with API key authentication or console-only login.
You must log in with your real Claude.ai account.
If you use Claude Code solely through an API key for billing purposes, Channels will not be available until you convert.
Step 1: Install Claude Code
If you have already installed and are running Claude Code, proceed to Step 2.
For everyone else, visit the official Claude Code website and get the installation command for your platform.
The installation process supports Windows, macOS, Linux, and WSL.
On Windows, using PowerShell, run the command:
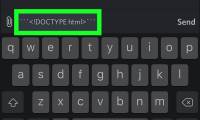
irm https://claude.ai/install.ps1 | iexAfter installation, create a project folder, navigate to that folder, and launch Claude Code.
mkdir cc-channels cd cc-channels claudeThis will open Claude Code in your terminal and start a local session.
That running session is the foundation of everything that follows, because Channels only operate within a single running instance of Claude Code.
Step 2: Log in using your Claude.ai account.
Channels requires verification of your Claude.ai account.
When you open Claude Code for the first time, it will usually ask you to log in.
Otherwise, run this command inside Claude Code:
/loginThis command will open a browser window for authentication.
Once you've logged in, return to the command line window, and you're ready to go.
If you skip this step, Channels won't work, and you'll waste a lot of time wondering why your bot isn't responding.
Step 3: Install Bun
The official Claude Code channel plugins require Bun.
If you haven't installed it yet, here's the command for Windows via PowerShell:
irm bun.sh/install.ps1 | iexAfter installation, confirm that it is working:
bun --versionIf the version number appears, you're done.
If nothing appears, it means the installation process failed, and you should check if your command-line session has access to an updated PATH.
Step 4: Add the official Marketplace Plugin and install the Discord plugin.
Claude Code uses a plugin system for Channels, and the Discord plugin is part of Anthropic's official plugin marketplace.
Before you can install anything, you need to make sure the marketplace has been added and updated.
Run these two commands in Claude Code:
/plugin marketplace add anthropics/claude-plugins-official /plugin marketplace update claude-plugins-officialIf you skip this step and the marketplace is missing, Claude Code will not find the Discord plugin and will report that it does not exist.
Error messages aren't really helpful, so avoid confusion and run these commands first.
Once the marketplace is ready, install the Discord plugin:
/plugin install discord@claude-plugins-officialThen reload the plugins so that the new commands are available in your current session:
/reload-pluginsReloading is required.
Claude Code may not recognize Discord plugin commands until you explicitly refresh the plugin state.
Step 5: Create a Discord bot in the Developer Portal
Open the Discord Developer Portal and click on New Application . Give it a name of your choice, for example, 'CC-Bot' .
After creation, navigate to the Bot section :
- Click on Reset Token and copy the new bot token.
- Store that token in a safe place; you'll need it in Step 7.
- Scroll down and turn on Message Content Intent .
This last part is very important.
If Message Content Intent is not enabled, Discord will send bots empty message content fields, and your Claude Code session will not know who is speaking to it.
This is Discord's specific requirement for bots to read incoming message texts.
Step 6: Invite the bot to your Discord server.
Still in the Developer Portal, open the OAuth2 tab and scroll down to 'OAuth2 URL Generator'.
Select bot in the Scopes section.
Next, select the following Bot Permissions:
- View Channels
- Send Messages
- Send Messages in Threads
- Read Message History
- Attach files
- Add Reactions
- Send Voice Messages
Discord will generate an invitation URL at the bottom of the page.
Copy that URL, paste it into your browser, select the server you want to add the bot to, and click Authorize .
The bot will appear on your server, offline until you connect to it.
Step 7: Connect the bot token to Claude Code
Return to Claude Code and run the command:
/discord:configure YOUR_DISCORD_BOT_TOKENReplace YOUR_DISCORD_BOT_TOKEN with the token you copied in Step 5.
Claude Code automatically saves the token to:
~/.claude/channels/discord/.envYou don't need to edit that file manually.
The command will handle this automatically.
A common problem: If the command /discord:configuredoesn't work, completely close the terminal window, reopen it, go back to your project directory, and launch Claude Code again.
Sometimes plugin state requires a clean session to be registered correctly.
Step 8: Launch Claude Code with Channels enabled.
At this point, everything is configured, but the Discord bot is still offline.
Channels are only enabled when you explicitly launch Claude Code with the channel flag.
Exit your current Claude Code session, then restart it using the command:
claude --channels plugin:discord@claude-plugins-officialThis command will start a new Claude Code session with the Discord plugin loaded and listening.
Your bot will now be online on Discord.
If it doesn't show up online, double-check that the token is correct and that Claude Code is actually running with the flag --channels.
Step 9: Pair your Discord account
While Claude Code is running and the bot is online, open Discord and send a direct message to your bot.
The bot will respond with a pairing code.
If the bot is unresponsive, your Claude Code session may have closed or been started without the flag --channels.
After obtaining the pairing code, return to Claude Code and run the command:
/discord:access pair YOUR_PAIRING_CODEReplace YOUR_PAIRING_CODE with the code that the bot sent you.
After pairing, lock access so that only approved Discord accounts can send messages to your session:
/discord:access policy allowlistThis is a step you shouldn't skip.
Without an permission list, anyone who can message your bot has the potential to interact with your Claude Code online session.
That includes people who accidentally stumble upon bots.
Step 10: Check the settings
Send messages to your bot in Discord.
Ask it a simple question, request a task, or tell it to check something.
The message will be sent to your running Claude Code session, Claude will process it, and the response will be returned in Discord.
A few things to keep in mind during the testing process:
Permission requests can pause the bot. Claude Code is designed to ask for permissions before performing actions such as running shell commands or writing files.
If you ask the bot to do something that triggers a permission check, it will pause and wait for approval in the terminal before responding in Discord.
You will need to approve it manually.
If you want fewer interruptions during testing, you can start Claude Code as follows:
claude --dangerously-skip-permissions --channels plugin:discord@claude-plugins-officialThis flag completely ignores permission requests.
It's convenient for testing, but only use it in an environment where you have complete control. The name says it all.
Conclude
Claude Code's Channels feature is really useful once it's set up.
The setup process involves more steps than you might think, but most steps only need to be done once.
Your Discord bot will then become the live interface for your local Claude Code session, and you can interact with it from anywhere you can access Discord.
The setup steps are as follows: Install Claude Code, log in with your Claude.ai account, install Bun, add the official plugin store, install the Discord plugin, create and configure the Discord bot, launch Claude Code with Channels enabled, pair your Discord account, and test.
There are a total of 10 steps, each of which is quite simple.
If you want to learn more about Claude Code, exploring the list of AI-powered IDEs in 2026 will give you a clearer picture of Claude Code's place within the broader landscape of AI-powered development tools.
Was this article helpful?
Your feedback helps us improve.


Reader Comments 0
Sign in with email or Google to join the discussion.