What you will learn
- Choose a practical central and elevated router position.
- Identify walls, metal objects and interference sources that weaken Wi-Fi.
- Measure the effect of a placement change with the same device and test method.
- Decide when a mesh point or wired access point is more appropriate than moving the router.
What you need
- Access to the router and its power/Ethernet cables.
- A phone or laptop connected to the Wi-Fi network.
- A speed test or simple download test you can repeat.
Understand what placement changes
Google’s official Wi-Fi guidance notes that distance, frequency, building materials and physical barriers can change speed and reliability. Moving a device closer or placing the router in a more open location can improve performance.
Wi-Fi radio energy spreads outward and loses strength with distance. Dense walls, metal cabinets, large appliances, mirrors and utility spaces can create weak zones. A router hidden on the floor behind furniture starts with several avoidable disadvantages.
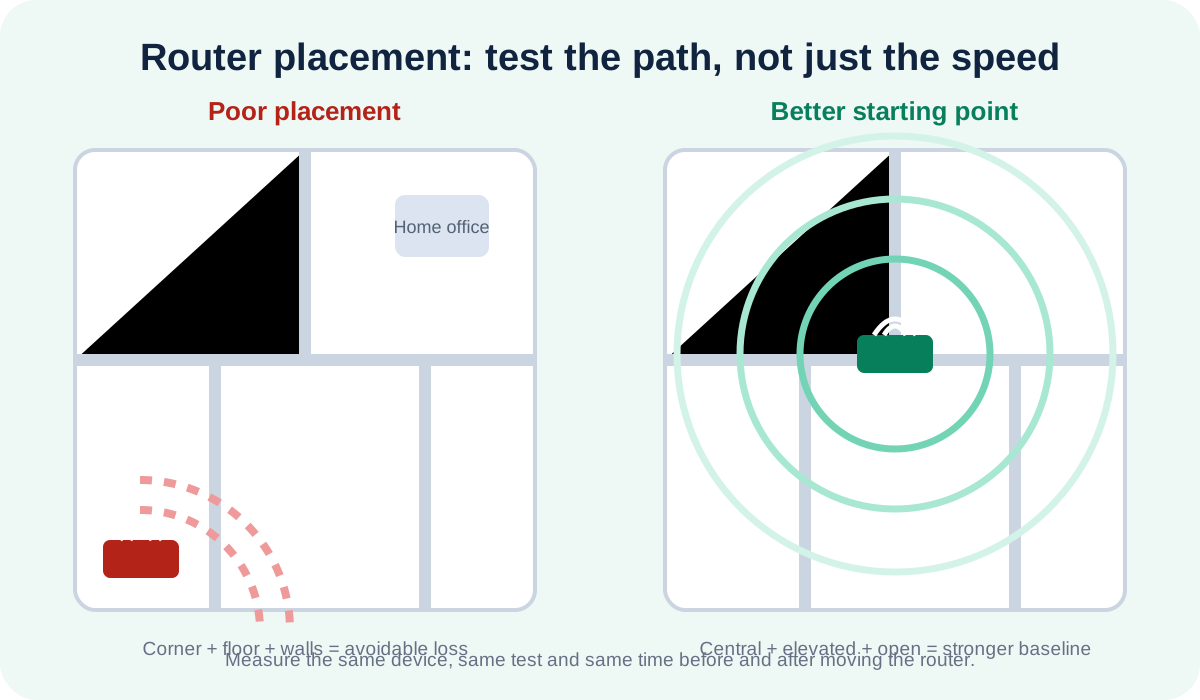
Choose a better candidate location
Official Google Nest placement guidance recommends putting the router off the ground and in plain view when possible. The best position still depends on home size, construction and where Wi-Fi is used.
- 1
Mark the rooms where reliable Wi-Fi matters most, such as a home office, living room and bedrooms.
- 2
Choose a location that is reasonably central to those rooms, not simply central to the building outline.
- 3
Place the router on a shelf or table, not directly on the floor.
- 4
Keep it in open air rather than inside a cabinet or behind a television.
- 5
Increase separation from microwave ovens, baby monitors, cordless phone bases, large metal objects and dense utility walls.
- 6
Keep enough airflow around the router and avoid a hot enclosed space.
Run a fair before-and-after test
A placement test is useful only when the device, test location, network and time window are kept as consistent as possible.
- 1
Before moving anything, test from three fixed locations: near the router, the main work area and the weakest room.
- 2
At each location, record signal bars, latency or ping, download speed and whether video or calls remain stable.
- 3
Photograph the original cable connections before moving the router.
- 4
Move the router to the candidate location without changing channels, security mode or other settings.
- 5
Wait several minutes for devices to reconnect, then repeat the same tests in the same order.
- 6
Keep the new location only if the important rooms improve without creating a serious new weak zone.
- The same device and test locations were used.
- At least one practical metric improved in the priority rooms.
- The router remains ventilated and cables are not under tension.
- No factory reset or configuration change was required.
Account for 2.4 GHz, 5 GHz and 6 GHz behavior
Google notes that devices on 2.4 GHz may not achieve the speed of 5 GHz, while distance and barriers also affect the result.
In general, higher-frequency bands can offer more capacity but lose useful strength faster through distance and obstacles. Do not judge placement from a single device that may be connected to a different band than another device.
Know when moving the router is not enough
Long narrow homes, multiple floors, thick masonry walls and detached workspaces may need another access point. A mesh point should still be placed where it receives a strong connection—not directly inside the dead zone.
Where practical, wired Ethernet backhaul gives an access point a more predictable connection than repeating an already weak wireless signal.
Create a three-location Wi-Fi map
Compare the current router location with one improved candidate location.
- 1
Choose three repeatable test locations.
- 2
Record signal, ping and download speed at each location.
- 3
Move the router to an open elevated candidate position.
- 4
Repeat the tests with the same device.
- 5
Keep a simple table of before and after values and select the position that best serves priority rooms.
Common mistakes to avoid
- Placing the router in a cabinet for appearance.
- Testing with different devices or from different spots.
- Putting a mesh point in the exact dead zone where it receives a weak upstream signal.
- Changing placement, channel, firmware and security settings at the same time.
Key takeaways
- Open, elevated and central placement is a strong starting point.
- Measure from the rooms that matter, not only beside the router.
- A fair before-and-after test is more reliable than judging by signal bars alone.
Frequently asked questions
Should router antennas point in the same direction?
Follow the manufacturer’s instructions. For adjustable antennas, different orientations can help devices on different floors, but placement usually has a larger effect.
Is the exact center of the house always best?
No. The best practical location is central to the areas that need coverage and must also allow modem, power and Ethernet connections.
Sources and further reading
- How to improve Nest Wifi Pro, Nest Wifi or Google Wi-Fi speed and performanceGoogle Nest Help
- Where to place your Wifi devicesGoogle Home and Nest Help
Ready to continue?
Mark the lesson complete so your Learning Path progress stays current on this device.