How to calibrate the screen perfectly?

Read the following article to learn how to optimize the monitor for nothing other than the naked eye and the calibration tools are available for free.
Every consumer grade monitor you buy has a factory-set default image setting and can look extremely awful. This is because manufacturers know that the calibrated screen will appear in the showroom light. Therefore, to get the most out of your screen, you need to reduce the default settings to accommodate the lighter indoor lighting conditions.
Read the following article to learn how to optimize the monitor for nothing other than the naked eye and the calibration tools are available for free.
How to calibrate the screen so perfectly
- Adjust in the settings part of the screen
- Good use of presets for users
- Use free calibration tools
- 1. Adjust the black level
- 2. Set the optimal contrast
- 3. Fine-tune the contrast and brightness settings
- 4. Sharpness and Gamma
Adjust in the settings part of the screen
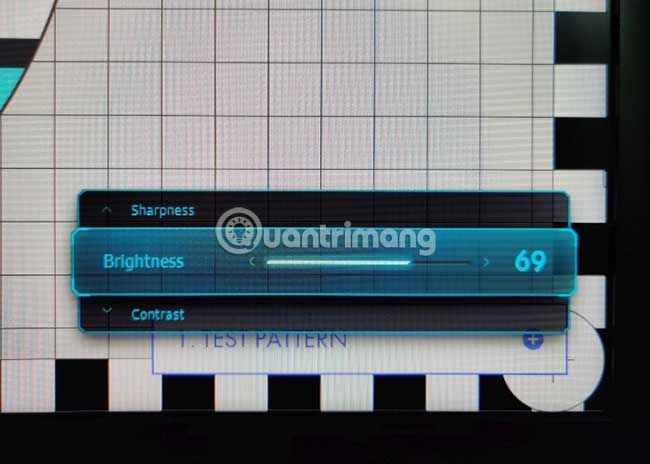
First and foremost, you have to find the original screen resolution. Setting the computer's resolution to match the screen resolution is essential for accurate results. Adjust the brightness setting of the screen to 35%. This is not a coincidence, but this is an optimal brightness setting (a luminance value of about 120cd / m2 for a regular monitor) for most monitors around this level. Reduce the contrast setting to 70%. Don't worry about whether everything is perfect at the moment. We will do it later with the help of calibration test samples.
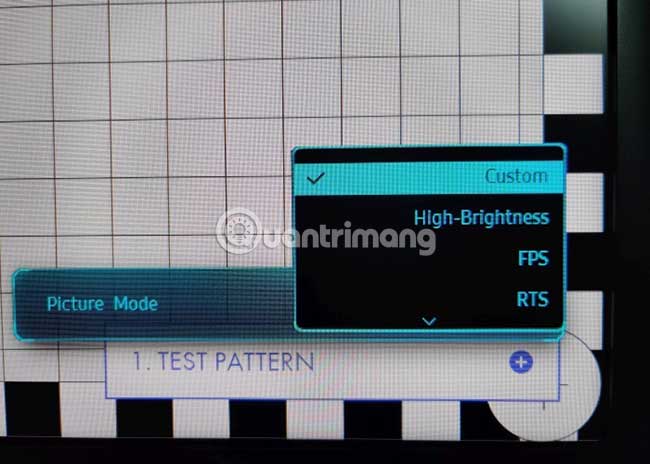
The following step seems counterintuitive, but disabling all other settings enhances the effect for the image. There are no exceptions. This includes settings such as contrast enhancement, digital noise reduction, dynamic backlight control, motion interpolation (a form of video processing in which intermediate animation frames are created). between existing frames using the interpolation method, to try to make the animation smoother, compensate for the amount of motion blur), LED local dimming (change the uniformity of the LED backlight), etc. .
Most monitors have the option to change the color temperature or set the white point. This option should be set to 6500K. This value can be labeled as normal ( mid ) or mid temperature in the monitor settings menu.
Good use of presets for users
Remember, the monitor calibration is related to a specific lighting condition. A screen calibrated for daylight settings will not be suitable for dim night lighting conditions. Therefore, it is recommended to calibrate the screen in desired lighting conditions and save the settings in the preset for the user. That way, you can quickly switch to the preset (preset) that is precisely calibrated for the desired lighting conditions.
Lastly, make sure the screen is turned on for at least 30 minutes before calibrating it. This ensures consistent and accurate results.

Use free calibration tools
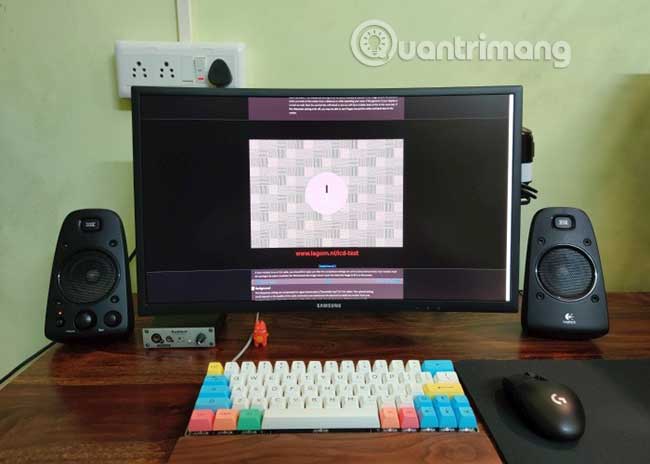
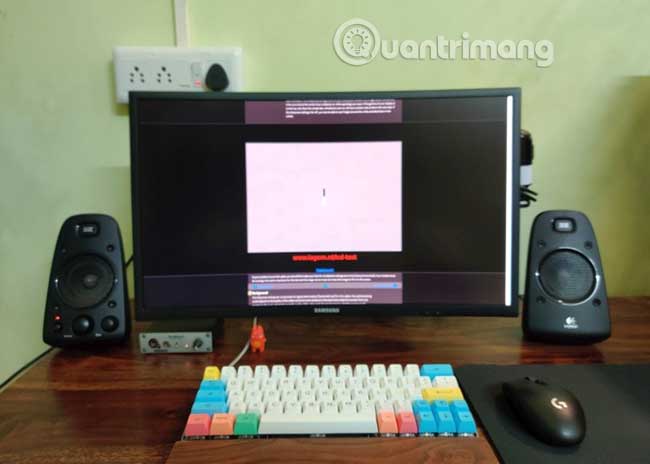
There are many free screen calibration tools available, but a few are as convenient and comprehensive as the Lagom screen test toolkit (see link: http://www.lagom.nl/lcd-test / ). There is no application to install here. The Lagom monitor calibration website presents several pages with different calibration patterns, along with the usage for each sample. This guide will bypass most calibration pages and focus only on the most important things.
Just be sure to view the page in full screen mode, which can be activated by pressing the F11 key in most browsers.
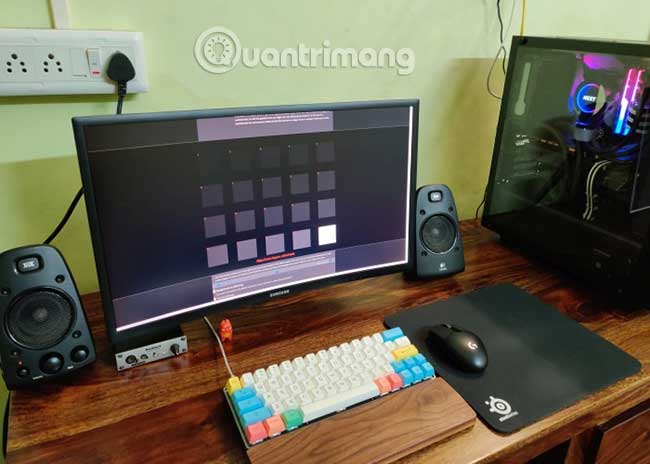
1. Adjust the black level
The article will start with the black level (see link: http://www.lagom.nl/lcd-test/black.php ). This displays the swatches that change from the darkest (labeled as 1 ), to the purest whites (defined as 255 ). Reduce the brightness setting in the monitor to the point where the background (surrounding the color swatches) changes from gray to black.
If the background appears black on the screen, increase it until it becomes slightly gray, then adjust down one level until it returns to black. You will know that you have adjusted the brightness properly, if the additional brightness reduction does not make any effect on the background.
This is where you will fine-tune the screen to achieve a good balance between the detailed black resolution and the overall accuracy of black reproduction. Pay attention to the first 10 color samples labeled from 1 to 10 . With the brightness setting adjusted to make the background black, it is difficult to distinguish between the background and all 10 color patterns on a regular LCD screen. If you do, you can move on to the next step.
If you own a regular LCD screen, you will have to increase the brightness of the screen until you can distinguish at least 6 color patterns from the background. Increasing the brightness setting may improve the resolution of black details, but may affect the reproduction of black correctly. As a result, the black parts will turn gray.
You can set the brightness level on the screen according to personal preference, depending on whether you want to maintain the accuracy of the black parts or want the screen to better resolve the details in dark scenes.
2. Set the optimal contrast
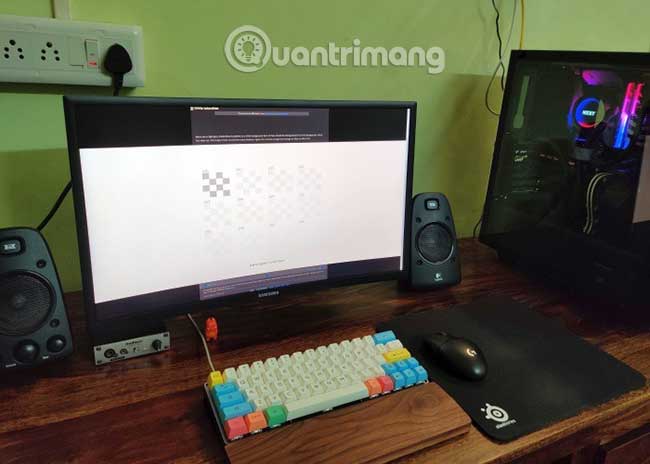
Next is the white saturation (see link: http://www.lagom.nl/lcd-test/white.php ). This part is a tool to adjust the whiteness of the screen or the ability to resolve bright details. The secret to getting this setting correctly is to adjust the screen's contrast setting to the correct level. To do that, turn the contrast levels to the highest possible setting on the screen, without causing the white test image to be dazzling at the edges.
You are viewing color samples with values between 200 and 254, with a pure white background of 255. With the contrast set to the highest possible value to avoid glare, you will notice that the color samples are bright. The bottom row will disappear. Reduce the level of contrast on the screen little by little until you can see the last 4 color samples labeled from 251 to 254. You will find your optimal contrast setting after the color sample is applied. label 254 displayed.
Some monitors will not be able to distinguish between white background and all color samples in the bottom row. In that case, stop reducing the level of contrast when the last color pattern can be seen ( 254 ). It is the optimal contrast setting and limits the ability of the screen to resolve details in bright scenes.
3. Fine-tune the contrast and brightness settings
The contrast test template (see link: http://www.lagom.nl/lcd-test/contrast.php ) is useful for fine-tuning brightness and contrast settings. Increase the screen brightness setting if you can see the darkest color pattern (labeled 1 on the left). Make sure you do not increase this setting to the point where the black background starts to appear gray.
Record the current contrast settings and check to see if the last 3 color patterns on the right have labels 30, 31 and 32 distinguishable from each other. If not, try increasing or decreasing the contrast settings until the resolution between these color patterns is improved. If it doesn't make a lot of difference, then you should go back to the original contrast settings that you noted earlier.
4. Sharpness and Gamma
Sharpness (see link: http://www.lagom.nl/lcd-test/sharpness.php ) is best considered from as far away from the screen as possible. The idea is to look at the model from afar and adjust the sharpness setting on the screen until the image appears uniformly gray. The top and bottom images show the sharpness blending together at the correct sharpness setting, when viewed from afar.
You calibrate your screen with your eyes and a free but powerful calibration tool. This level of calibration is good enough for work, gaming and movies, but you'll need a colorimeter, if your monitor is a professional monitor for color-related tasks on your computer.
Hope you are succesful.